Samplize Peel and Stick Paint Samples Review Plus Alternatives
Sampling paint colors before you paint a room is critical so you won’t choose one that you dislike. Today we’re talking about Samplize peel and stick paint samples along with all the other different ways to test paint colors.
We’ll cover the pros and cons of each method so you can decide for yourself which one to use.
This post contains affiliate links for your convenience. I may make a small commission on products purchased with my link, but your price does not change. For full disclosure go here: Disclosure and Policies. Thank you for supporting my site.
Analysis paralysis. It’s what happens when we can’t make a decision because we’ve over-analyzed it and are afraid to make a mistake. And trying to pick a paint color often results in this frustration. But it doesn’t have to drive you mad.
Why is it so important to choose the right paint color?
Before we go any further, I feel like I need to say something: Don’t stress out! In my 30+ years of helping thousands of clients choose paint colors, I’ve seen so many people wringing their hands and obsessing over making the wrong paint color decision. But there’s no “perfect paint color”.
Tips for choosing paint colors
Read my tips for finding the right paint color here: How To Choose the Right Paint Color
In no way do I want to downplay the need to choose a paint color you love, but what’s the worst thing that could happen in you don’t love it? Maybe you’ll have to repaint because you can’t live with it.
And it might cost a little money, but it’s not the end of the world. That’s just my two cents worth on the subject.
While it’s not as critical as choosing the right features that are more permanent and expensive such as floors, furniture, kitchen counters, etc., there are definitely several good reasons why you want to get your paint color right. Let’s talk about them.
Paint Makes a Large Impact
Painting your walls can have a huge impact on how your room looks. It can change the entire mood of the space and you don’t want a color you don’t like.
Here’s just one example of how your paint color can make a area look different:
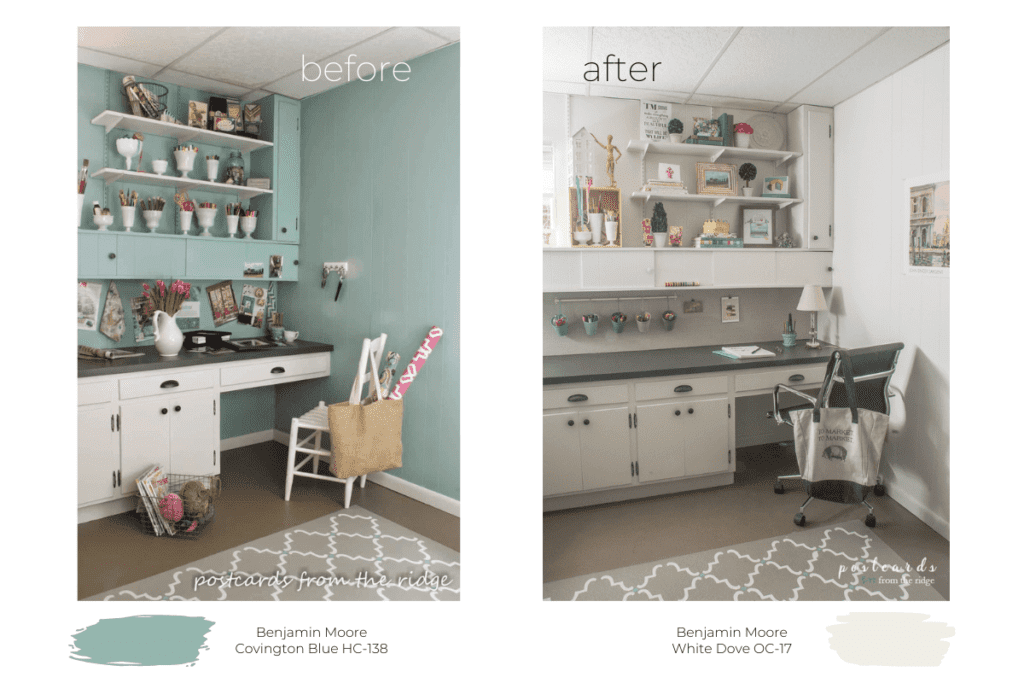
You can see more of my craft room makeover and the current look here: $100 Craft Room Makeover
Cost
Materials – We all know that paint isn’t cheap these days. And I certainly don’t recommend skimping here. But thank goodness it’s probably the least expensive part of your remodeling or redecorating plan.
INSIDER TIP FOR SAVING MONEY – Many paint companies run sales around major holidays and that’s a great time to save some money. You can also have your painter pick up your paint and they’ll usually get a contractor price on it. Just check to make sure they get what you really want and not a cheaper product. Also, if you’re painting several rooms in the same color you might be able to buy a 5 gallon size of the paint and save some money that way too.
Labor – Hiring a professional painter will give you beautiful results and can cost several hundred dollars at a minimum. And it’s definitely worth hiring a reputable one to make sure the job is done right.
NOTE: If you have the time and abilities, you can do the job yourself and save some money. See how to get a beautiful paint job here: How to Paint a Room for Beginners – A Complete Guide to a Professional Finish
And you can see my best advice for choosing your paint colors here: Paint Advice – How to Choose a Paint Color
Now let’s talk about some different ways to see how a paint color will look in your space.
Paint Samples – Different Options and How to Use Them
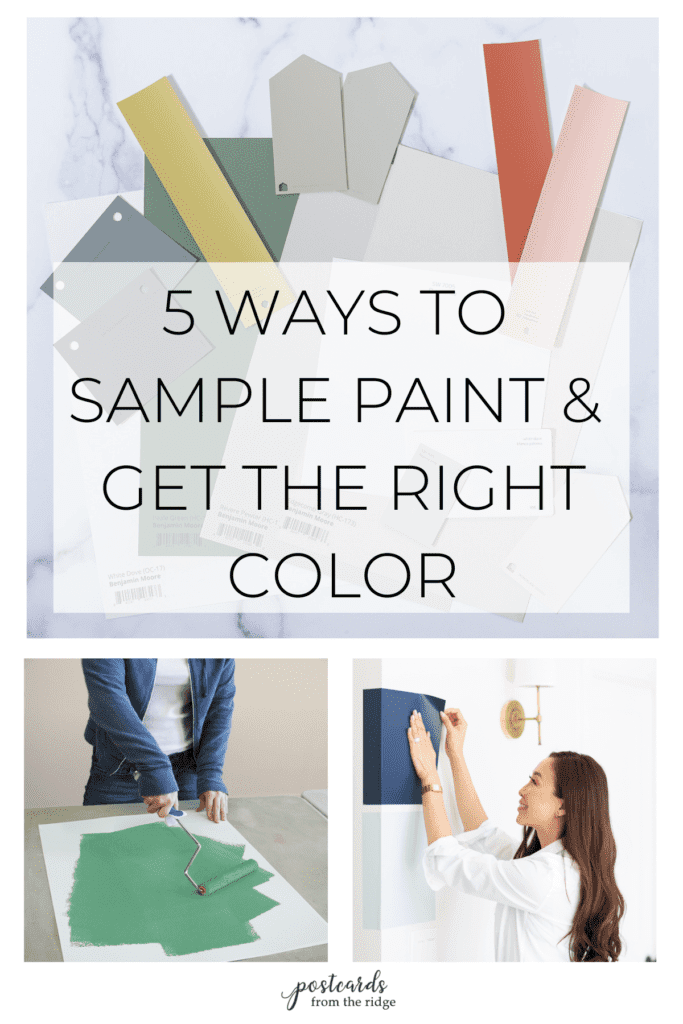
There are a few things you can do to make paint samples more effective. Here’s my best paint sampling advice.
Tips & Tricks for Sampling Paint Colors
- Try to narrow down your choices to no more than 5 before sampling.
- If you’ll be applying your final color choice to the walls with a roller, apply your sample colors with a roller as well. It can make a slight difference on how the paint looks and you want to be as accurate as possible when testing.
- Sample your paint next to your trim and on different walls.
- Look at the sample during various times of the day and with the lights on and off. Colors will appear different depending on the lighting situations. See illustration further down in the post.
- If your existing wall color is anything other than white, look at your samples against a white background so you’re not swayed by any undertones in your existing color. Keep reading this post for an illustration of this.
- Keep in mind that light reflects off of everything and can make your colors look different. For example, if you have a lot of trees in your yard you might get a green reflection on a sunny day. Or if you’re wearing a brightly colored shirt it might change the way your colors appear. It’s best to wear a neutral shirt if possible. Sounds crazy but it’s true.

Samplize peel and stick paint samples
** MY FAVORITE** The best invention for sampling paint is peel and stick samples. These were introduced a couple of years ago and are a wonderful way to decide on a paint color. Why didn’t I think of this?? They’re so easy to use!!
Are Samplize peel and stick paint samples accurate? YES! Samplize samples are painted with 2 coats of the actual paint from the brand, giving you 100% accuracy.
The color is exactly the same as the final paint, and is much more accurate than traditional paint swatches that are dyed to represent the color.
Here’s what one reviewer had to say about them:
Love that I can get large samples of paint colors that even the manufacturer doesn’t have. The painting is an expensive job so getting it right is super important. I don’t want to have any regrets once it’s done and these large samples really help.
tracey m.
You can find them here: Samplize Peel and Stick Samples
Pros of Samplize peel and stick paint samples
- Painted with 2 coats of actual paint in eggshell finish
- Larger size than samples from the paint store – 9″ x 14.75″
- Available in most colors for Benjamin Moore, Sherwin-Williams, PPG, and Farrow & Ball
- Easy to move around the room
- Reusable
- Samplize orders are shipped overnight delivery and typically arrive in 1 – 3 business days
- You won’t need to prime and paint over samples painted directly on the wall
- They can be stored by re-applying the backing to the adhesive so it stays clean
Cons of Samplize
- Can get expensive (but is less than purchasing a sample can of each color)
- Not available for every brand
- Only available in certain finishes
- Will stick to anything and could get dirty
Best way to use Samplize peel and stick paint samples
If you’re looking at more than one sample at a time be sure to space them several inches apart on your wall, surrounded by white if possible. Move them around and view them on different walls next to your trim and baseboards. Look at them at various times of the day.
After you’re finished, replace the backing so the samples won’t stick to anything other than your walls.

Even though these aren’t perfect they’re still the best way to sample paint colors.
Paint Color Visualizer
This is a good place to start when choosing your paint color. Most major paint manufacturers offer a way to view their colors in a room setting. You can either choose from photos on their site or upload your own.
Once you decide on an image you can virtually apply color to walls and various surfaces with a simple click of the mouse.
Here are the best paint color visualizing tools:
- Benjamin Moore Personal Color Viewer
- Sherwin-Williams ColorSnap Visualizer
- Behr Color Visualizer
- Lowe’s Color 360
Pros
- It’s a great way to get a general idea of how any color would look in a room
- No cost
- No mess
- Zero actual painting is required
- You can save your favorite room designs on the brand’s website
Cons
- The images provided by the paint companies are limited
- Sometimes the visualizers are glitchy
- It’s NOT a great way to choose a specific color but is definitely helpful in narrowing it down to a particular direction.
Best way to use
Using a color visualizer is a good way to decide which color family to use and how light or dark to go with your color. They help visualize a color much easier than the other methods since it’s all virtual. But I would never recommend making a final color decision this way. Colors always look different in reality than they do on a computer screen on in a magazine.
Free paint samples
Free is always a good thing. A quick visit to your local paint store can provide you with all kinds of free swatches. Plus many paint brands will allow you to order free samples from their website and you’ll receive the swatches in the mail.
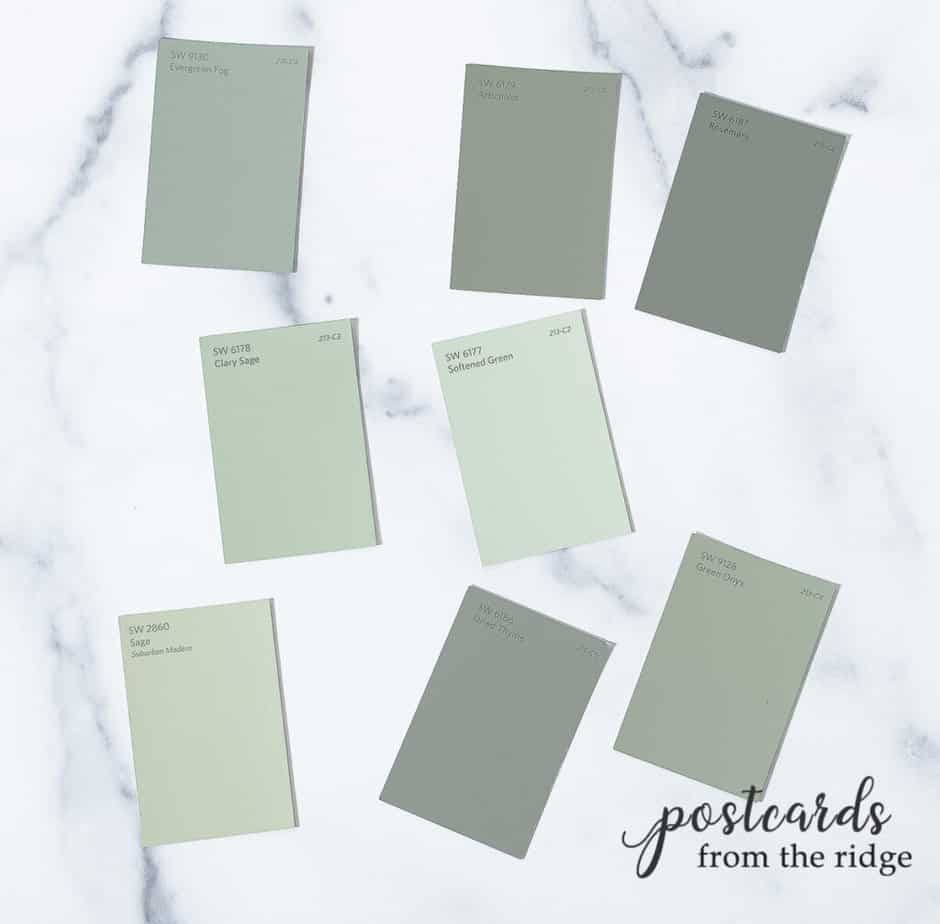
NOTE – just because these are free doesn’t mean you need to take 50 of them. It will only confuse you. Find a range of colors and take no more than 10 -15 to help narrow it down to the one you like best.
Pros
- Free
- Good place to start
- Easy to get in-store or online
- No mess
Cons
- Small size
- Totally smooth and not representative of real texture of paint
- Must be taped together for a larger sample
Best way to use small free paint swatches
The best way to use these smaller samples is to get multiples of the colors you’ve narrowed it down to and tape them together for a larger sample. It’s crude but it’s free and works.
SureSwatch paintable peel and stick sheets
I recently discovered these removable, paintable sections of clear film from SureSwatch and love the versatility of them. They’re basically unpainted peel and stick samples that you can apply whatever paint you want to them.
Read what one reviewer thought about them.
These saved our sanity during the remodeling process. Made it so easy to throw color options on the wall & move them around to hit different types of light. Also great to place accent colors next to main walls. Awesome product!
anonymous amazon reviewer
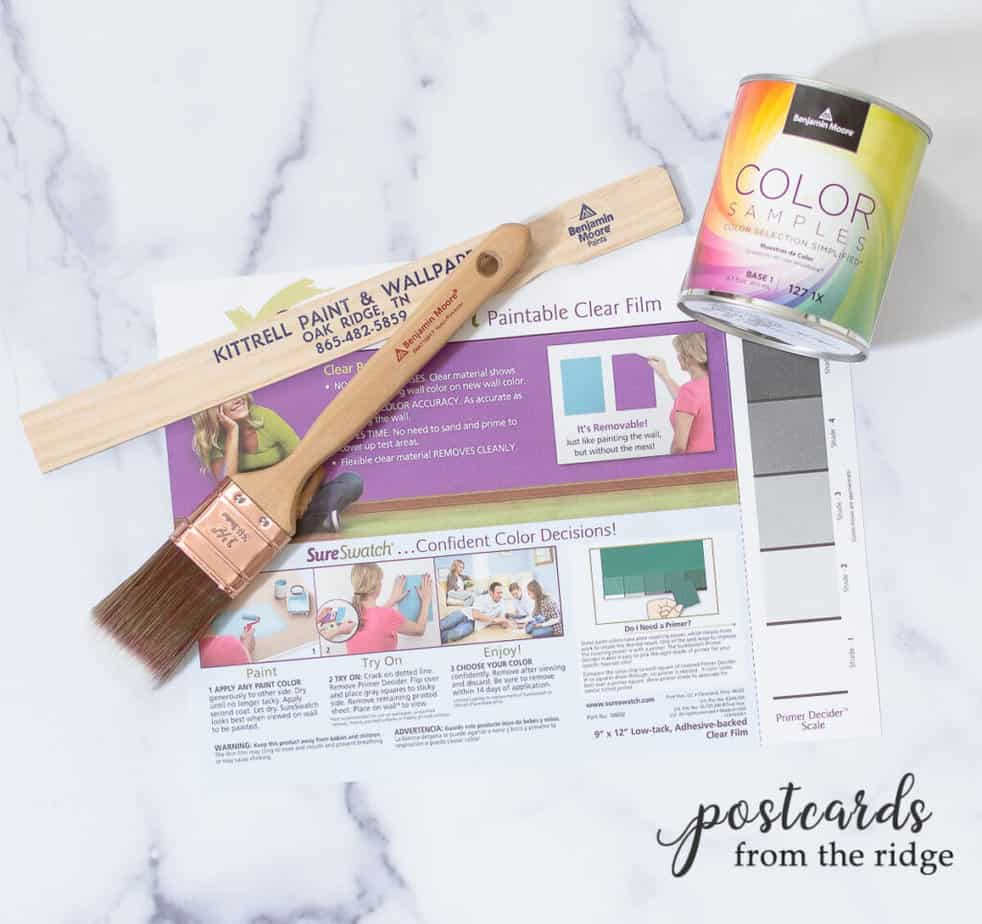
Sureswatch Pros
- Any brand in any finish can be used
- You can move it to different walls
- It can be repainted multiple times
- You can buy a set of three
- They’re decent sized – 14″ x 10″
Sureswatch Cons
- They have to be ordered
- You’ll need to apply 2 coats of paint and let them dry in between
Best way to use SureSwatch peel and stick samples
For the most accurate results, paint 2 coats of your color in the finish you’ll be using. After the paint dries completely, look at the sample on different walls next to your trim and baseboards. Also view it at night, during the day, in natural and artificial light.
Paint your own sample boards
Before the days of peel and stick samples the best way to sample a color was by purchasing a small amount of paint and painting your own boards. And this is still a great way to test a color in your home.
When it comes to painting boards there are a few ways to do it. The least expensive boards are poster board. You can also use foam core but it will warp slightly as the paint dries, so I don’t recommend it.
But these are the best boards to use: Mighty boards They won’t warp like foam core does.

Here’s a description from their site:
Made from an innovative lightweight plastic, Mighty Boards are flexible like paper, waterproof and virtually indestructible … a stronger alternative to poster board. Each board is a generous 18 X 24 inches. Their special matte/matte finish grips to nearly all coatings products including latex paint, oil paint, various faux finishing products, pencil, pens, oil bars and more.
Mighty Boards Pros
- You can use any color from any brand in any finish
- Easy to move around
- Can be repainted
- Last a long time
- They’re large – 18″ x 14″
Mighty Boards Cons
- They’re expensive. $48 for a pack of 6. But they can be cut down to smaller sizes and you’ll have twice as many of them. And if you’re testing multiple colors it’s a good investment.
- It takes a little time to paint 2 coats and let them both dry completely
- You must also purchase the paint and applicators (I highly recommend these for sampling paint – Color Tester Roller Kits)
- Removeable tape will be needed to attach these to your wall so you don’t damage it
Best way to test paint with a Mighty Board sample board
If using a board, tape off the outer 1″ of the board before painting it. Once the paint is dry, remove the tape carefully so your color will be surrounded by a white edge.
This will help you to disregard whatever color is currently on your walls when you hang up the board to view your sample color. Attach to the wall with painter’s tape.
Color Tester sample painted on walls
Painting a large area on your walls is a very accurate way to see how it will look in the room. The larger the area you paint, the easier it is for you to envision the whole space in that color.
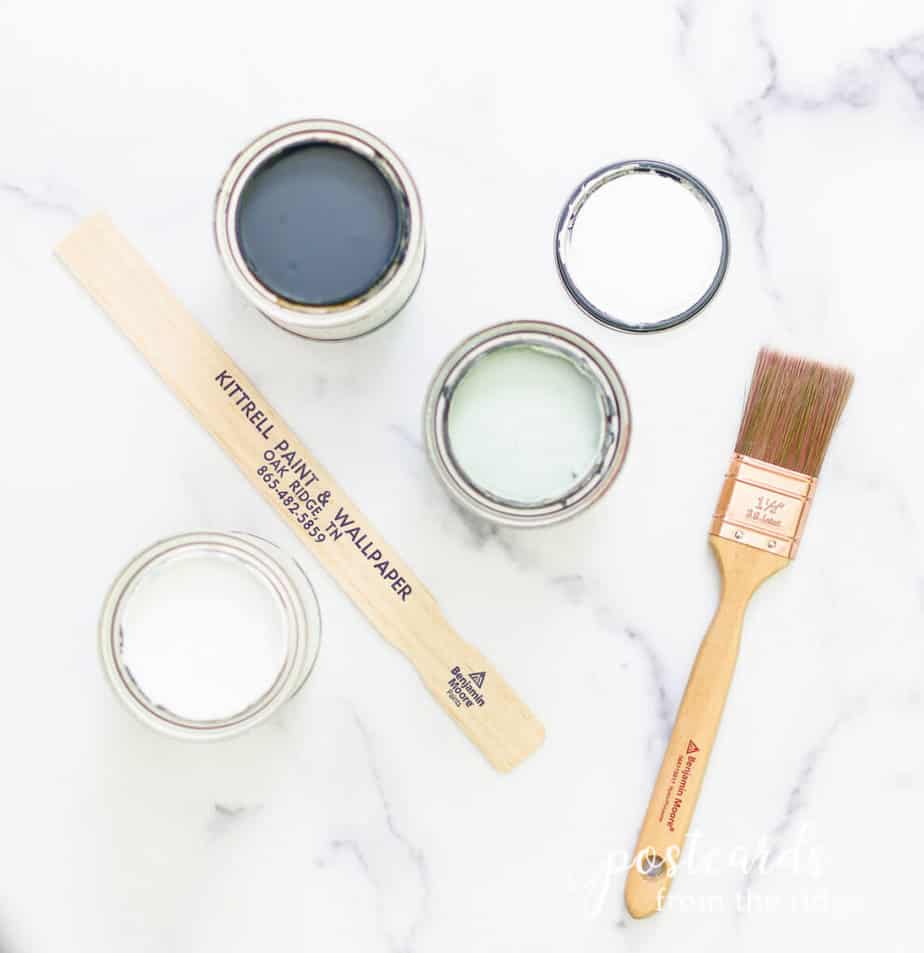
Here’s where you can get tester cans:
- Large swatches and half pint samples of Benjamin Moore colors here: Benjamin Moore color testers
- 100ml Farrow & Ball Sample Pots here: Farrow & Ball Sample Pots
- 8 oz Behr Sample pots here: Behr Sample Paints
- Quart size Color to Go samples from Sherwin-Williams: SW Sample quarts
- HGTV Sherwin-Williams and Valspar 8 oz samples here: HGTV & Behr Sample Paints
Pros
- You can paint a large area
- Available in all colors
- You’ll get a true sense of how the color will look
Cons
- It can get expensive but is less than buying a gallon of a color you don’t like
- You can’t move it around like you can with the sample boards or peel and stick samples
- You’ll have leftover paint (this can also be a pro)
Best way to use paint color samples
If you choose to sample your color this way, paint an area at least 3′ x 3′ next to your trim on a couple of different walls. It’s best to use no more than 3 or 4 colors if you’re painting directly on the wall. It can get confusing very quickly because you’ll be looking at all of them at once.
BONUS – How color is affected by light and surrounding colors
There are several influences that can affect how a color looks and you want to be aware of them all so you can make the best decision. Here are a few things that will change the appearance of colors:
- The amount of light
- The source of light – natural, LED, incandescent, fluorescent, etc.
- Other colors that are next to or nearby your color
One color against 4 different colors
Let’s look at an example of what I’m talking about. I photographed one color against 4 different colors in two different lighting situations. The first one was shot in natural light and the second was with overhead lights on.
The small paint samples are all the exact same color, Sherwin Williams Clary Sage. You can see how different it looks depending on what it’s next to. It looks lighter when placed next to a dark color, and darker when placed next to a white.
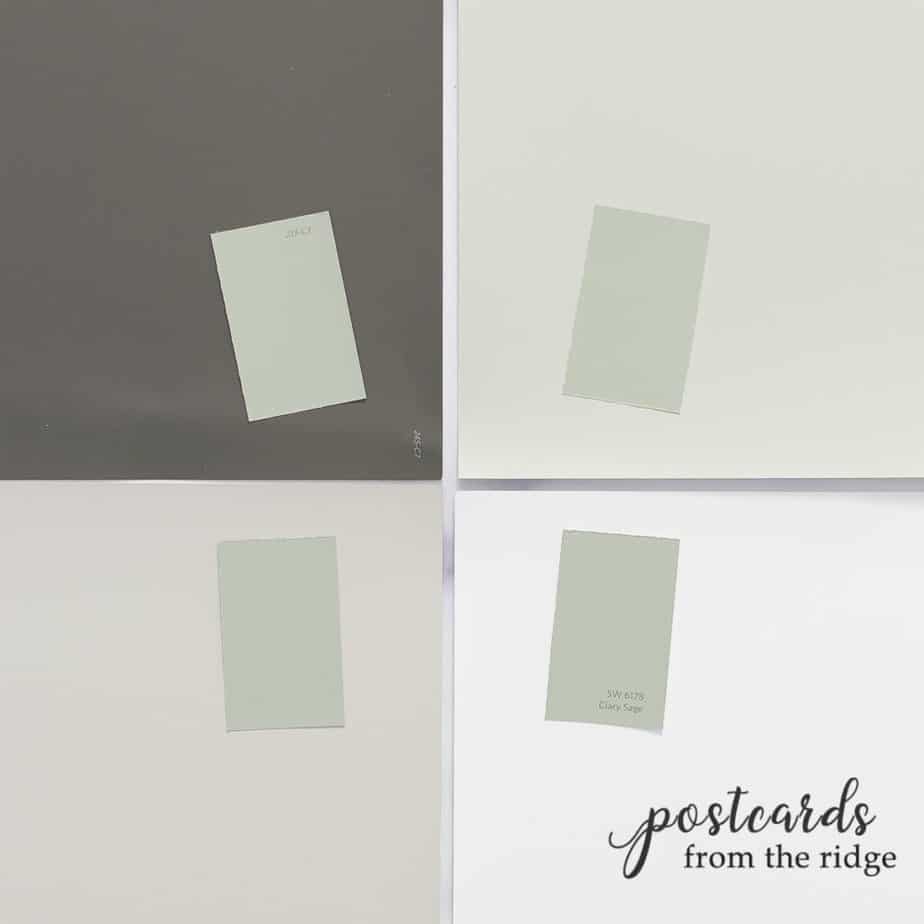
These are the colors used beginning at the top left and going clockwise: Sherwin-Williams Urbane Bronze, Benjamin Moore Vale Mist, Benjamin Moore Chantilly Lace, Benjamin Moore Revere Pewter.
And here are the same colors with overhead lights on. You can see how it makes the colors look warmer.
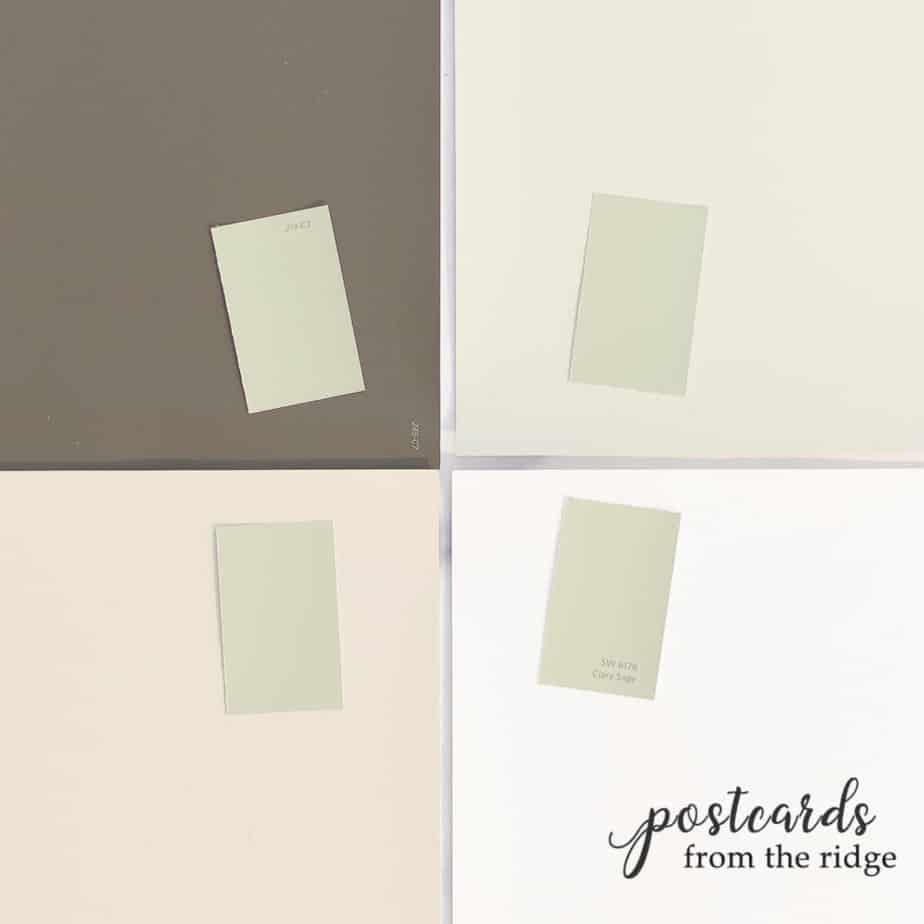
Bottom line – be aware that the colors will look different depending on light and adjacent colors. There’s no way around this.
Guide to Paint Gloss
Learn all about paint gloss levels and where to use each one here: Ultimate paint Sheen Guide Printables
Recap
I hope you’ve learned a lot about all of the paint samples and methods that are available these days. Sampling a paint color is a critical part of redecorating a space. Here are all the options for testing or envisioning a color:
- Color visualizer
- Free small swatches
- Samplize Peel and Stick Paint Samples
- Sureswatch Peel and Stick Sheets (unpainted)
- Mighty Boards
- Small color tester cans
Leave me a comment below and let me know how you like to test your paint colors. I’m always interested to know what works best for you!
Get the Best Paint Finish
See my favorite tried and true painting supplies including my favorite comfortable grip paint brush here: Must-Have Painting Supplies
Paint like a pro
See what the pros use for a beautiful paint finish in my Painter’s Toolbox Collection.
Paint Color Inspiration
Need inspiration for paint colors in your home? You’ll love these posts:
- NEW – 2023 Benjamin Moore Color of the Year and Palette
- 2022 Benjamin Moore Color of the Year and Trends
- 2021 Benjamin Moore Color of the Year and Trends
- NEW – 2023 Sherwin Williams Color Forecast
- NEW – Sherwin Williams Shoji White Color Review
- Sherwin Williams Clary Sage Spotlight
- Sherwin Williams Agreeable Gray Spotlight
- Coastal Grandmother Decor & Paint Colors
- 9 No-Fail Neutral Paint Colors from Benjamin Moore
- Best Benjamin Moore Whites & Off Whites
- Best Bedroom Paint Colors
- 13 Gorgeous Interior Door Paint Colors
- 37 Front Door Paint Colors Plus Tips for Choosing One
Painting tutorials
- How to paint paneling like a pro
- How to paint your brick fireplace and instantly update your home
- How to paint linoleum or vinyl floors
- How to paint your laminate counters
- How to crackle paint
- How to paint numbers and letters on furniture
- How to paint an 80’s oak table
- How to paint a glass vase to look like stoneware
