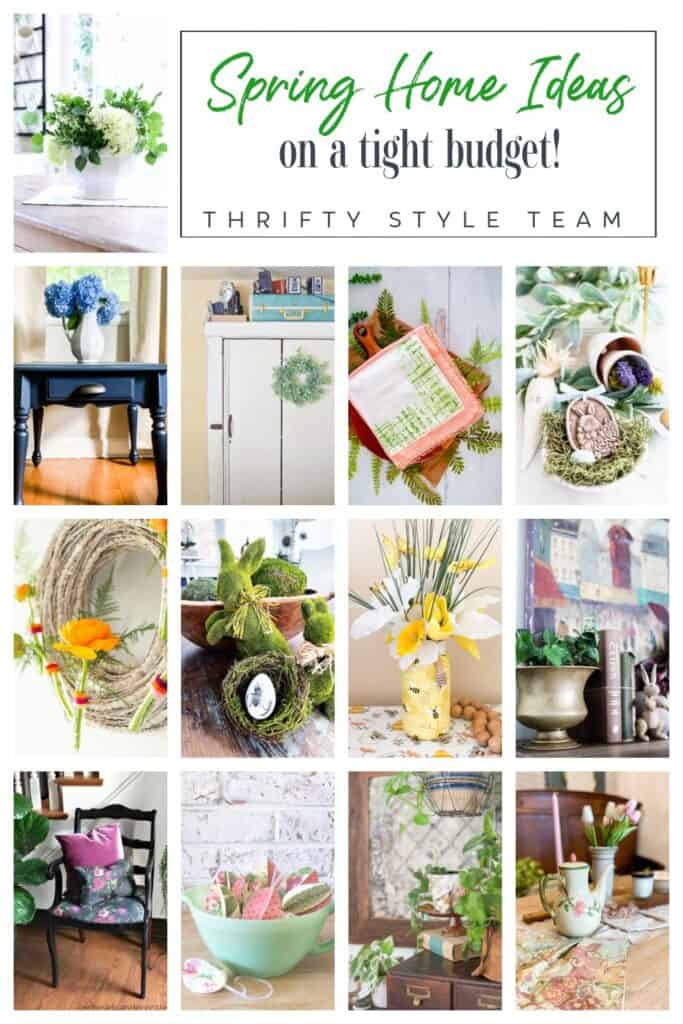
DIY 3D Paper Eggs
Let’s welcome spring with these fun DIY 3D paper egg ornaments. They’re easy to make and so pretty!
DIY 3D Paper Egg Ornaments
I’m so ready for spring weather! We’ve had some warm days already and the spring flowers are beginning to bloom and I couldn’t be happier about it.
Today I’m joining with my Thrifty Style Team friends and we’re sharing budget-friendly ideas for your home. This monthly challenge is hosted by my friend Julie at Redhead Can Decorate and the theme is always thrifty ways to decorate your home.

Links to all of the ideas are at the bottom of this post, so be sure to visit everyone for some great tips.
This post contains affiliate links for your convenience. I may make a small commission on products purchased with my link, but your price does not change. For full disclosure go here: Disclosure and Policies. Thank you for supporting my site.
This month’s challenge is a bit sad because we have lost two of our members in the past month. My dear friend Paula from Sweet Pea lost her battle to cancer at the end of February. And a few days before that our talented member Michelle from The Painted Hinge passed away. It’s been a very tough month, and both of these ladies will be sorely missed.
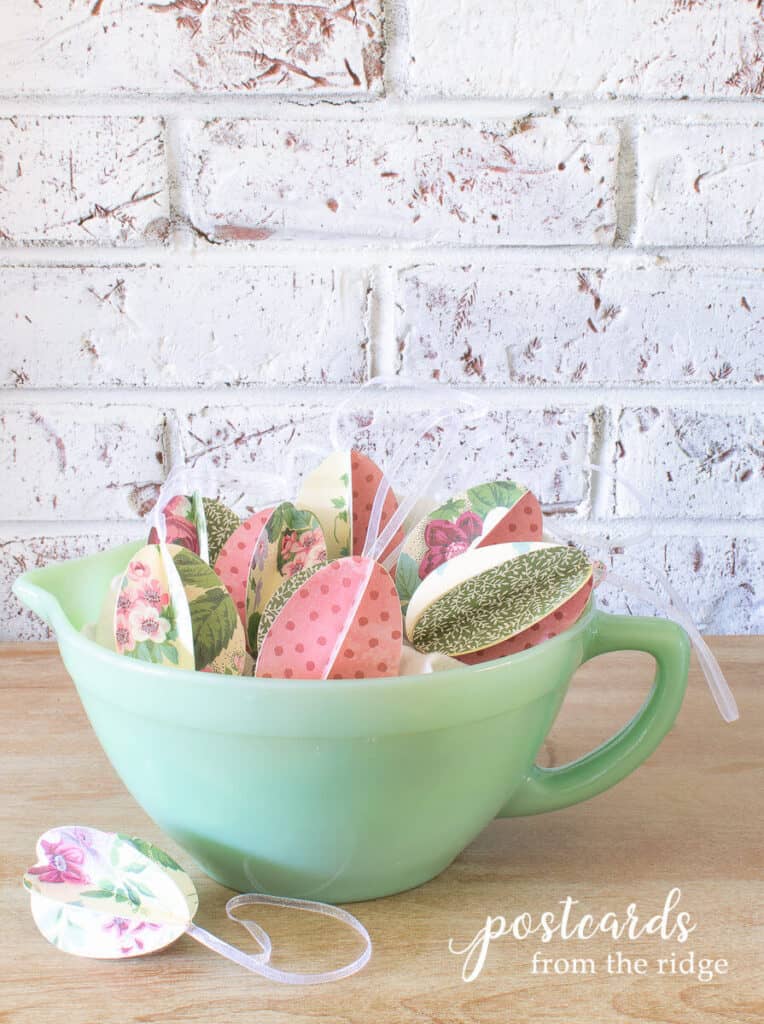
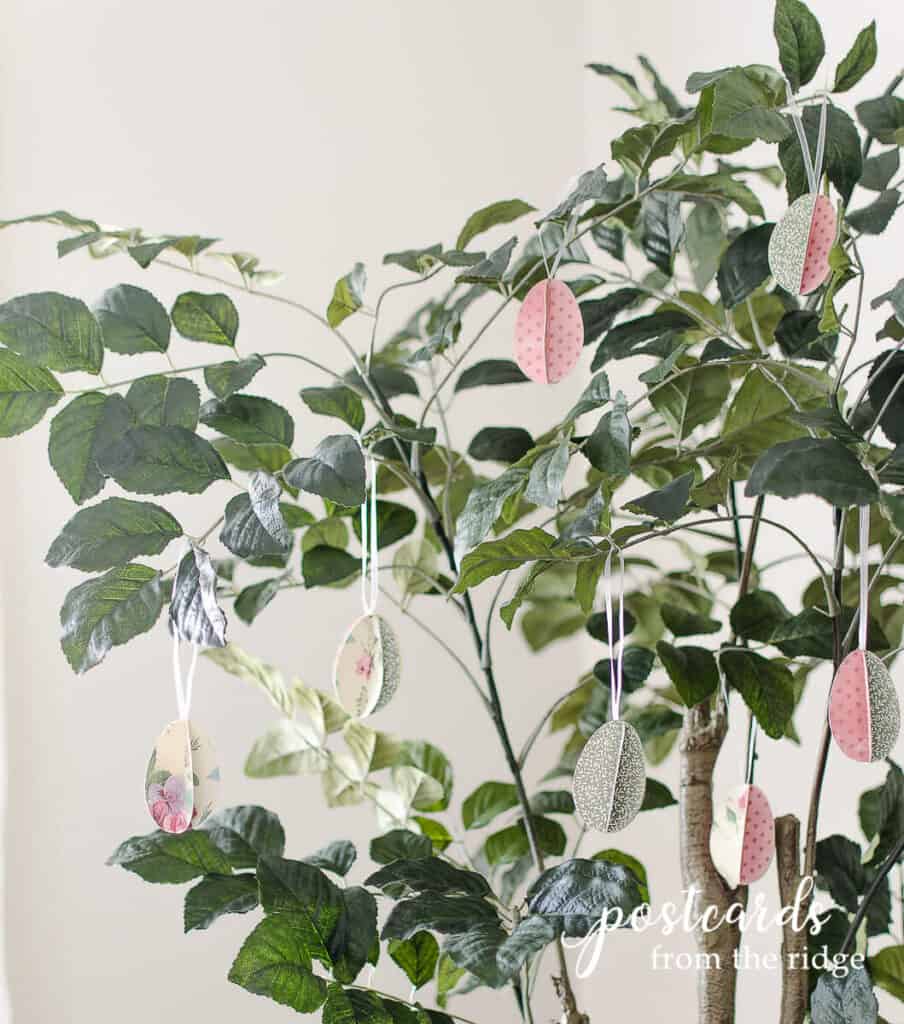
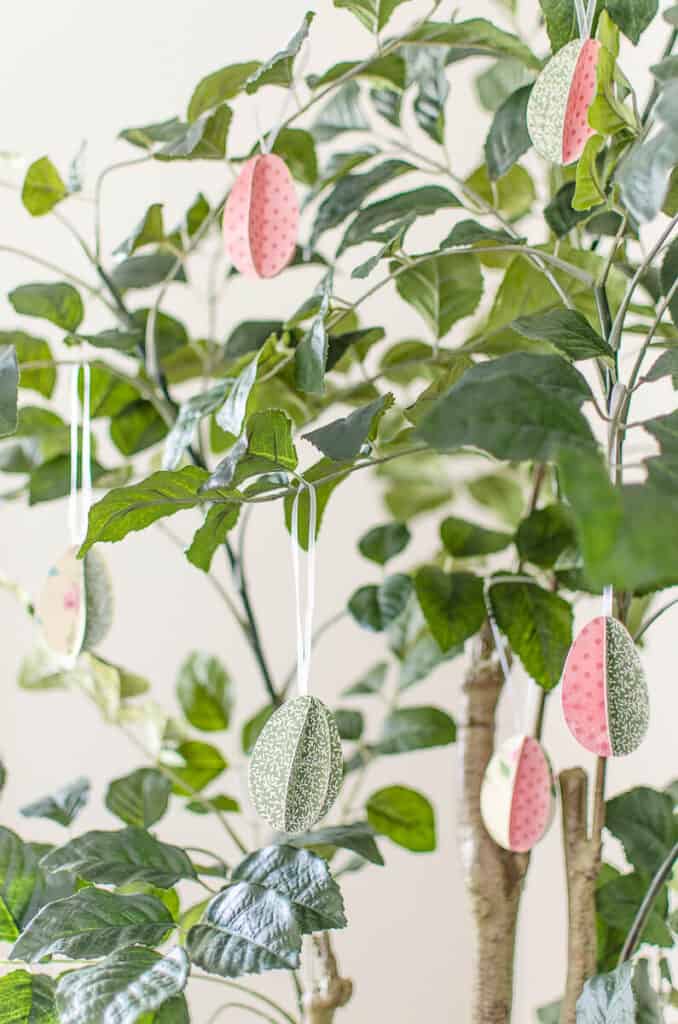
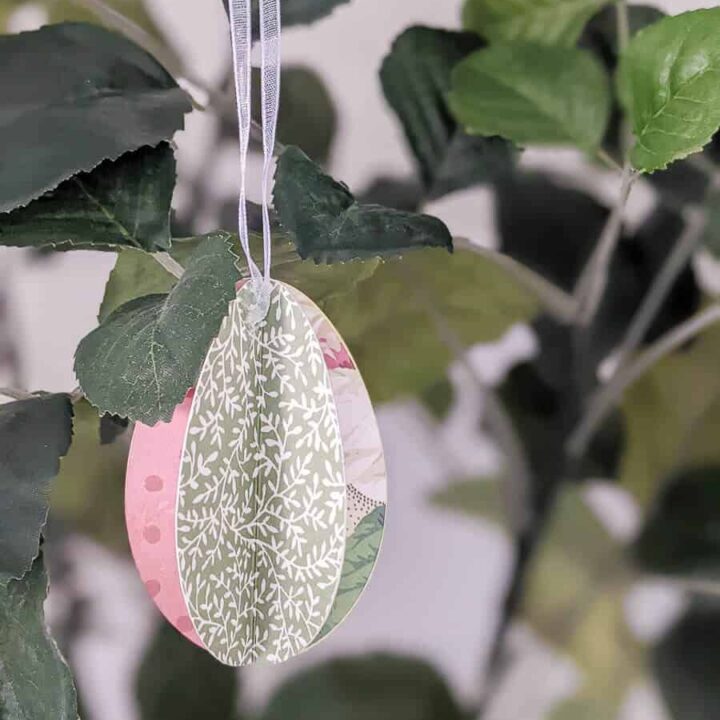
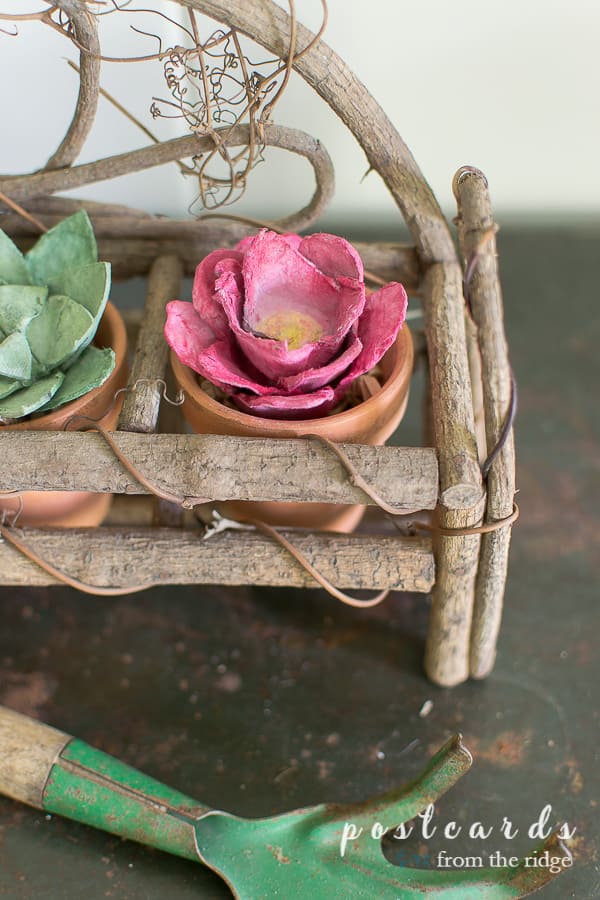
Now let me show you my little project for this month. I created some DIY 3D paper egg ornaments from some pretty floral cardstock. I have them hanging on the tree in my living room, but there are several ways you could display them.
Here are a few ideas:
- On a tree like I mine
- Attached to a string and used as a garland
- In a pretty bowl
- Any way your heart desires
If you’ve followed me for a while, you might remember some previous paper crafts with my 3D Paper Heart Wall Art project or my Watercolor Fall Paper Leaves from past Thrifty Style Team projects. See all of my craft projects here: Crafts Archives
How to Make 3D Paper Ornaments
This is an easy project that won’t take long to do. And you only need a few supplies.
Supplies needed
- Pretty Cardstock or Scrapbook Paper
- Cricut Explore Air or Egg Shaped Paper Punch
- Scoring board or tool
- Glue Pen
- Ribbon to use as hanger
Instructions for Making 3D Paper Eggs
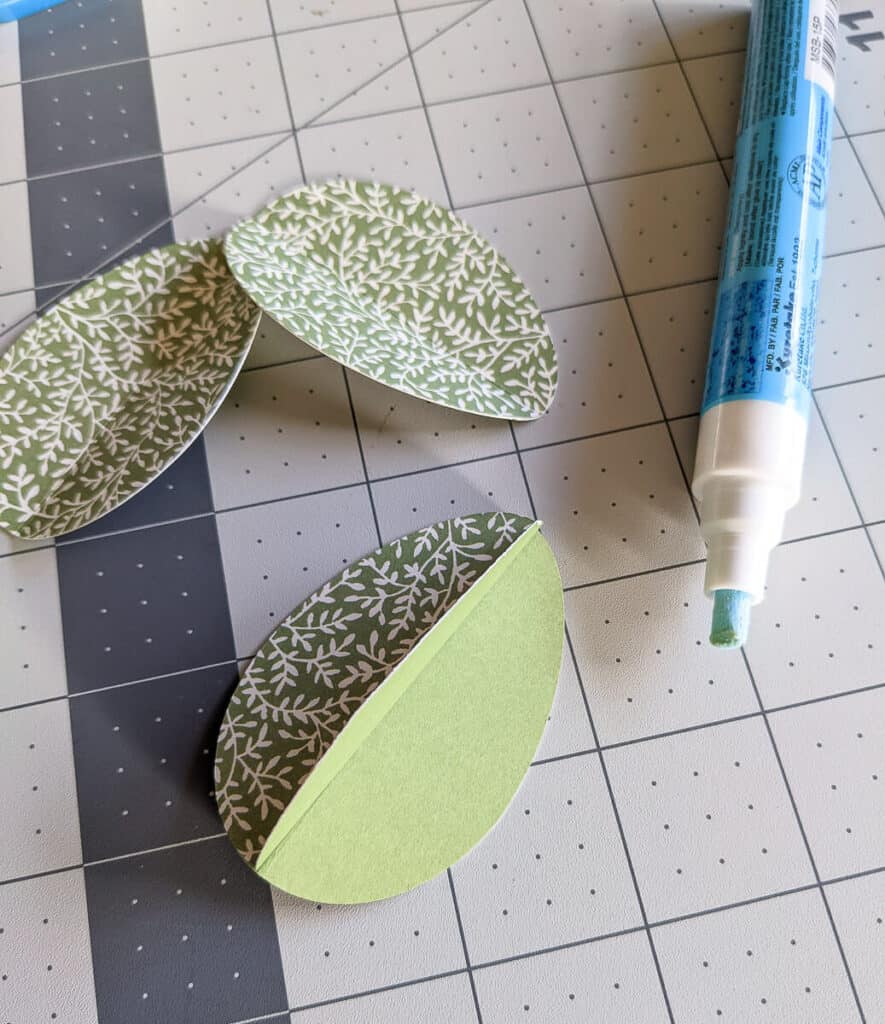
1. Cut your paper into egg shapes and fold or score lengthwise
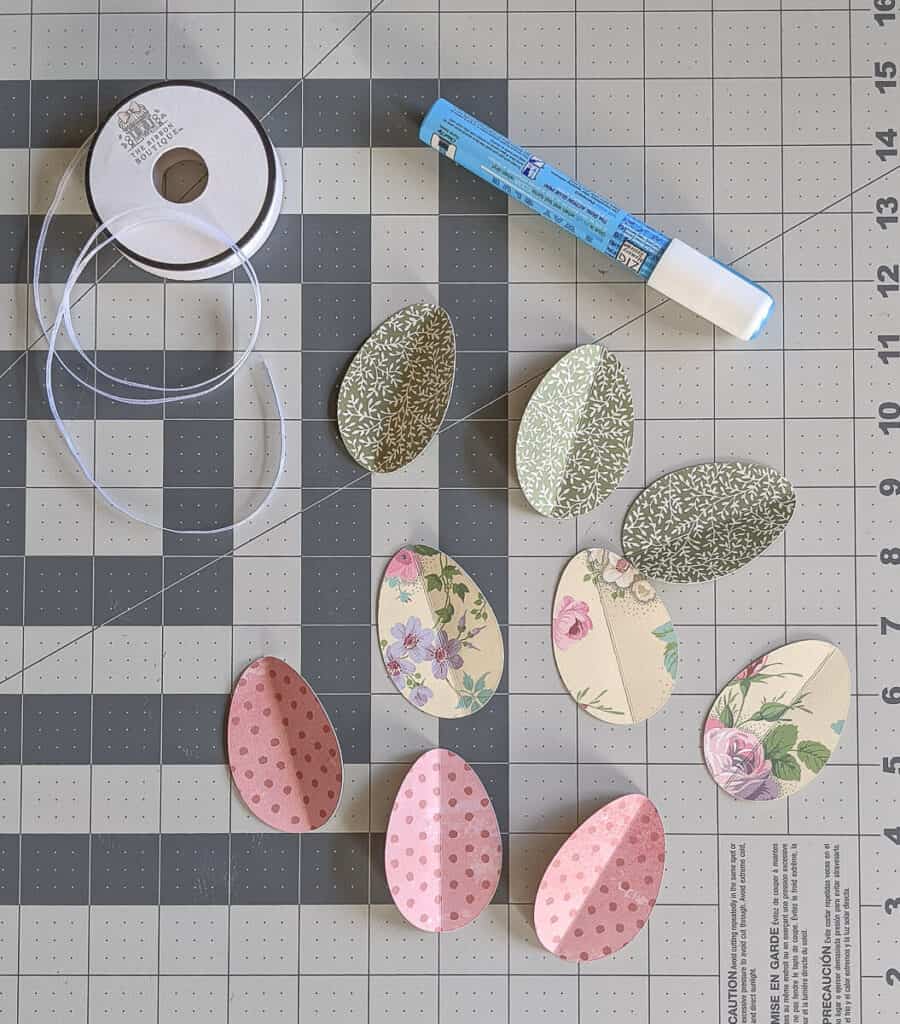
For my eggs, I used 5 cutouts per egg. Using your cricut or an egg-shaped paper punch, cutout enough pieces to make as many eggs as you want. I made 8 eggs, so I cut out 40 pieces.
2. Glue Egg Shaped Cutouts Together
Using your glue pen (you can also use a glue stick) attach the right side of one cutout to the left side of the next one. You can use the same pattern or mix them up. It’s totally up to you.

3. Attach Ribbon
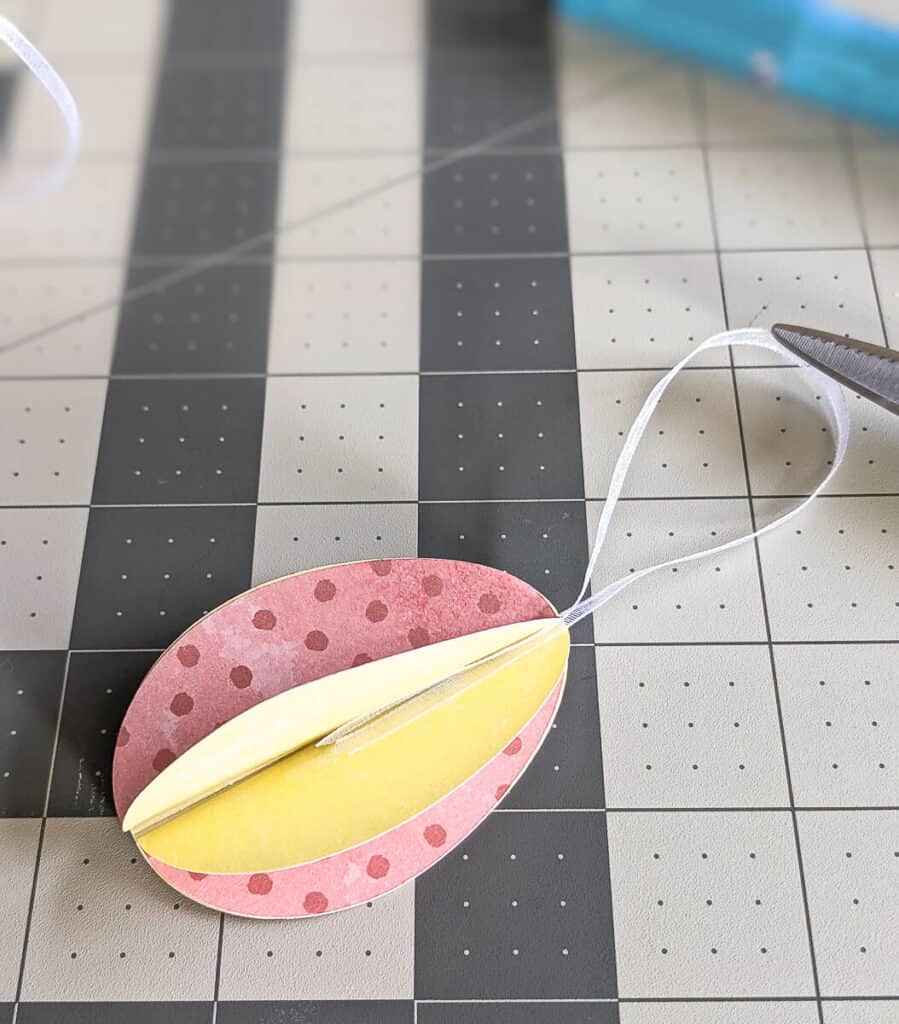
Before gluing the last pieces together, insert a ribbon to use as a hanger. I cut my ribbon pieces to about 7″, but you can make them as long or short as you want. You could also use twine instead of ribbon for a more rustic look.
All that’s left to do is enjoy them!
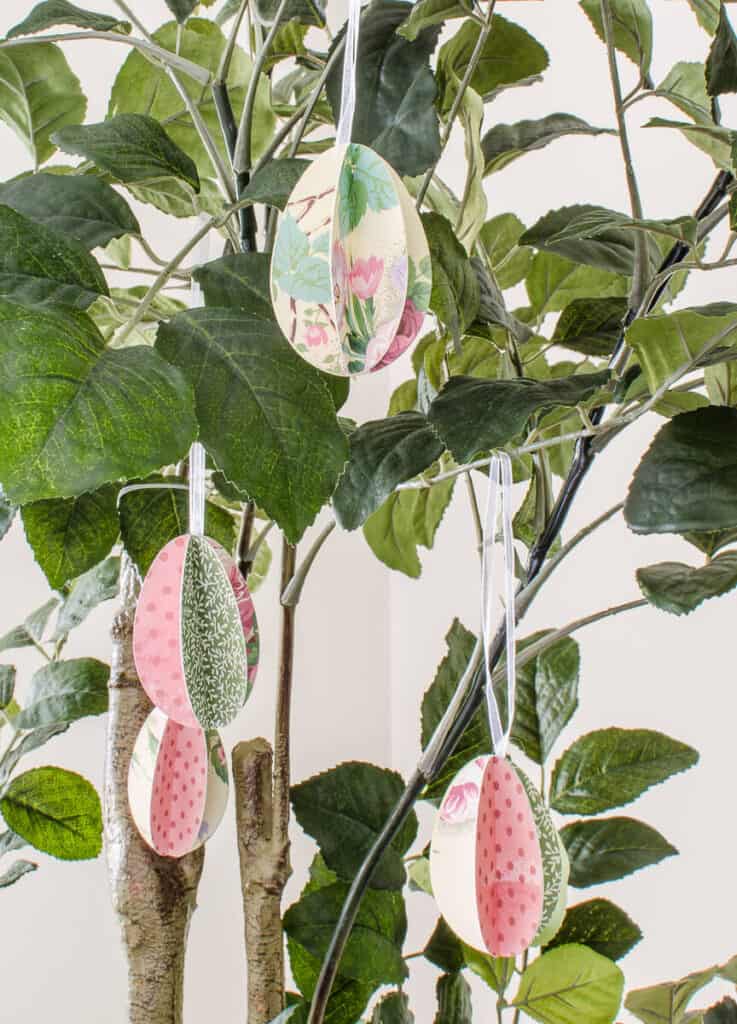
I’m enjoying looking at these on my living room tree.
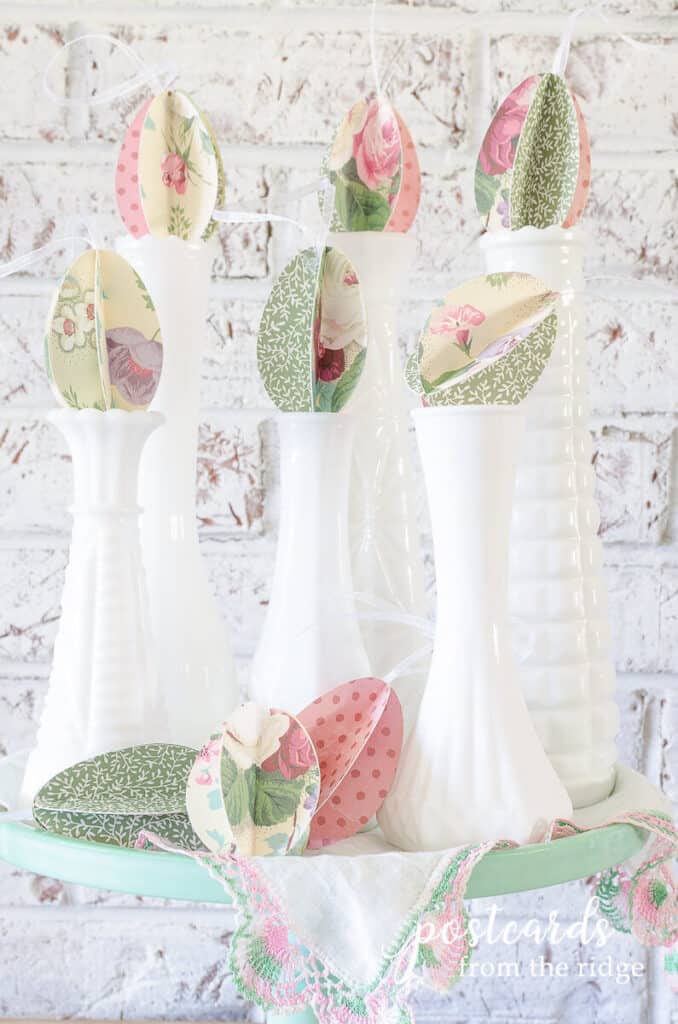
But I also had fun setting them on top of some of my vintage milk glass vases!
Here are all of this month’s projects!
3D Paper Ornaments
These 3D paper ornaments are a fun and easy project that adds color to any season.
Materials
- Pretty Cardstock
- Ribbon
Tools
- Glue Pen
- Cricut or Egg Shaped Paper Punch
- Scoring tool or Scoring board for crisp folds
Instructions
- Using a Cricut machine or an egg-shaped paper punch, cut the cardstock into egg shapes. You'll need 5 cutouts per 3D egg.
- If using a Cricut, score center of the egg vertically with the scoring wheel or tool. If using a paper punch, fold the eggs in half lengthwise and crease with a scoring board or paper creaser.
- Glue egg shapes together with the folds fanning outward one at a time with a glue pen. You'll attach the left side of one the the right side of the next one and continue.
- Before gluing completely together, add a ribbon to the center to use as a hanger.
Notes
This technique can be used to create Christmas ornament too! Just use festive Christmas cardstock or whatever colors you want.


These turned out so cute, Angie, and I love the beautiful pastel colors. Perfect for spring.
These are so cute Angie! Love the new blog design!
They are so sweet, Angie! I know, Michelle and Paula have been on my mind too.
Michelle and Paula will be missed. They are crafting together in Heaven. I love your Easter egg
ornaments. Fabulous job!
I hope to make some time soon and these made. They are darling! Love the paper you chose as well. pinned
These paper eggs are so sweet! I love the paper you chose…they’re all so pretty! Thank you for the inspiration!
These little eggs are so sweet, Angie! The pastels are gorgeous. They are perfect for Easter!!
Beautiful Spring colours, these eggs are simply adorable!
Angie these turned out just darling! I love anything 3D and the paper you chose is so sweet. Pinned!
These are so cute and so simple! Fun way to decorate an Easter tree:)
Angie, your paper eggs are just adorable. I love how they look on your living room
tree. Thanks for sharing the tutorial.
Happy Spring!
Angie,
These turned out so cute. I love your color combinations. I’d like to share a link on my Sunday, Dirt Road Adventures. I hope that’s ok.
Rachel, Thank you! Yes, that would be great.