
Hall bath renovation reveal and details
Hello, friends! Today I’m sharing a complete reveal of our hall bathroom that was remodeled a few weeks ago. I finally got the Christmas decor out of this space and added some wall hangings and took some photos on a recent sunny day.
This post contains affiliate links for your convenience. I may make a small commission on products purchased with my link, but your price does not change. For full disclosure go here: Disclosure and Policies. Thank you for supporting my site.
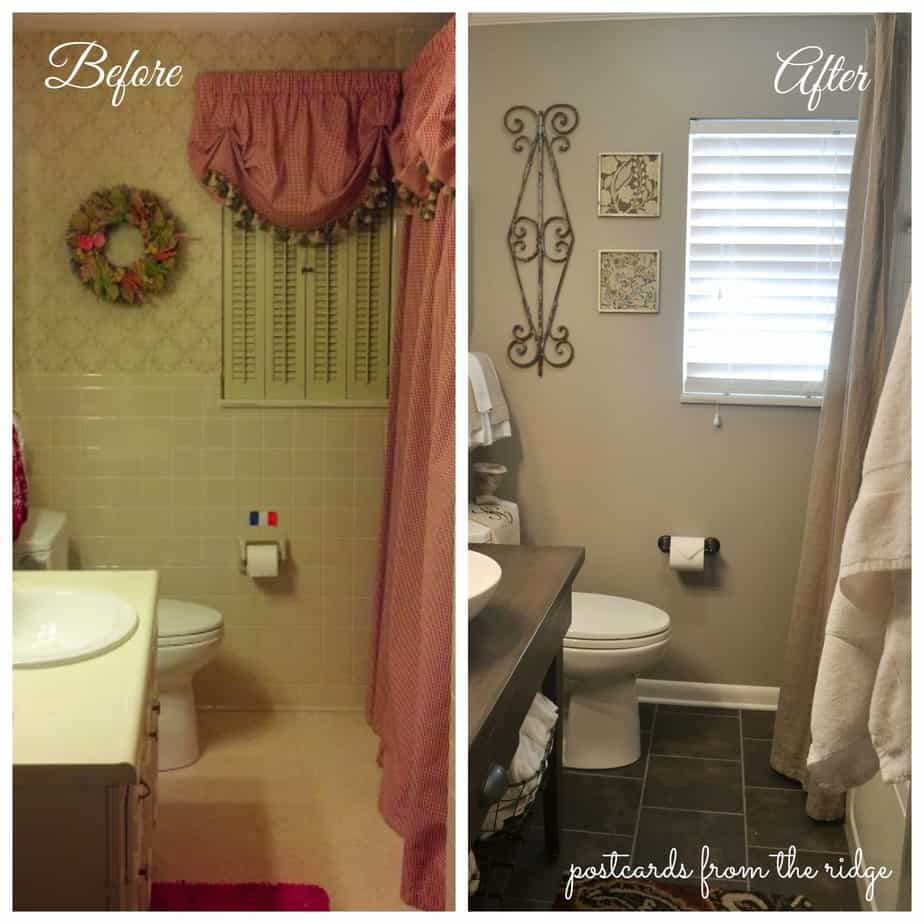
Above is a comparison of the bathroom before and after the remodel. Before the remodel it wasn’t too hideous. Well, except for the 60’s green bathtub that’s hidden behind the shower curtain. The wall tile, floor, and vanity were all neutral, even if they were a bit dated.
This remodel was done because there was a leak in the wall behind the shower and the tiles were beginning to come loose from the wall. That’s never a good thing.
I shared the daily progression of the renovation here. You can see the before and during pictures and see what it was like to have the old bathroom completely removed and the new one installed one day at a time.
And here’s my inspiration board for the space.
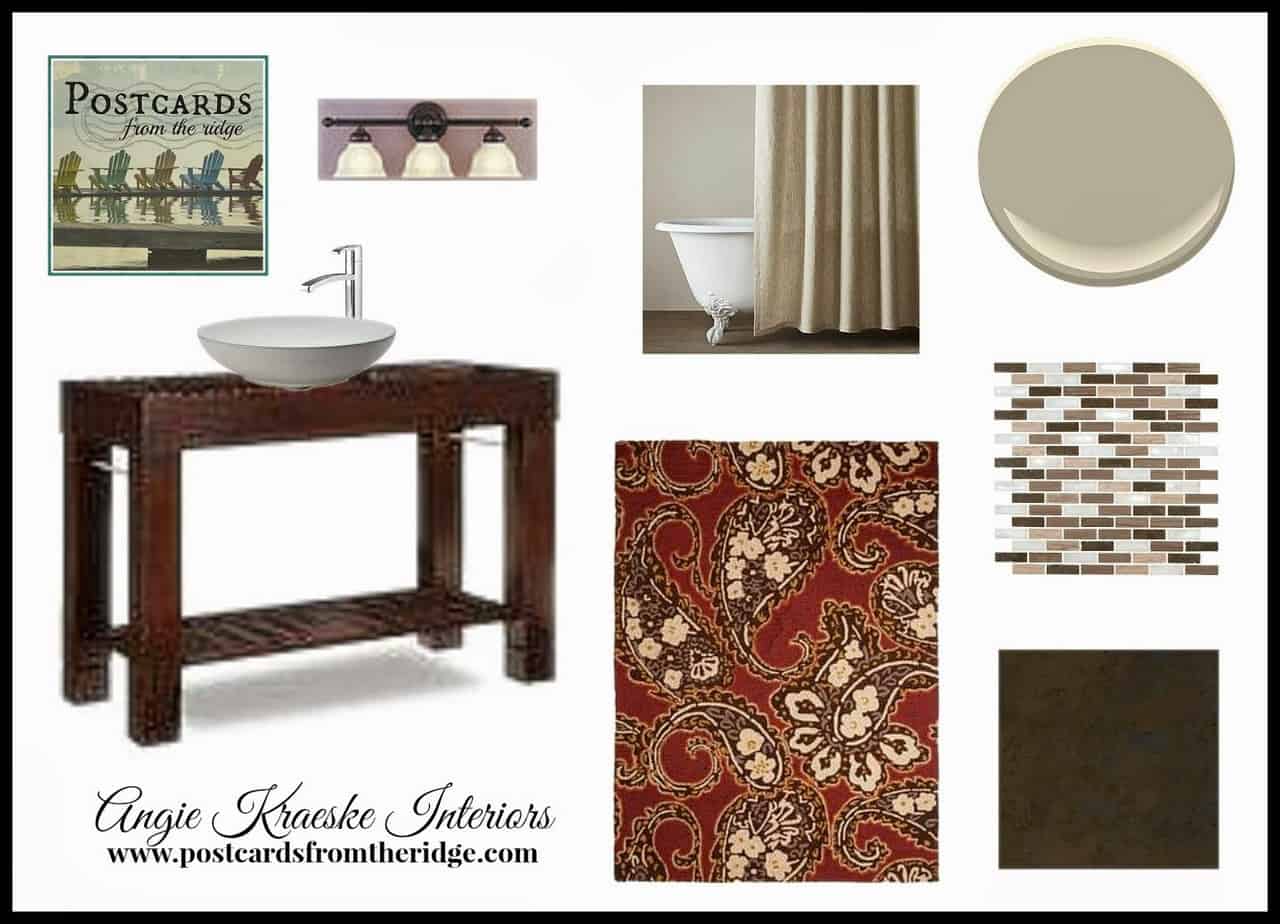
I don’t have the white subway tile on the board or the toilet and shower faucet. But pretty much all of the major design elements are shown. Scroll to the bottom of the post for more sources and shopping info.
Welcome to our new bathroom!
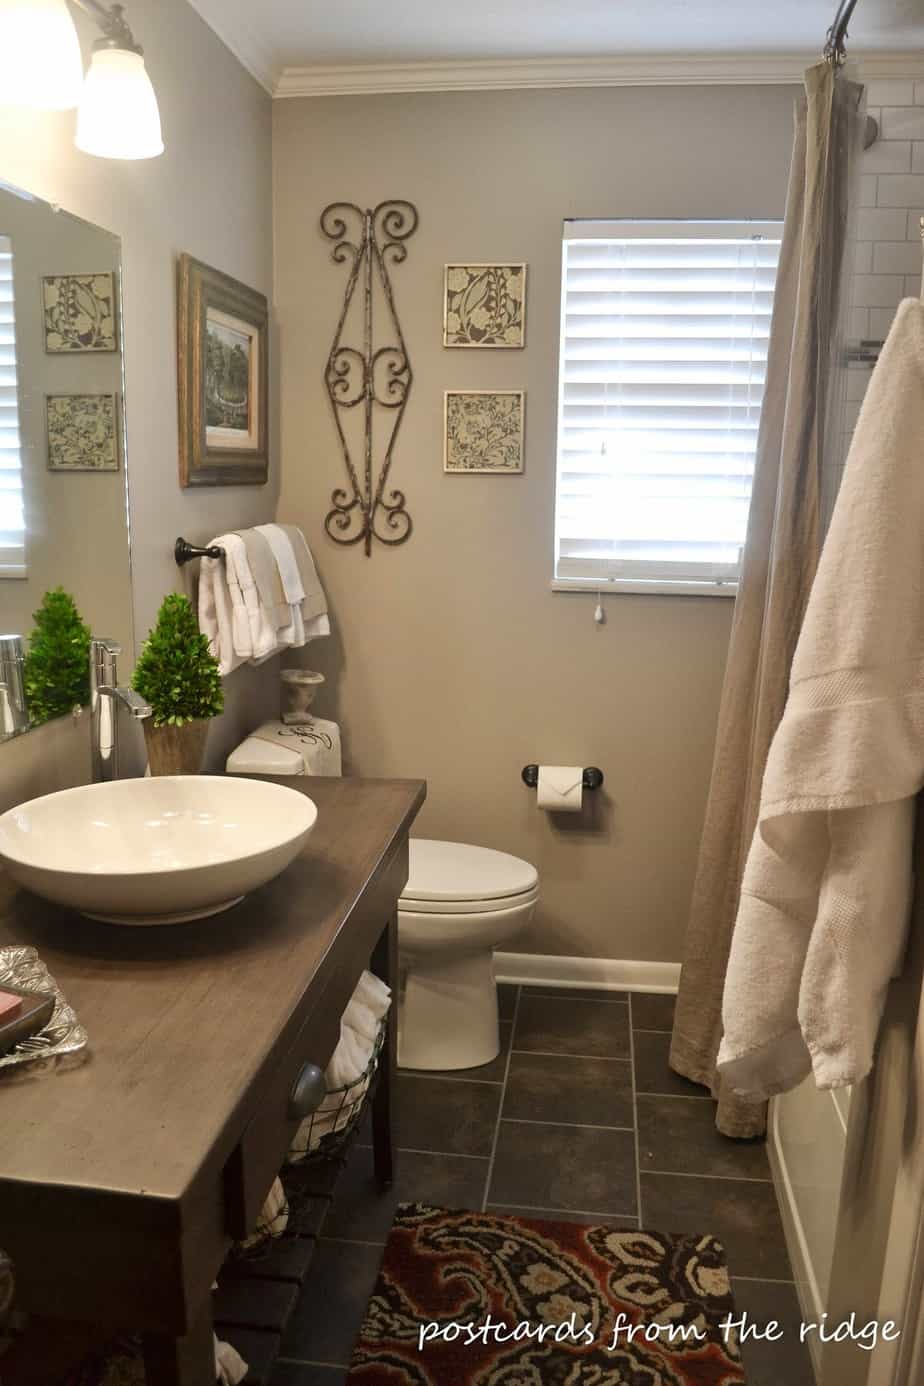
This bathroom is used by our 14-year-old daughter daily and also by any guests that come to the house. We wanted something neutral and non-gender, but not too stuffy or grown up. We’ll probably change the rug and towels seasonally. My daughter wants some brighter colors in here as accents.

I was only a little afraid that the floor tile might be too dark, but I really love it. Our master bath has white tile and I don’t love it. It looks really pretty for a little while, but it shows everything. So I went with warm and dark in this bathroom. Live and learn.
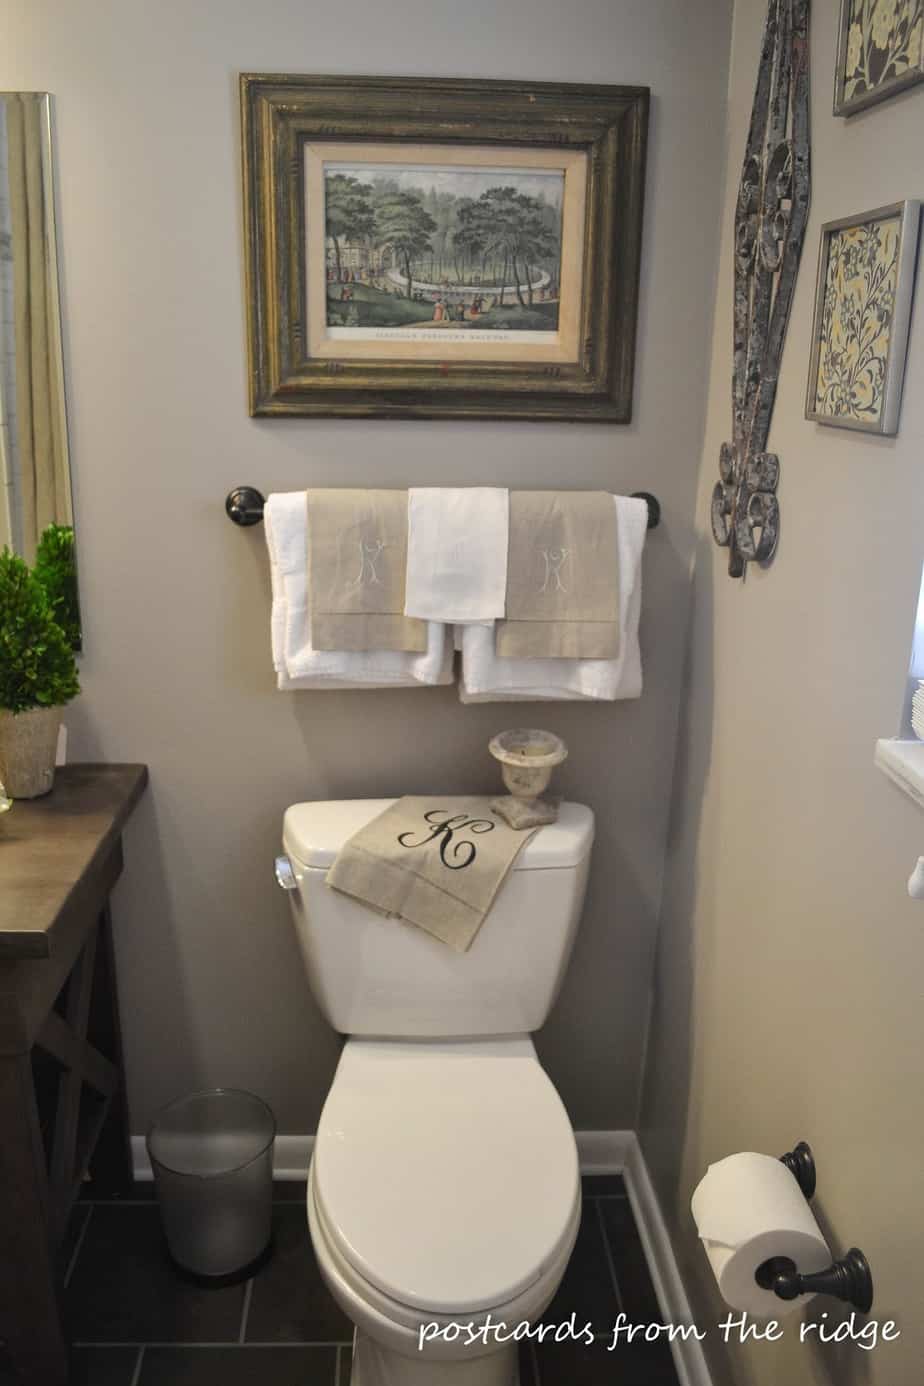
Some white towels, monogrammed linens and artwork surround the toilet. Scroll down to learn my secret about the framed print hanging on the wall.
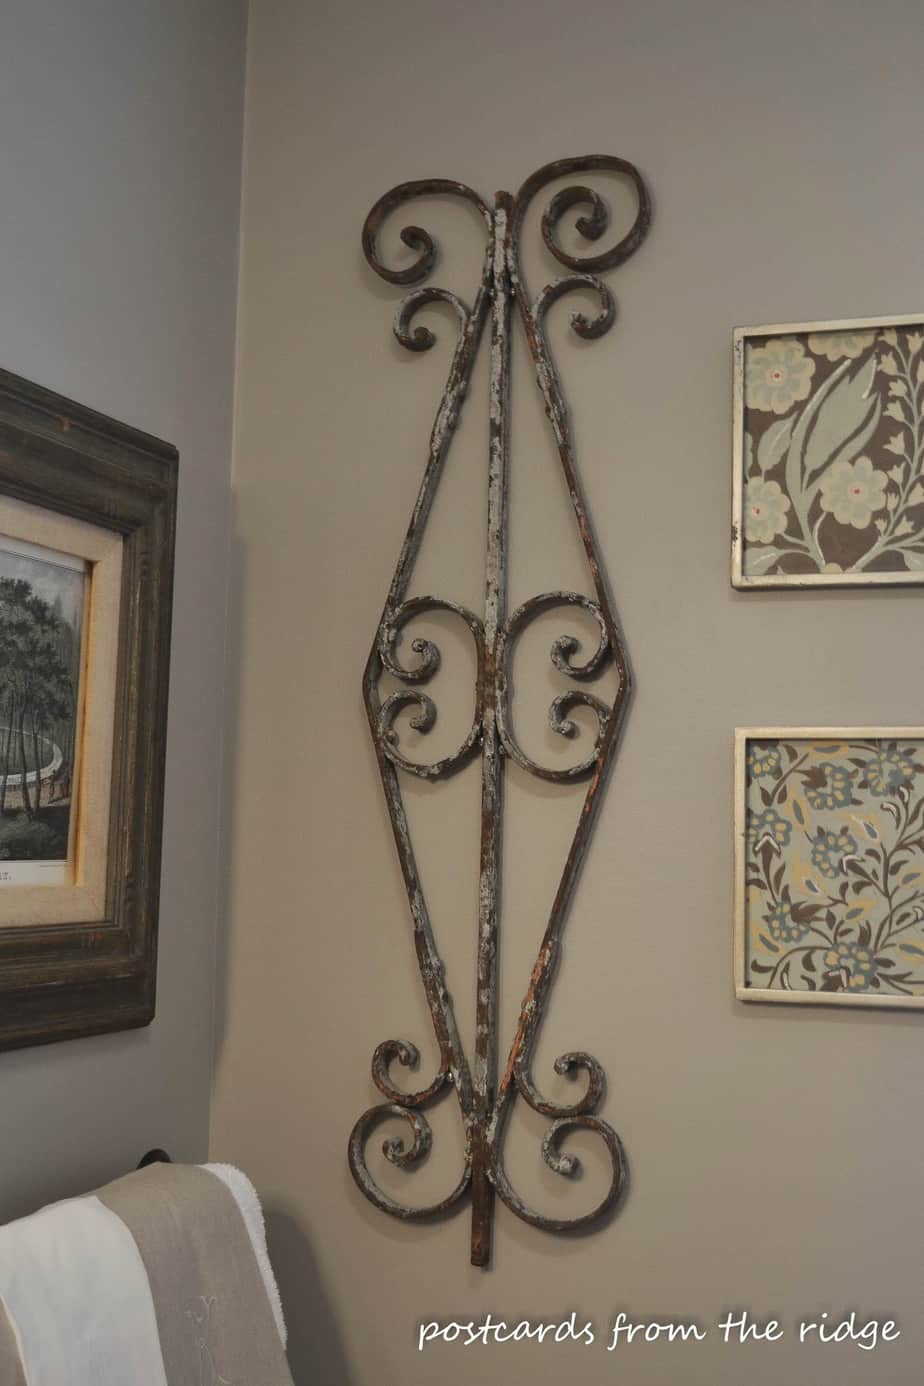
One of my favorite finds ever is this old rusty section of an iron gate. It’s been several places around the house, including our living room hearth and our deck. But it’s going to be staying here for a while.
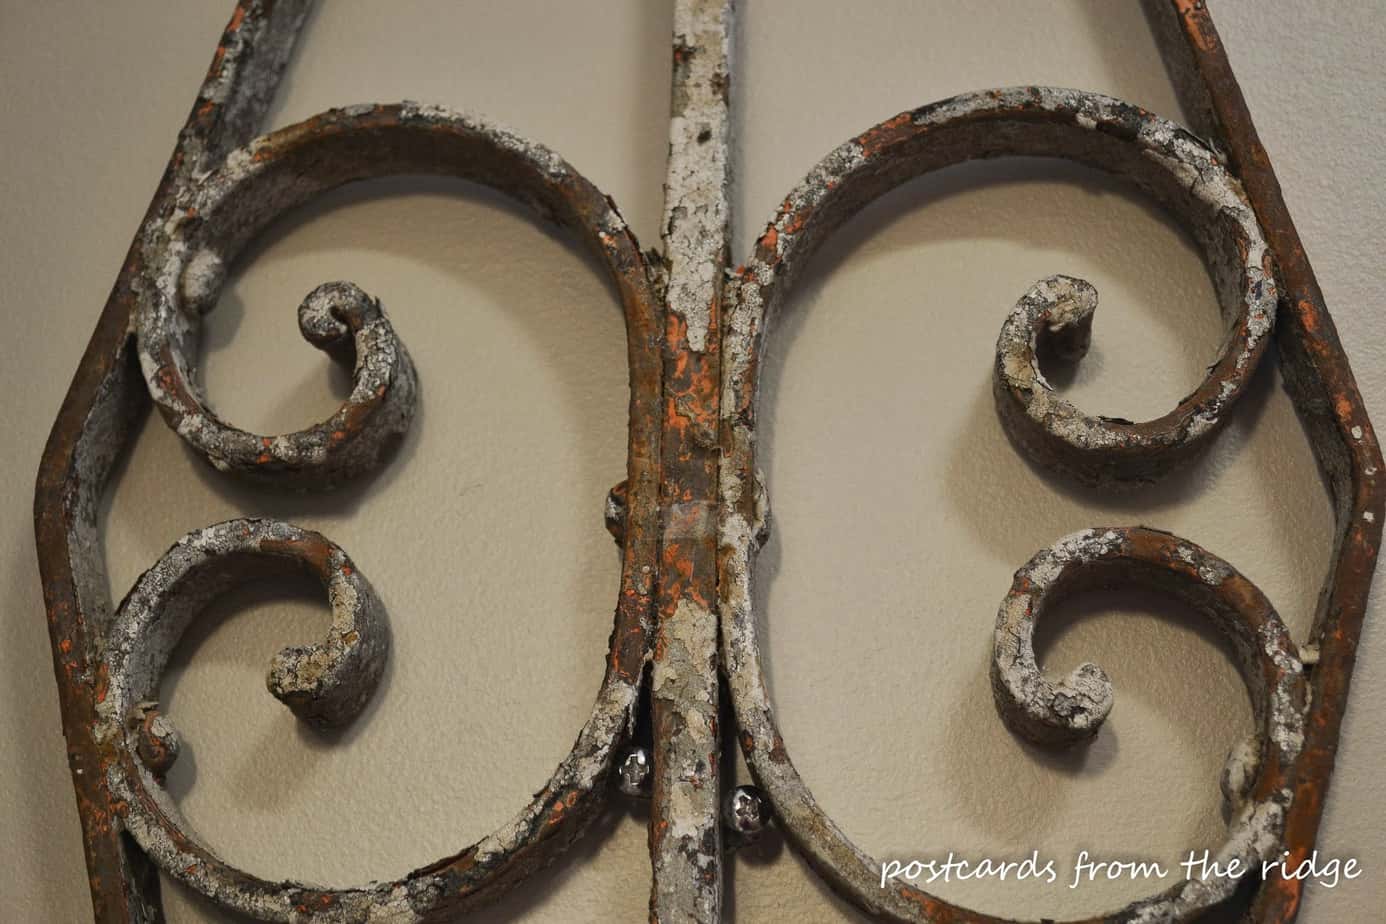
Look at all that chippy, rusty goodness.
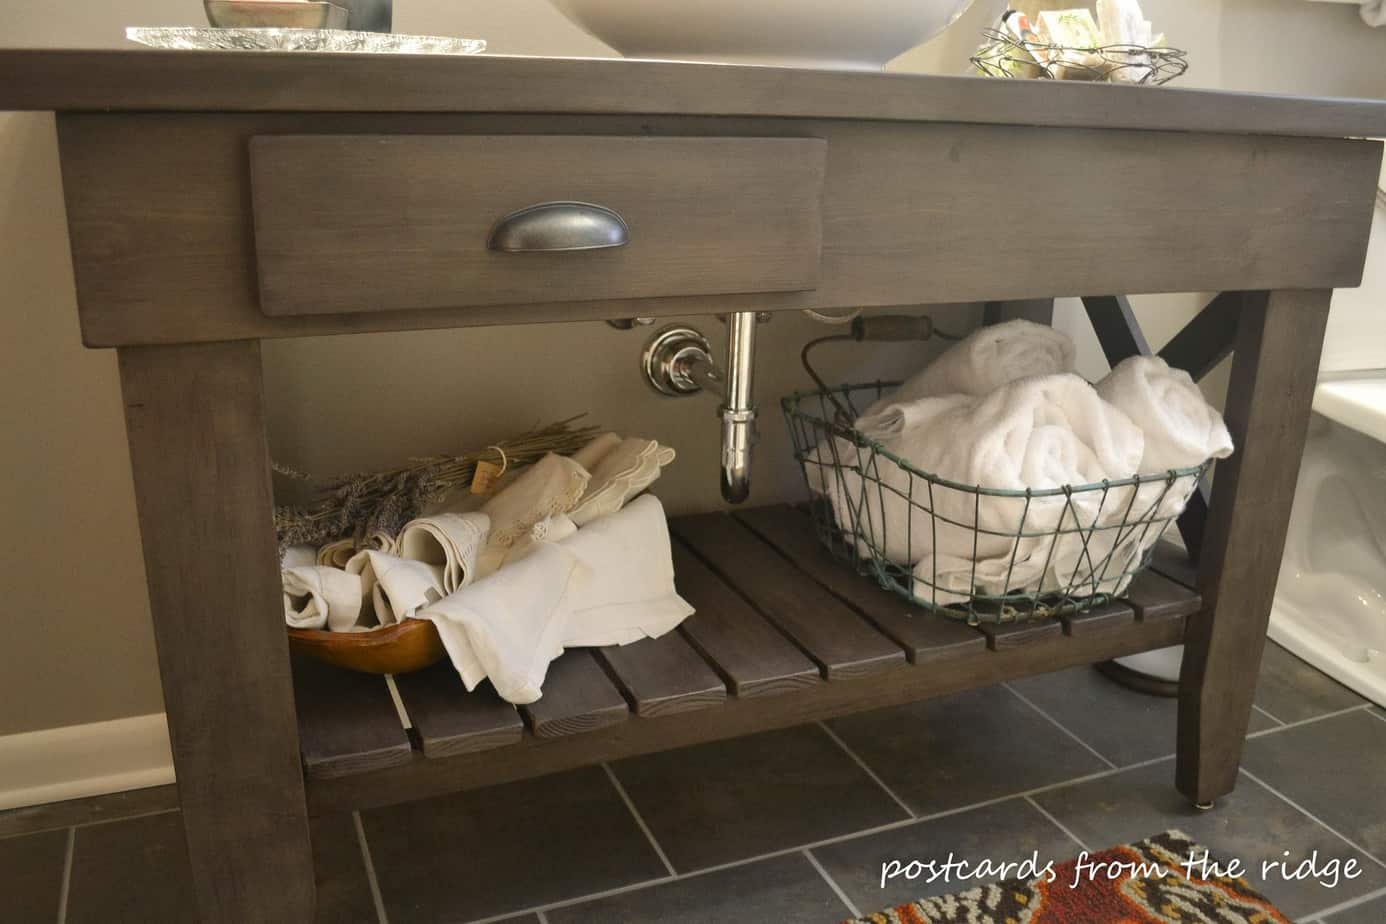
A dough bowl and a wire basket hold towels and vintage linens and some lavender on the shelf of the vanity.
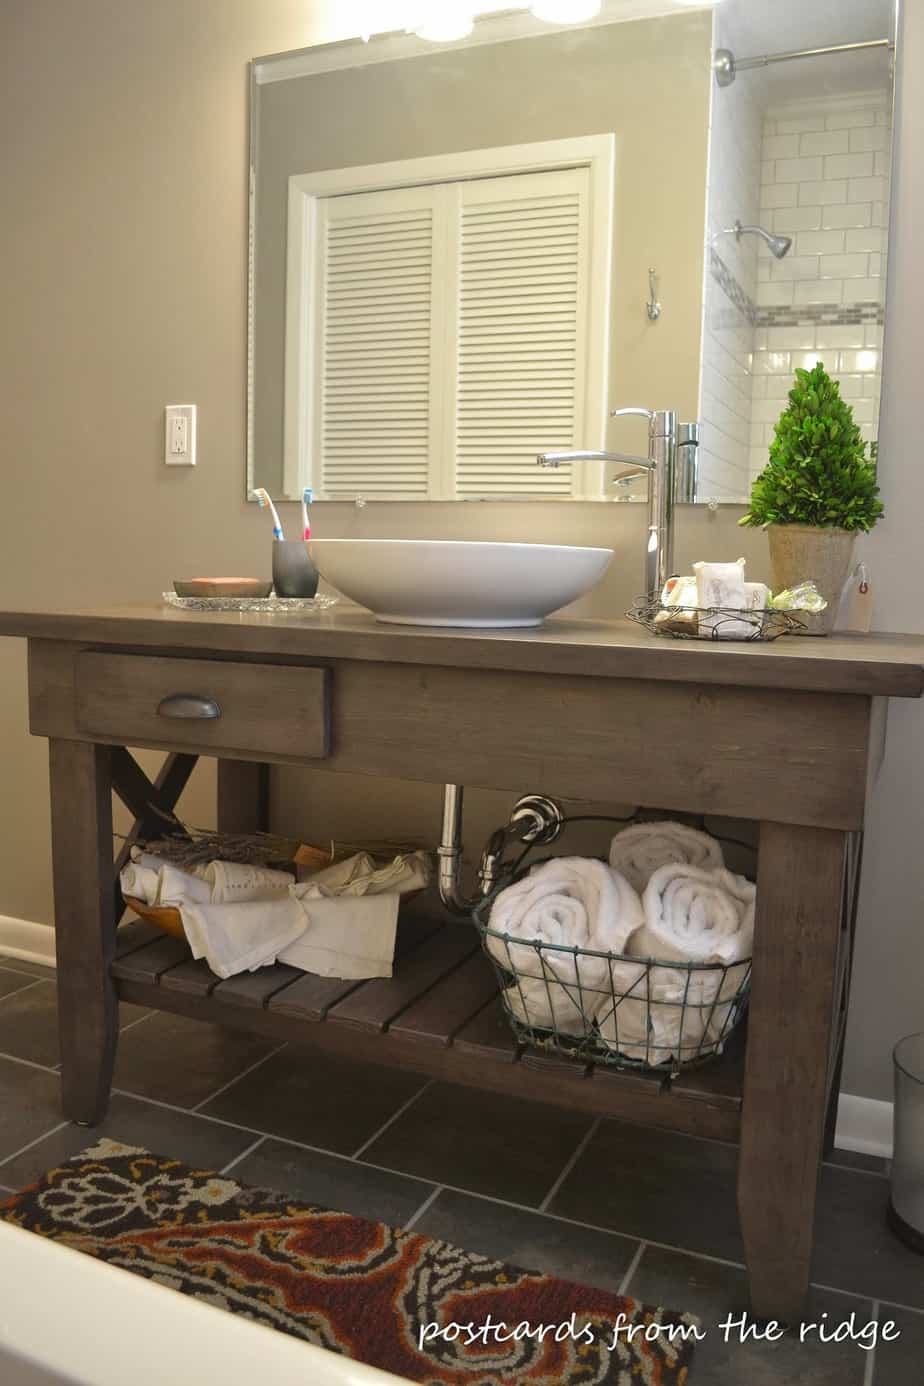
I couldn’t find a vanity I liked that was in my price range so I had this one built by a local carpenter. I got to design it and finish it exactly the way I wanted. I’ve seen similar ones, and have links to those if you like this look. See the inspiration board above, or the sources listed at the bottom of the post.
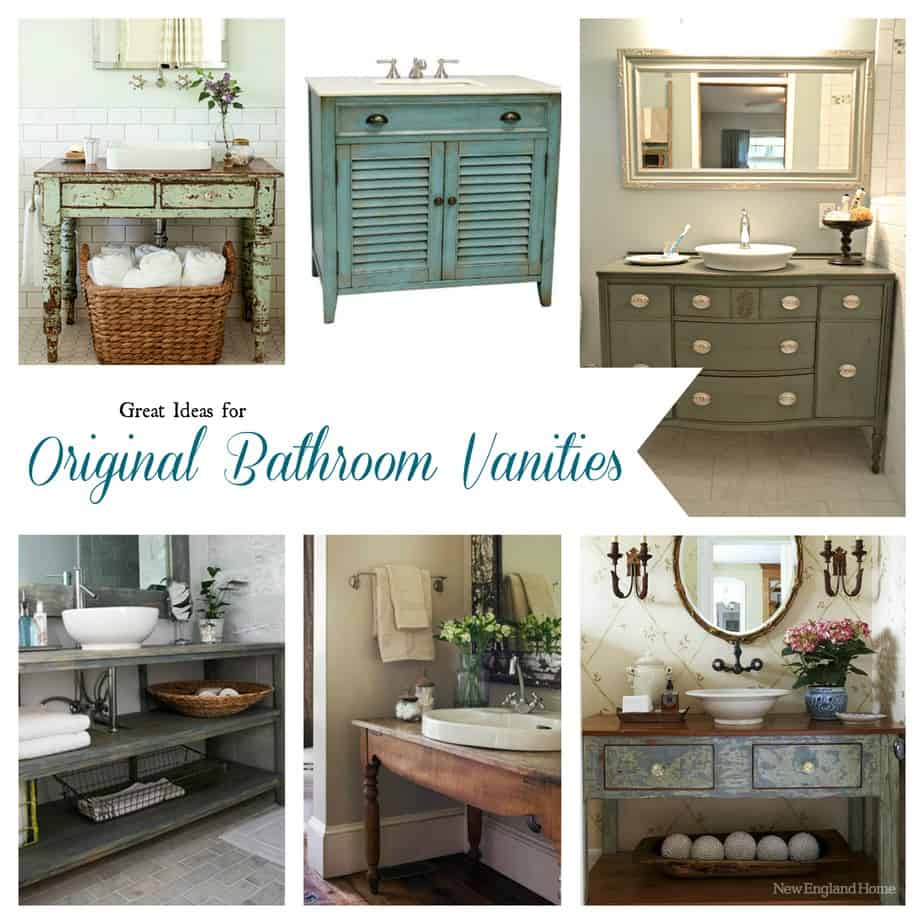
These are some of the vanities that I used for ideas in designing this one. To learn more about the ones in this photo, go here.
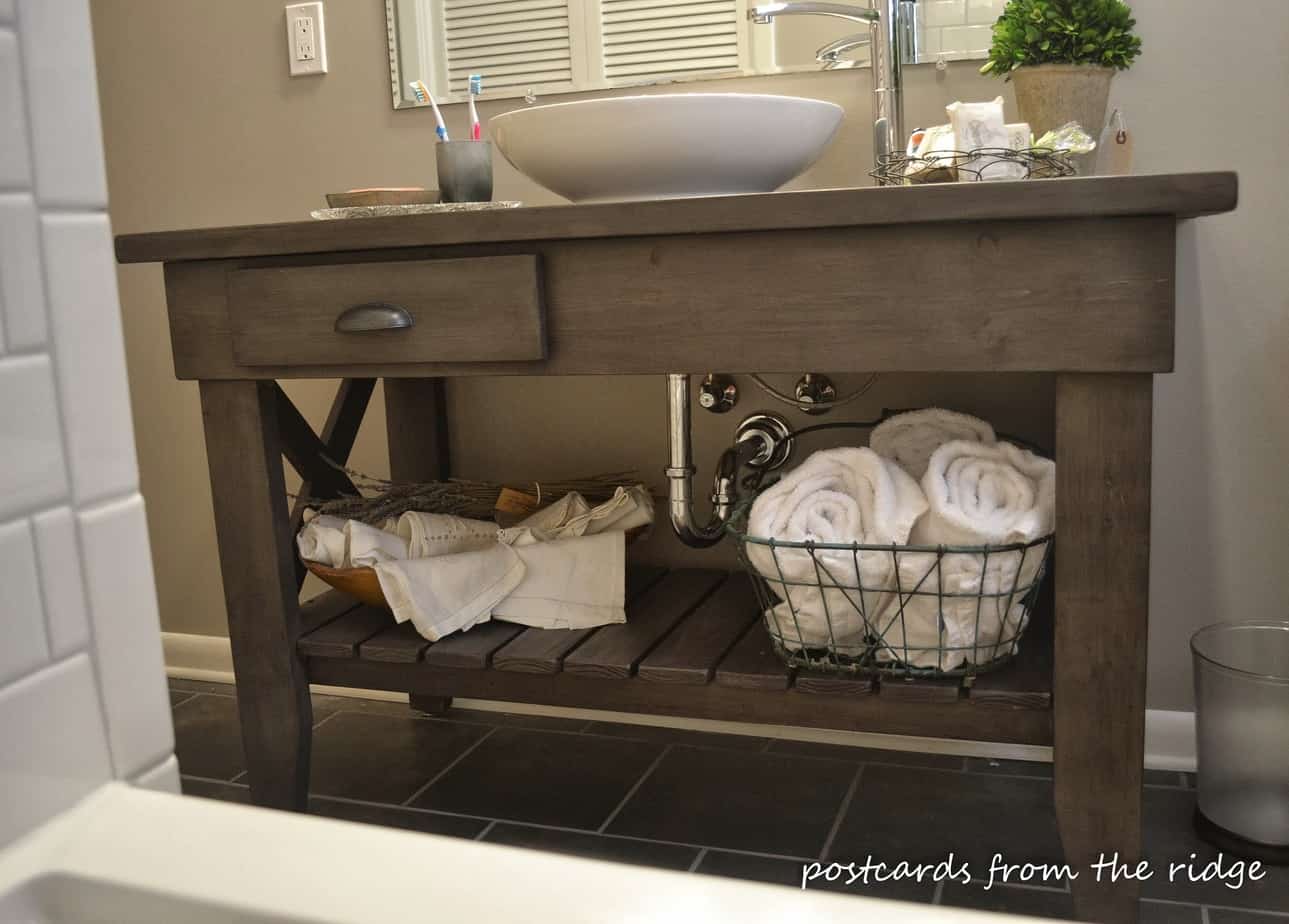
The right side will possibly have a small towel bar added. That was the original plan, but I might just leave it as is. I really like the openness of it all.
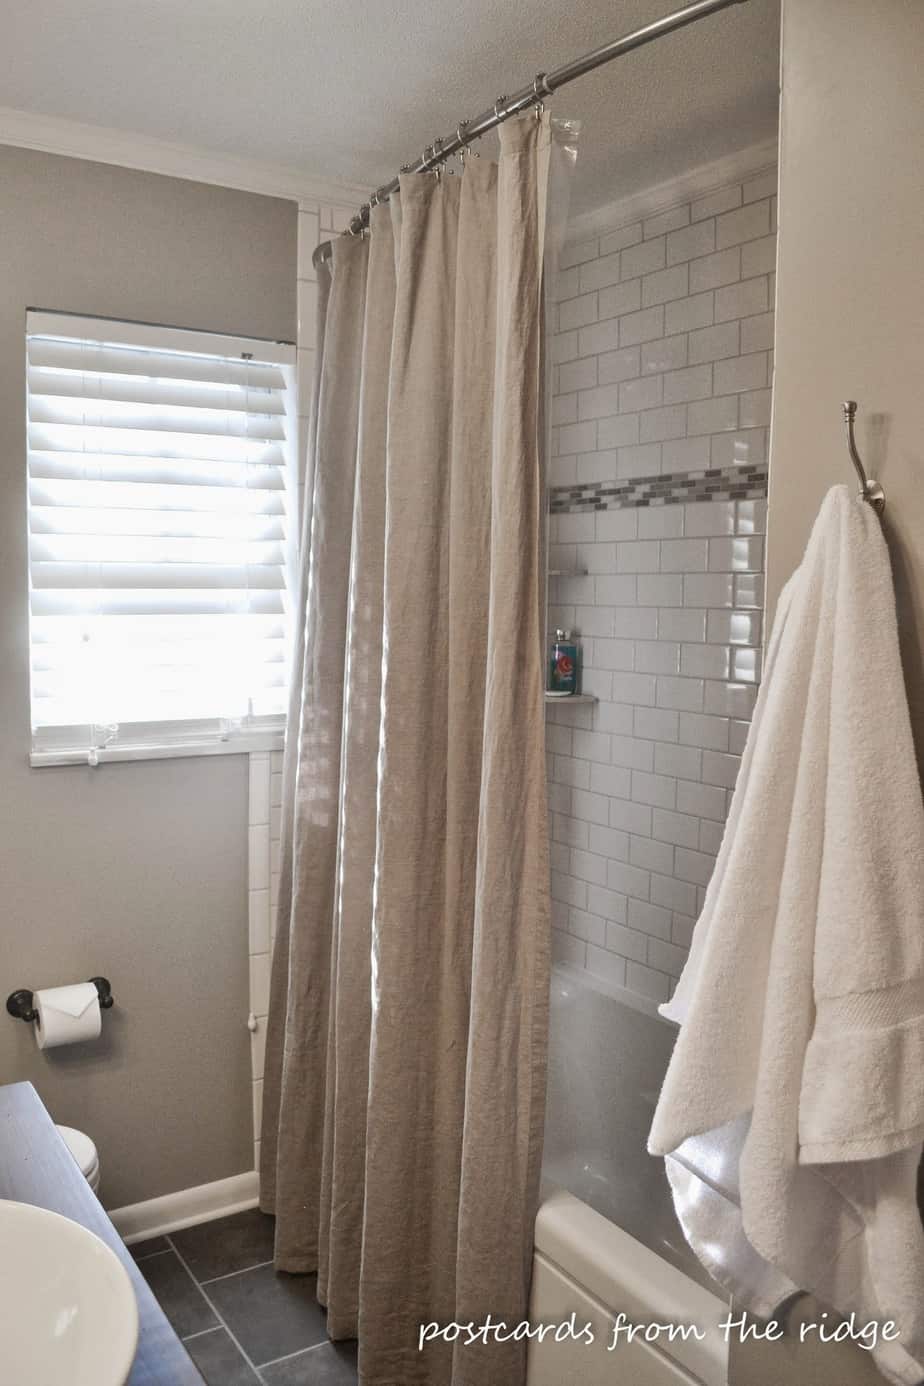
I used an extra long shower curtain on a curved rod to make the room seem a little taller. And I used these rings that hold both the liner and curtain. I’m planning on making a roman shade type of valance to hang over the window as well. I’ll share that project when I get it finished. I’m still on the hunt for just the right fabric.
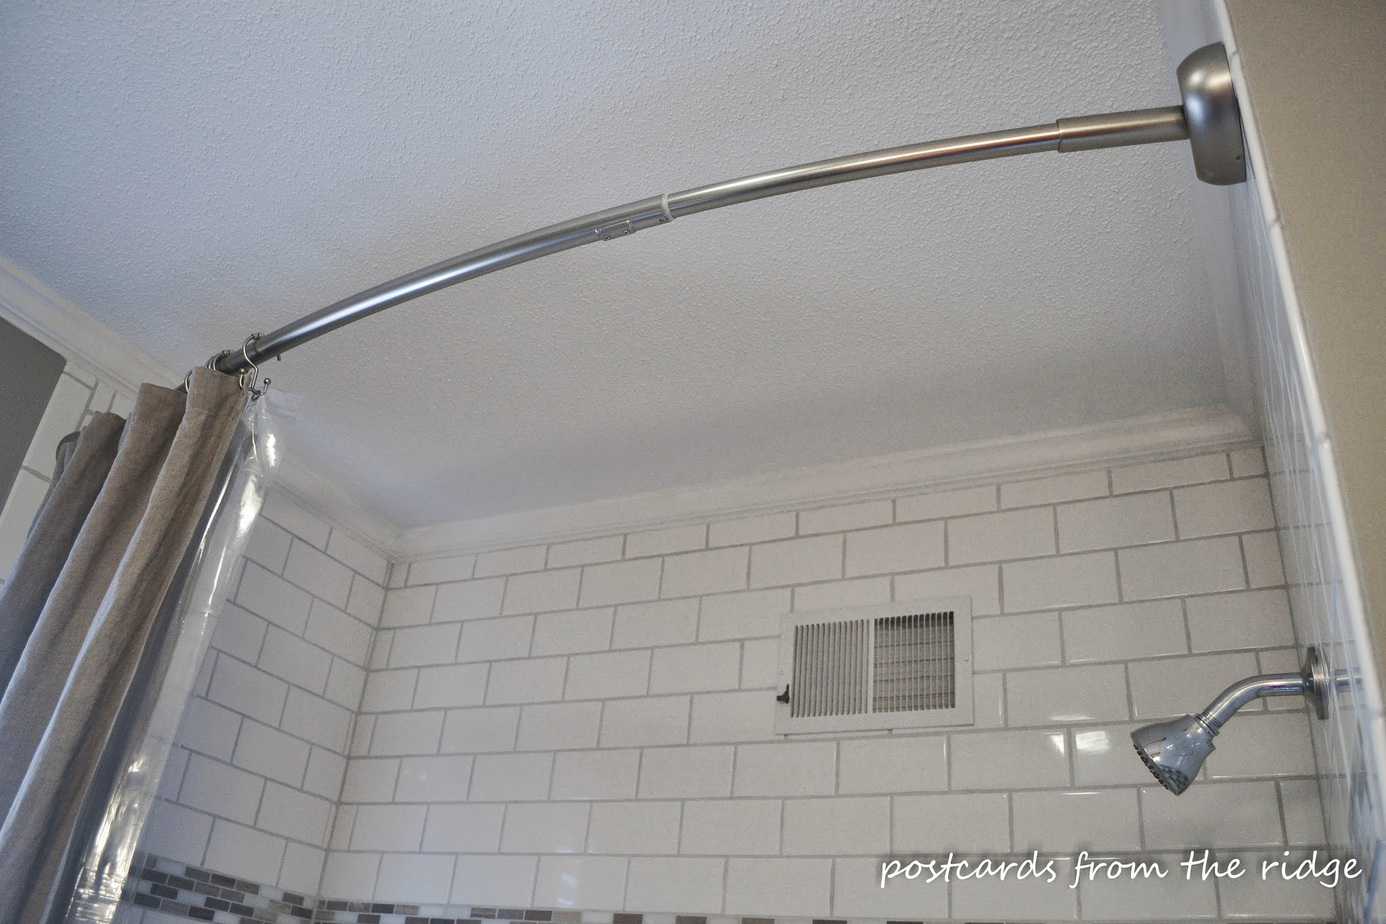
The curved rod gives more elbow room when you’re showering.
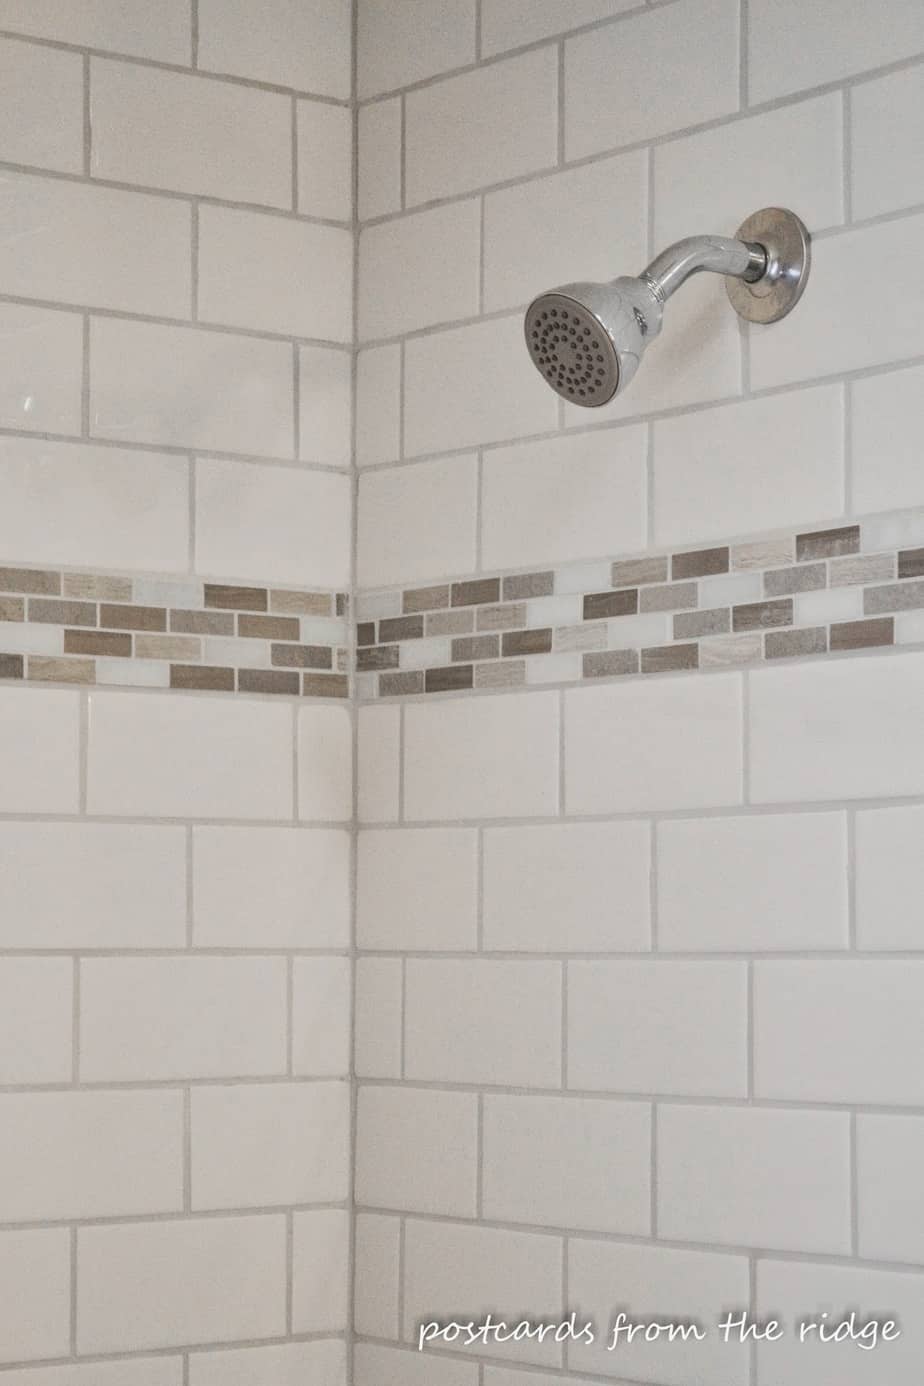
We went with a basic Moen shower faucet. Even though it’s basic, it’s so much better than the old one.
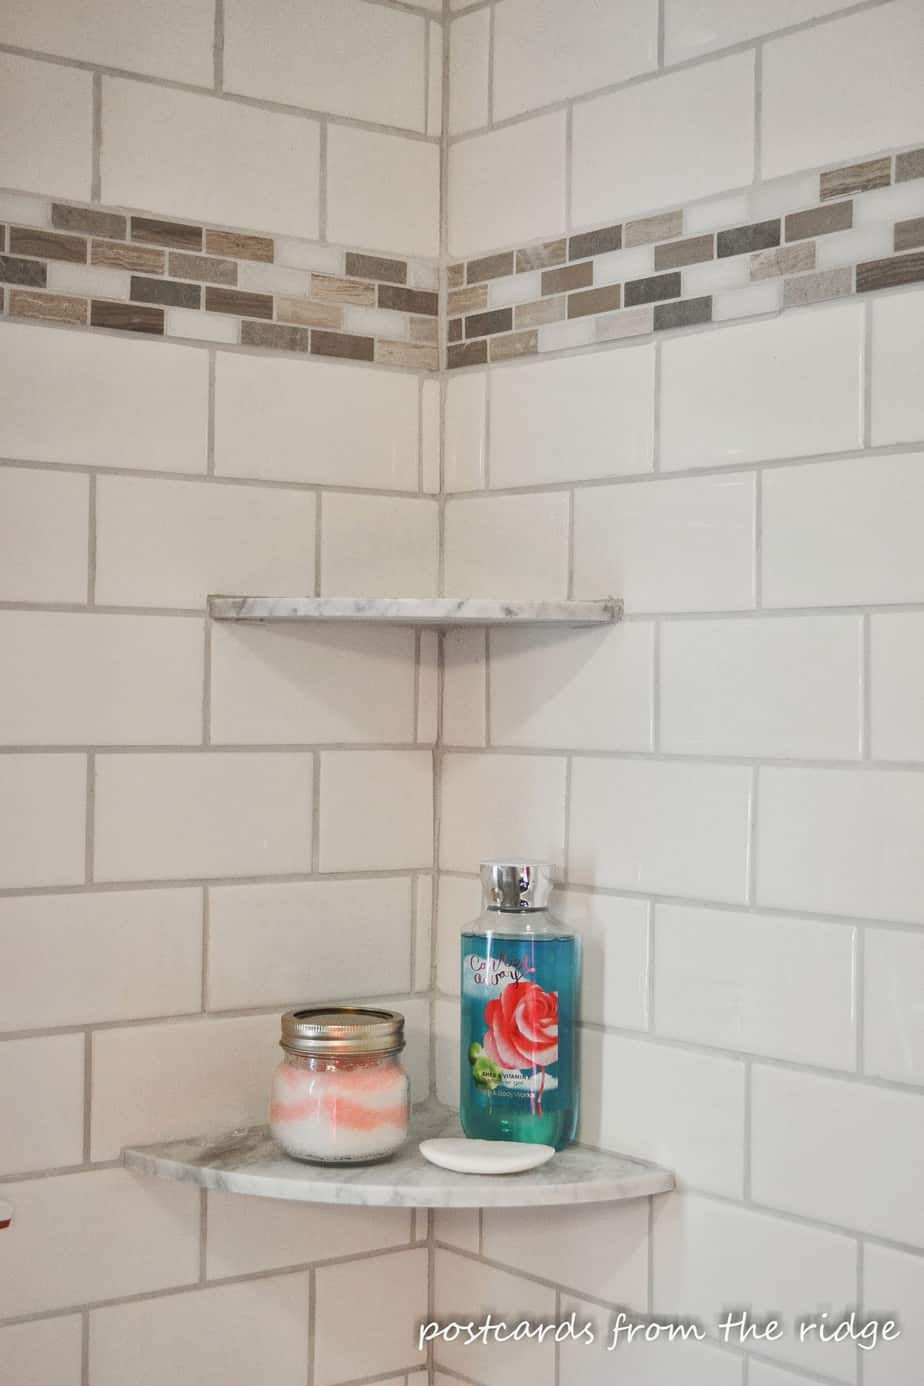
We had marble corner shelves installed so we won’t need to use a metal shower organizer. Every one of those that I’ve ever had rusted over time. We also did these in our master bath and I love them.
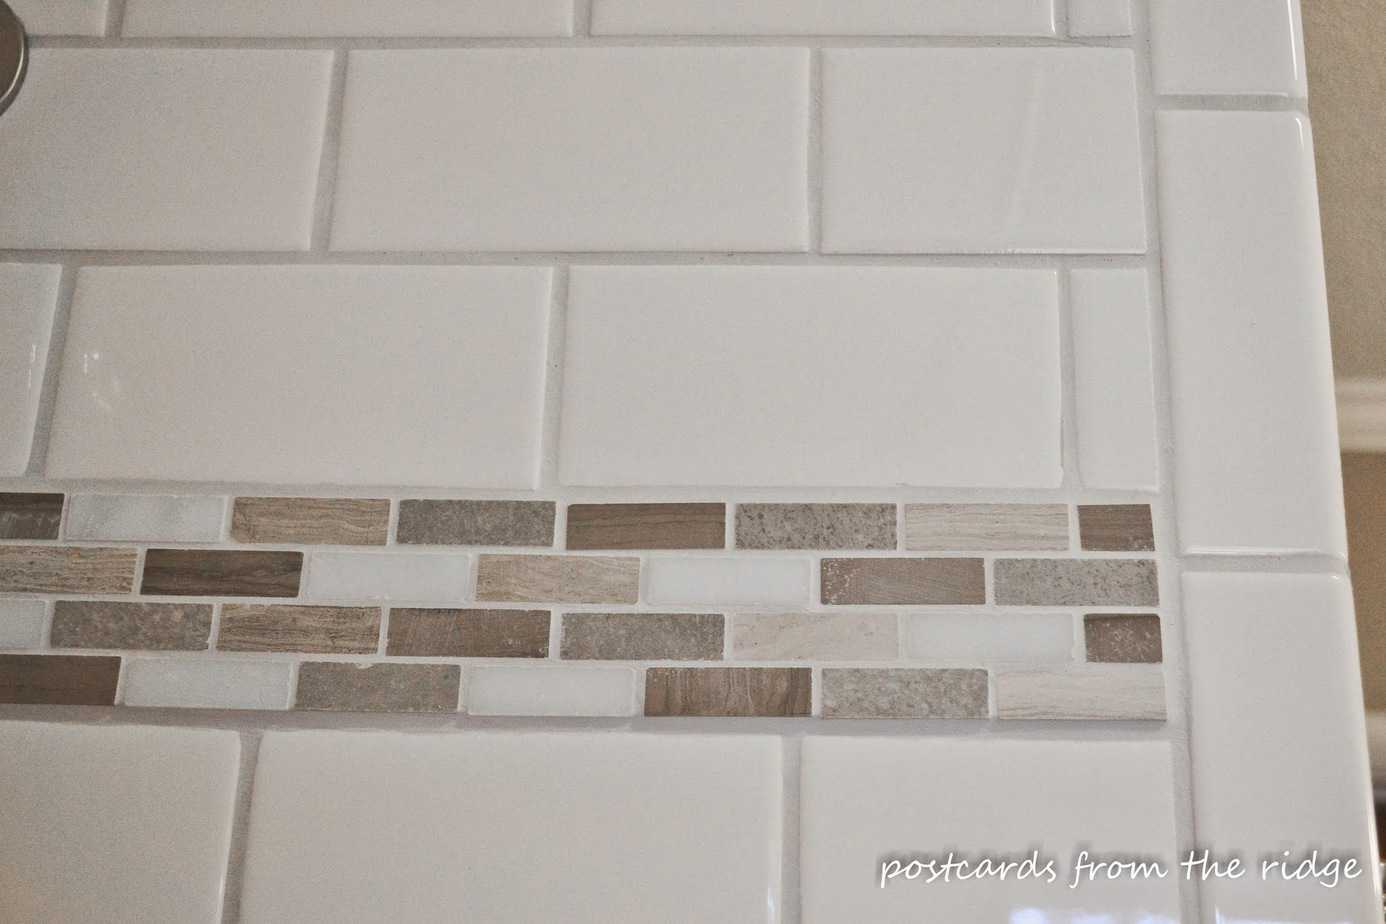
For the accent strip, we had 12″ x 12″ sheets of mosaic tile![]() cut into smaller sections and installed around the entire enclosure.
cut into smaller sections and installed around the entire enclosure.

Back to the artwork. I wasn’t sure what to use in here and I just couldn’t come up with anything. I tried several items but they just weren’t right for this space. Wrong size, wrong colors, wrong type of print, just wrong.

I went around the house looking for something…anything, and literally put this together one afternoon in about 5 minutes from an old, empty, estate sale frame and…
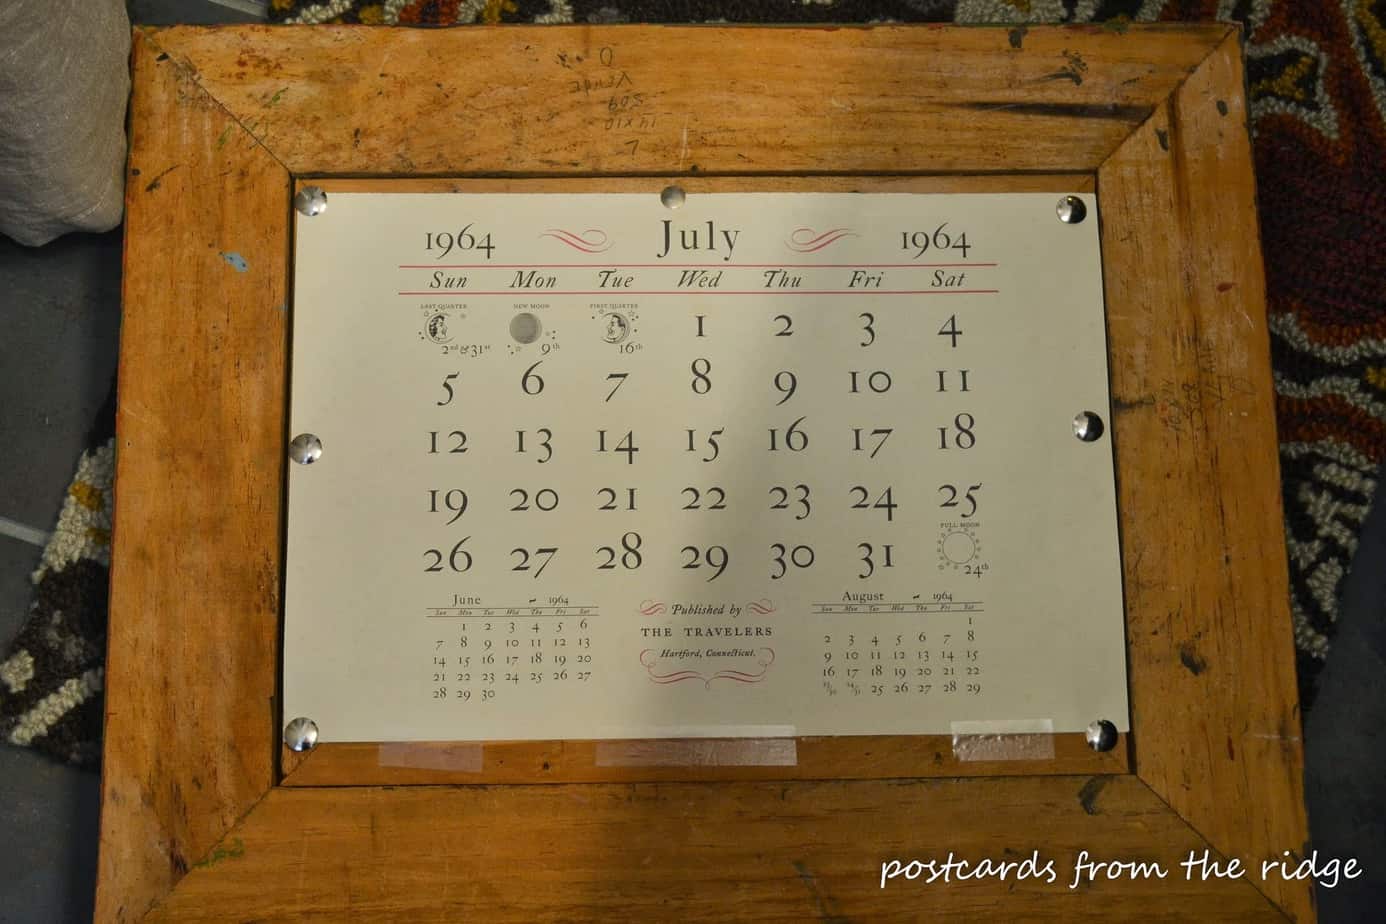
a page from an old Currier & Ives calendar, also from an estate sale. I attached it with thumbtacks and scotch tape. Classy, no? Whatever works out best is always what I do. 🙂

I’m sure I don’t have any more than $6 in the whole thing. Probably less than $5, truth be told. Looks pretty good for the price!
Here’s one last view looking in from the hallway.
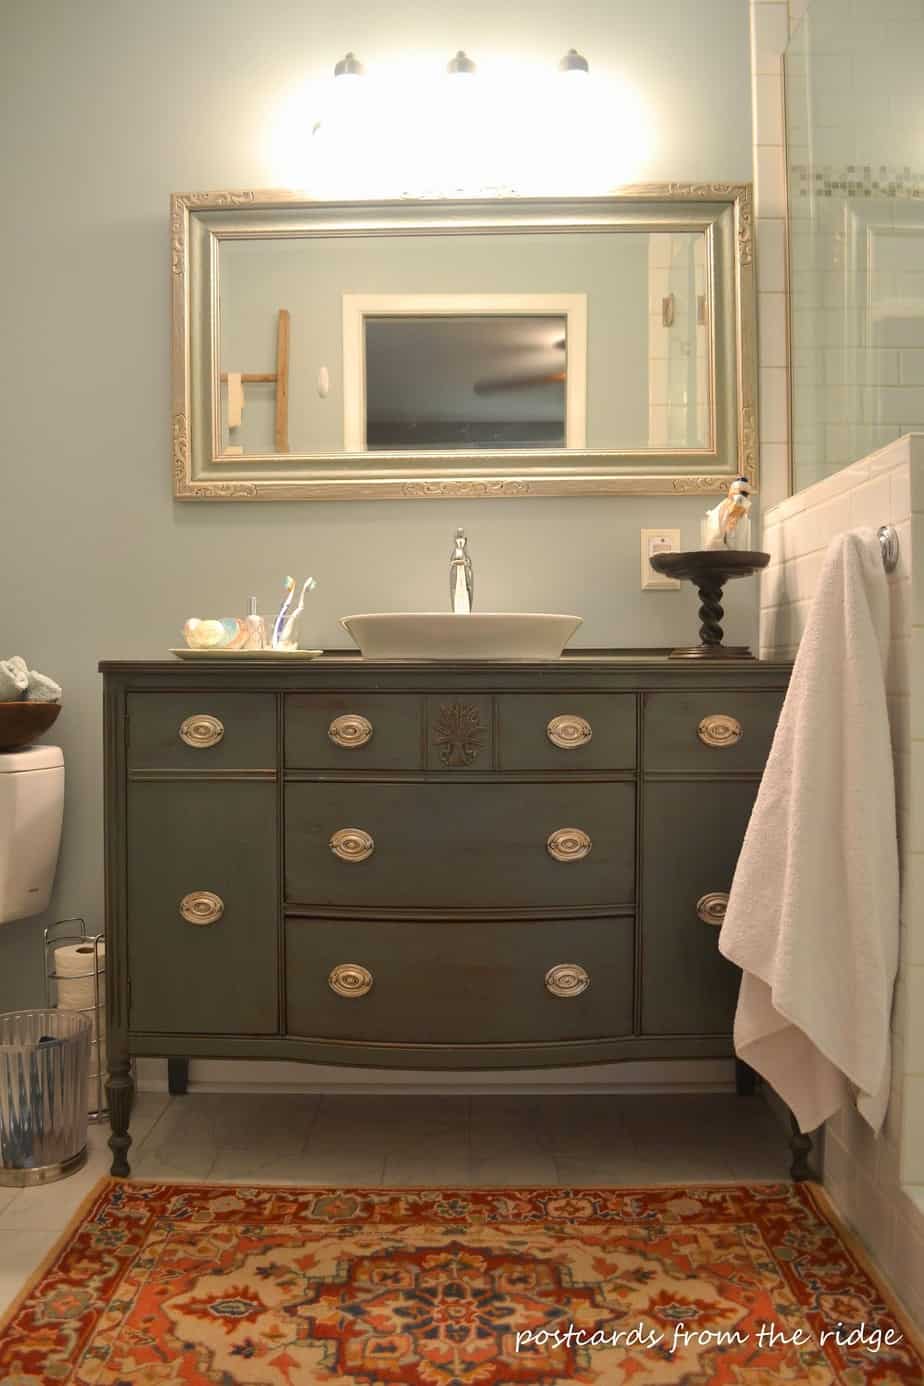
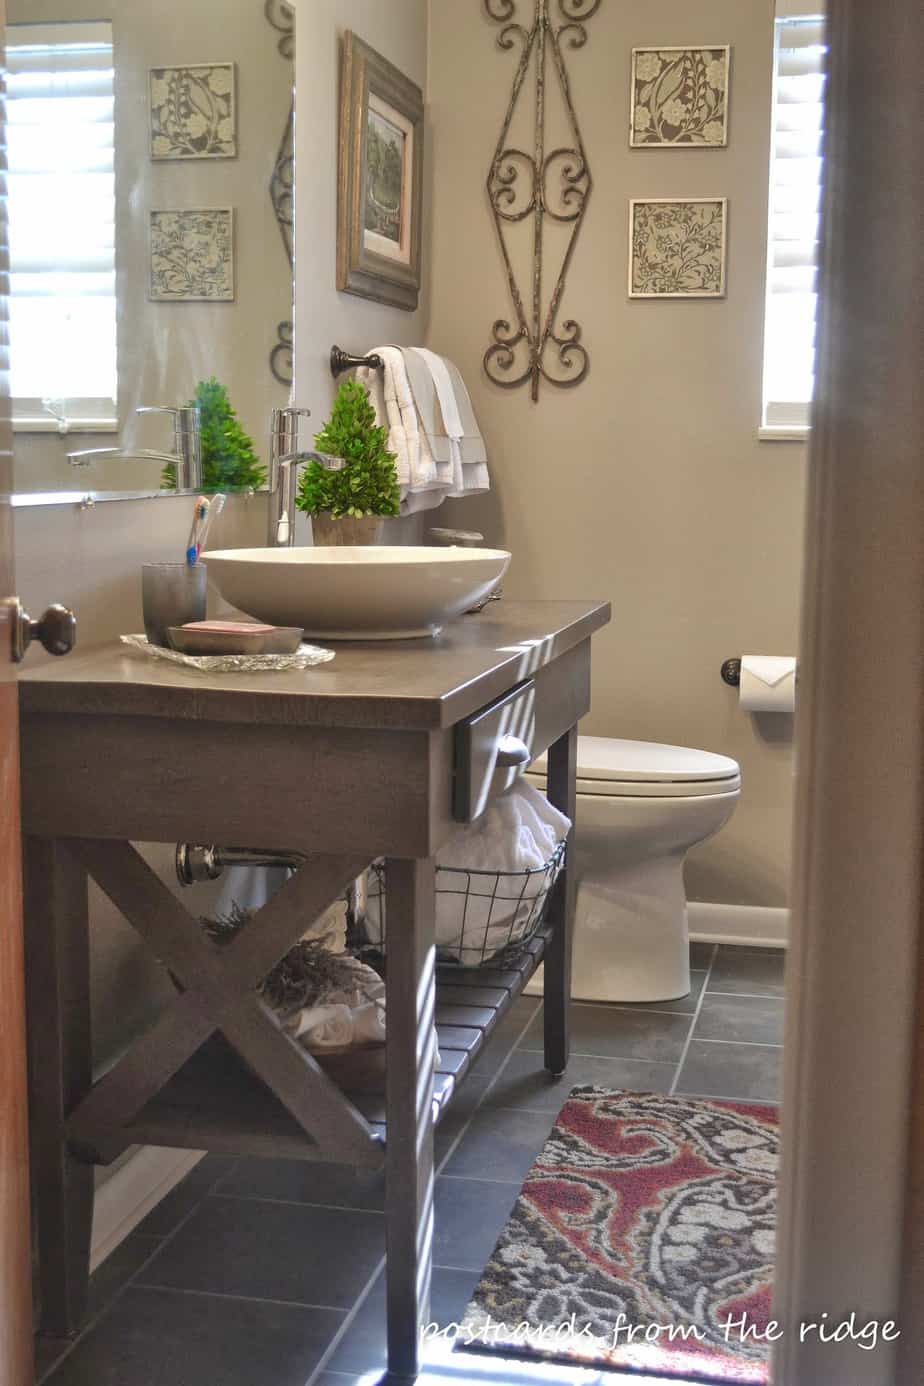
Our master bathroom (above) also had to be remodeled due to a leak back in 2012. Such is life in a 1964 home. To see more of this bathroom remodel, go here.
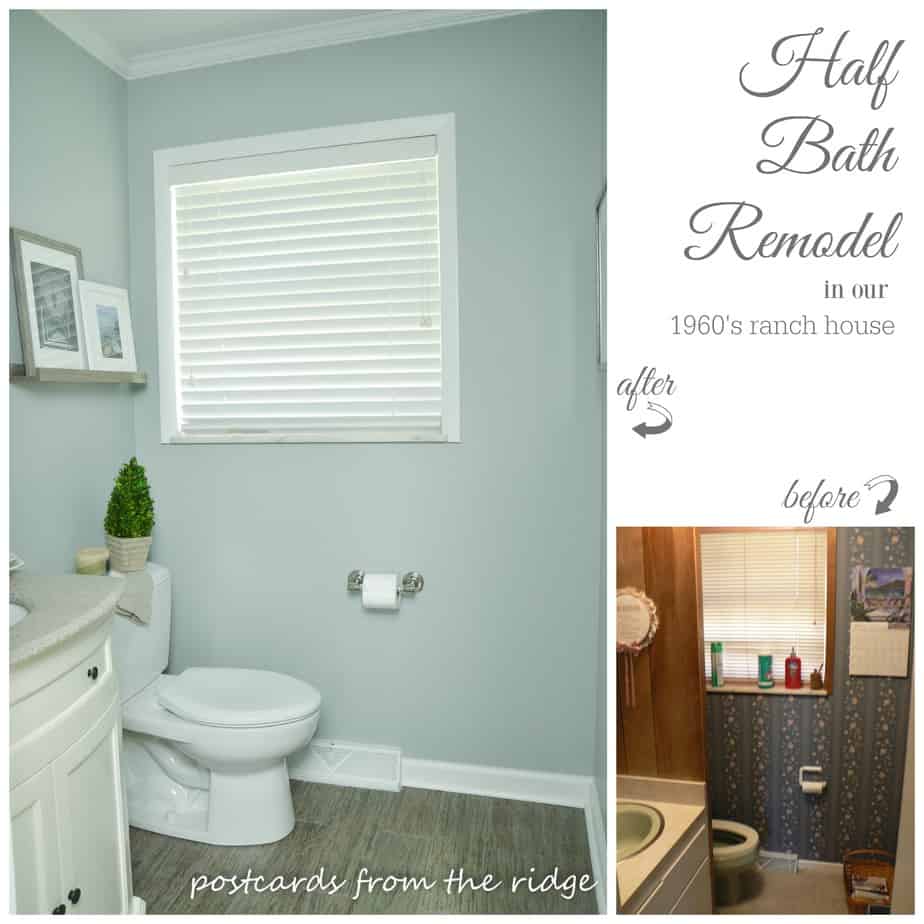
And one more renovation to our half bath was done in the spring of 2015. It might be the best one yet! To see all of the details, go here.
When we bought this house back in 2006, we knew that these bathroom remodels would eventually be necessary, as is often the case with an older home. But we really liked the space of the house and the location, so we went into it with our eyes wide open and have done these remodels as time and money have allowed.
In case you’re interested in anything in the hall bathroom, here’s what we did:
- Wall paint Benjamin Moore Plymouth Rock (aka Valley Forge Tan)
- Trim paint Custom tinted to match the tile. Closest Benjamin Moore color is Glacier White.
- Vanity Custom built
- White subway tile in shower Lowe’s
- Accent tile in shower Home Depot

- Toilet
- Shower kit
- Sink Amazon – our exact model has been discontinued but this one is the closest that I could find.
- Sink faucet
- Floor tile discontinued
- Light (discontinued)
- Area rug discontinued
- Shower curtain
- Shower curtain rod
- Shower curtain rings
- Marble corner shelves (similar)
- Jetted Tub
All other items are from my personal collection, mostly from antique shops, thrift stores, estate sales, and barn sales.
We’re so glad to have this project behind us and happy that our remodeling contractor, DJ Construction, did such a nice job. We have a half bath that’s slated for a remodel in the fall, so stay tuned for that one. We’re going to attempt to do most of the that one ourselves, so that should be quite interesting!
Let me know if you have any questions about anything in the space.
I love this re-do!! We are in a full-on bath remodel and it’s time to start thinking about the details. What height are the shelves in your shower? We are also installing 2 in the rear corner but can’t decide what feels right.
Hi Mandi. Thank you! The shelves are at approximately 48″ and 60″. I hope that helps. Good luck with your remodel! ~ Angie
It's absolutely wonderful Angie! Definitely a space to enjoy as you get ready each day. All of your little touches and elements come together so wonderfully.
Thanks, Jen! We spent a lot of time in the planning phase so it would all coordinate. Thanks for dropping by!
Wow! It looks fantastic! I love the vanity and the dark floor. You did a fantastic job, right down to that Currier and Ives picture!
Thanks Amy! That picture makes me smile every time I look at it. Thanks for dropping by.
Such a transformation Angie! I love all of the colors you chose! That vanity is so pretty!
Thanks Shanna! I went with neutral colors so we can change out the towels and rugs seasonally. I tend to get tired of too much color on the walls. I hope it's not too boring!
Have a great weekend.
Gorgeous! It really is beautiful. Wonderful job.
Thanks Karen! We're so glad to have it finished! Have a great weekend.
It's beautiful Angie! Love your choices and that you had the vanity built. What a great transformation!
Thanks, Holly! I just couldn't find anything I liked that was in my budget! Sometimes you just have to start from scratch.