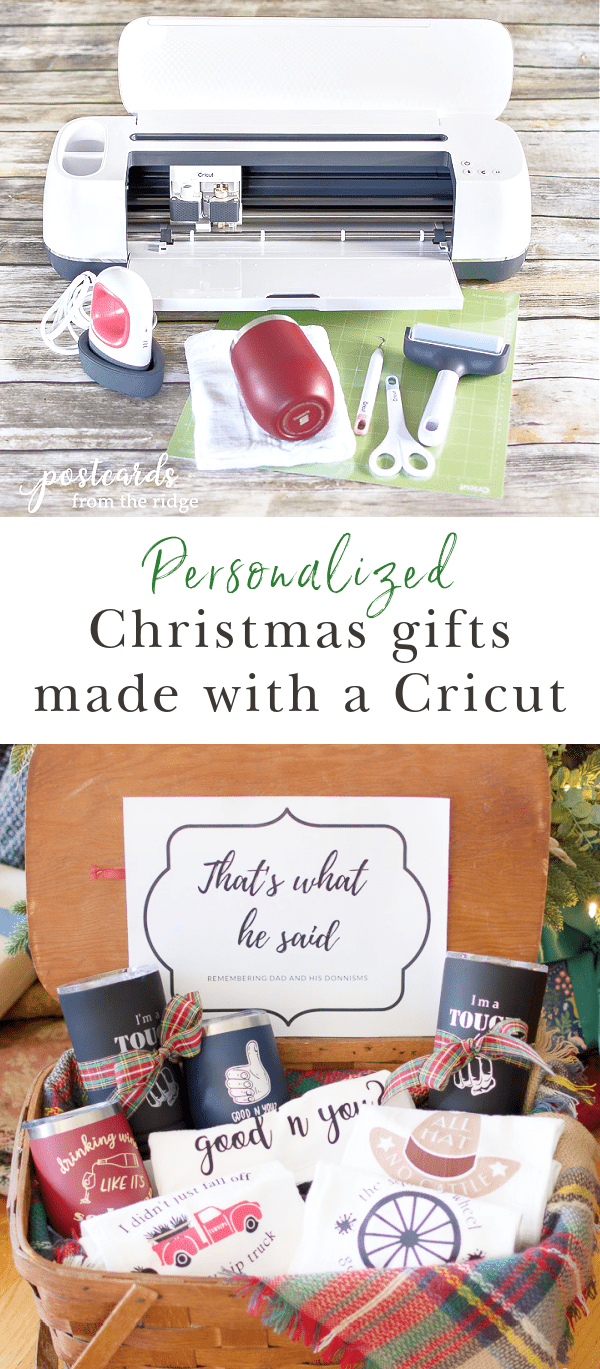
Cricut Christmas Ideas
make personalized Christmas gifts with a Cricut
This post contains affiliate links for your convenience. I may make a small commission on products purchased with my link, but your price does not change. For full disclosure go here: Disclosure and Policies. Thank you for supporting my site.
Cricut Christmas Gift Ideas
Thank you to Cricut for sponsoring this post and also sending me the materials I needed for these very special personalized Christmas gifts.
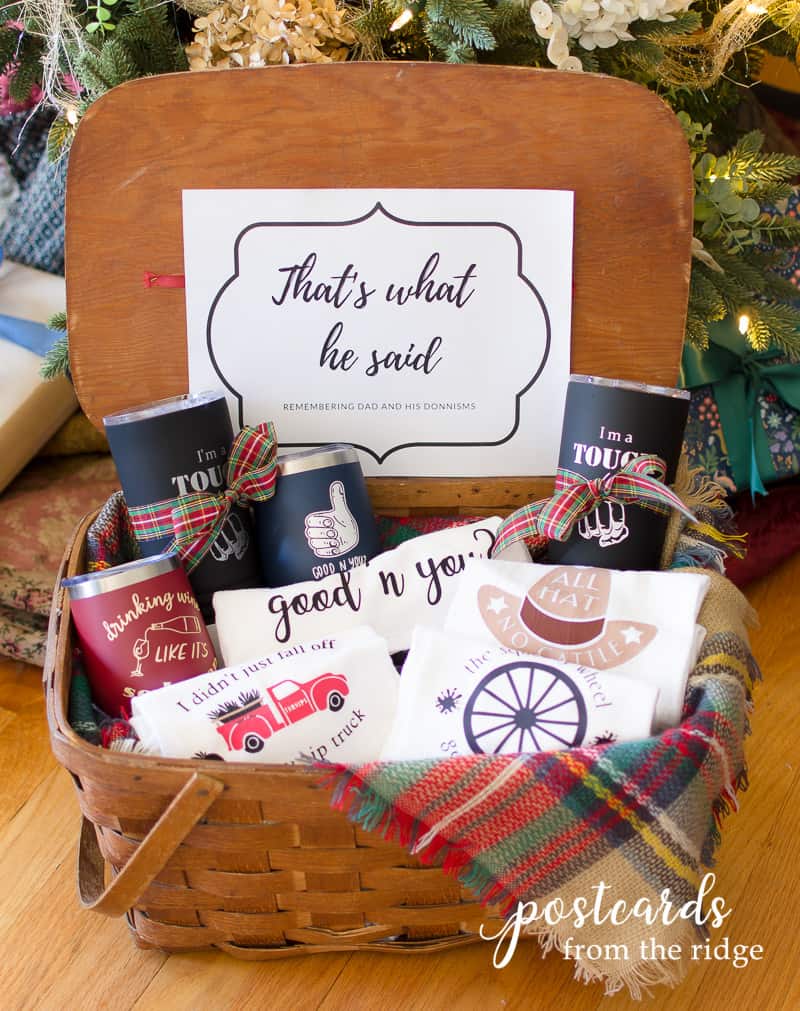
There’s nothing more special than a personalized gift and today I’m showing how to use a Cricut to make unique, personal Christmas gifts for anyone on your list.
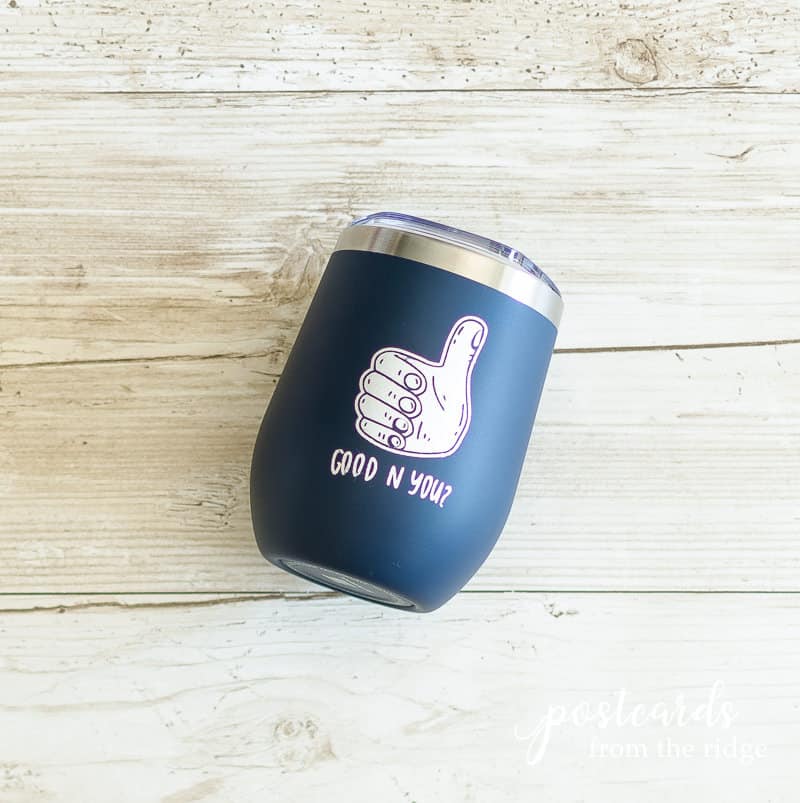
This project was a little bittersweet for me. We lost my dad in March after a battle with Parkinson’s disease and miss him terribly. He really had a way with words and had some of the funniest sayings. The personalized gifts I made involve the unique and funny things that he said.

While I’ve enjoyed remembering all of his wacky quotes, it has made me a bit sad at times. But I love the way these gifts have turned out and I think my family will thoroughly enjoy them. We quote dad all the time and now we’ll have little reminders of him that will make us laugh.
How do you personalize something with vinyl
It’s actually pretty easy.
- Decide what kind of item that you want to personalize.
- Imagine your design then create it in Cricut design space using their images and fonts in no time.
- Your Cricut will precisely cut out your design to your exact specifications.
- Adhere your vinyl (or iron-on) to your item.
I have detailed instructions for making these personalized mugs with vinyl and tea towels with iron-on, but feel free to ask any questions in the comments.

Personalized gift ideas with Cricut
Here are a few ideas of other things you can personalize with Cricut vinyl or iron-on:
- Mugs
- Tea towels
- Pajamas
- Treat boxes
- Hats
- Aprons
- T shirts
- Tote bags
- Coasters
- Notebooks
- Ornaments
- Pillow
- Candle
- Water bottle
- Sleep mask
- Potholder
- So many more things.
I’ve only used my Maker for a little more than a dozen projects and absolutely love using it. If you’ve got a Cricut on your wish list then be sure keep this post bookmarked for some easy beginner projects. BTW, they’re always running a sale and you can find the current deals here:
Current Cricut Deals
Making projects with my Maker gets easier and quicker every time I use it. And I find myself losing track of time because I’m enjoying it so much, especially during the holidays. It’s like having a therapy session every time I make something. 😄 And I’m thrilled with how these simple
personalized Christmas gifts turned out.
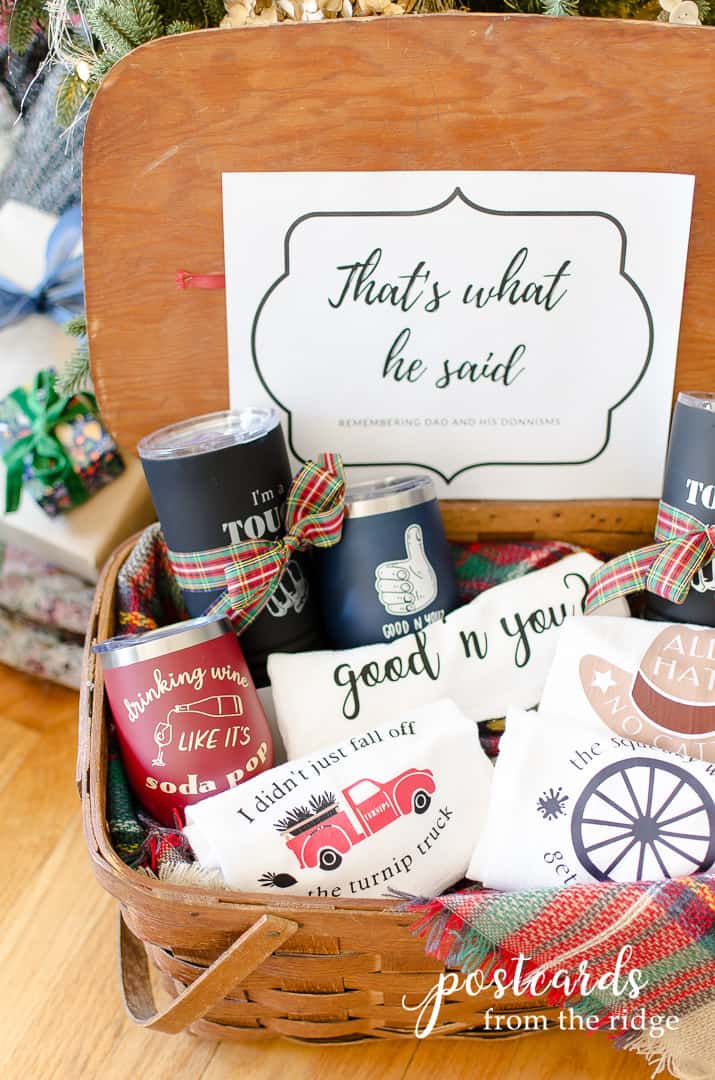
So if you’re wanting to learn how to make personalized Christmas gifts with your Cricut, then settle in and let’s dive in to my tutorial.
Warning: there are lots of pictures, screenshots, and details. But I always appreciate it when I read a detailed tutorial and hopefully you’ll find this one helpful!
How to make personalized gifts with a Cricut
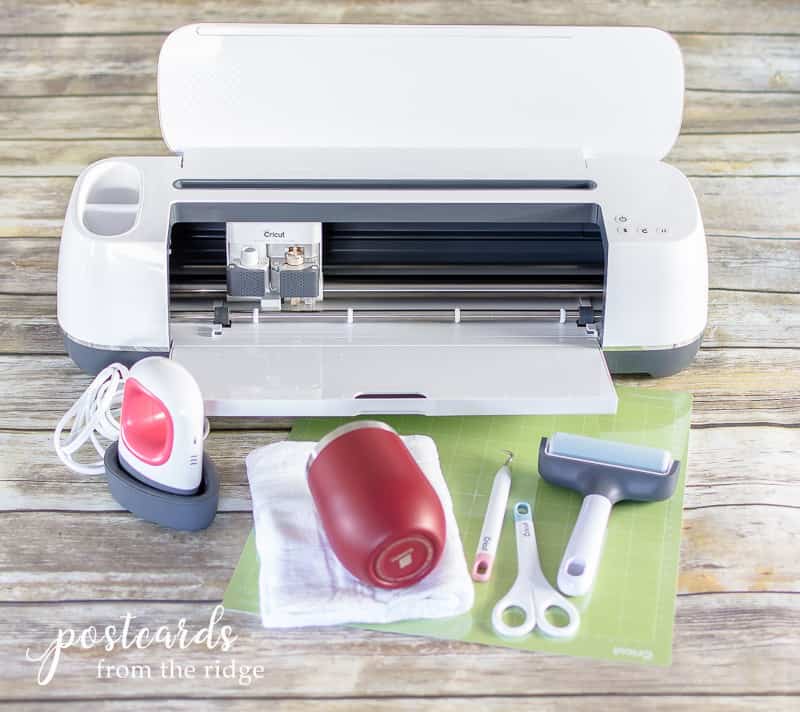
Supplies Needed
Here are the supplies needed for these personalized mugs and tea towels made with my Maker (you can also use an Explore Air 2 to make these):
- Premium Vinyl, Permanent, black and white
- Premium Shimmer Vinyl, Permanent, silver and gold
- Transfer Tape
- Standard Grip Mat
- EasyPress Mini
- Everyday Iron-On, black, red, green, neutrals or other Cricut Iron-on
- Brayer
- Basic Tool Set
- Insulated Mugs
- Flour Sack Kitchen Towels
All of my designs were created using images and fonts found in Cricut Design
Space.
Instructions for Making Personalized Gifts with a Cricut
For any new project, start with the basics:
- Open the Cricut Design Space App
- Click “New Project” button in the top right corner of the screen (it’s
green)
Step 1. Add images and text in design space
- Images: To add an image from design space, click the “image” button
on the left toolbar and search for what you want. Click on the images that
you want, then click “add to canvas” button in bottom left corner. - Shapes: You can add basic shapes as well. Click the “shapes” button
on the left toolbar and several options will appear. Click on the ones you
want and they’ll be added to your canvas. Scroll down to see how you can
alter their proportions. - Your own images: You can also upload your own images and graphics
by clicking the upload button. - Text: If you only want text, click the “Text” button on the left
toolbar then add your text. To select the font, double click on the text
box, and them clicking on the dropdown arrow to see the available fonts.
Select the one that best fits your project.
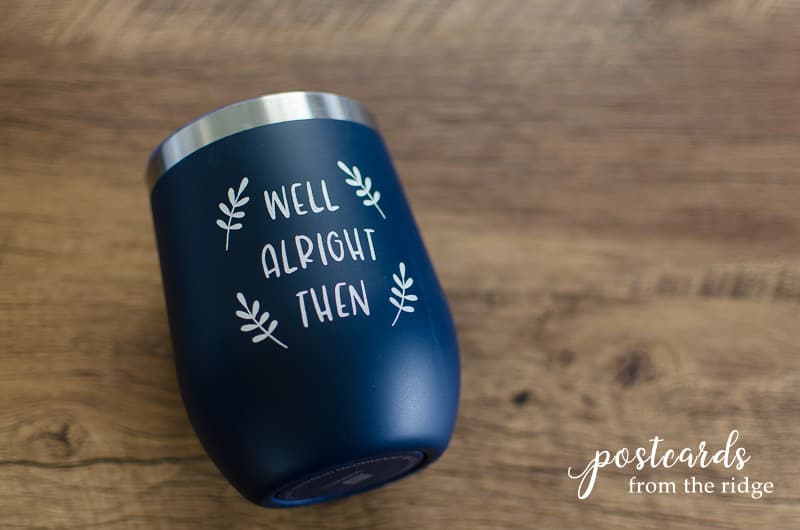
For the insulated mug project that I’m featuring, I wanted to use text and
some leaves. I did a search for leaves in design space images and added
them to my canvas.
For the other projects shown, I searched for various images and added to a
canvas for each design.
You can simply add a name or initial if that’s what you want to do with your
projects. It’s a great way to make a very personalized gift.
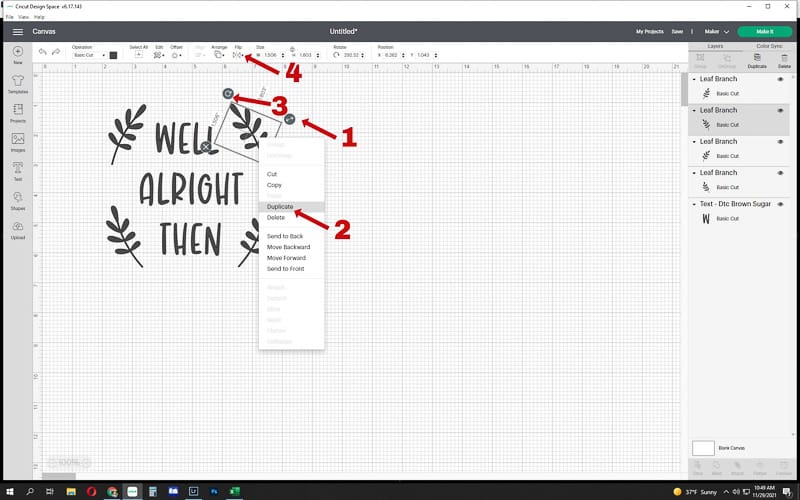
How to alter images or graphics in design space
After images are added to the canvas, there are several things you can do to
alter them as follows (see image below for exact location of editing
buttons):
- Make them larger or smaller by dragging the resize (↔) icon.
- Duplicate them by right clicking on the image box and clicking
on the “duplicate” option - Rotate them by dragging the circular arrow icon (↺)
- Flip them vertically or horizontally by clicking the “flip” tool
in the top toolbar (˃|˂ )
Tip: You can change the proportions of some images by clicking the
little lock image on the bottom right of the image box to unlock the
proportions, then dragging the resize button to make it wider or longer.
This works with shapes and some images.
There are lots of ways to make the images look different. You just need to
experiment with all of the different buttons.
How to center your text
After you chose your font, you can center it by clicking “align” in the top
toolbar and clicking the centering icon to center the words vertically or
horizontally.
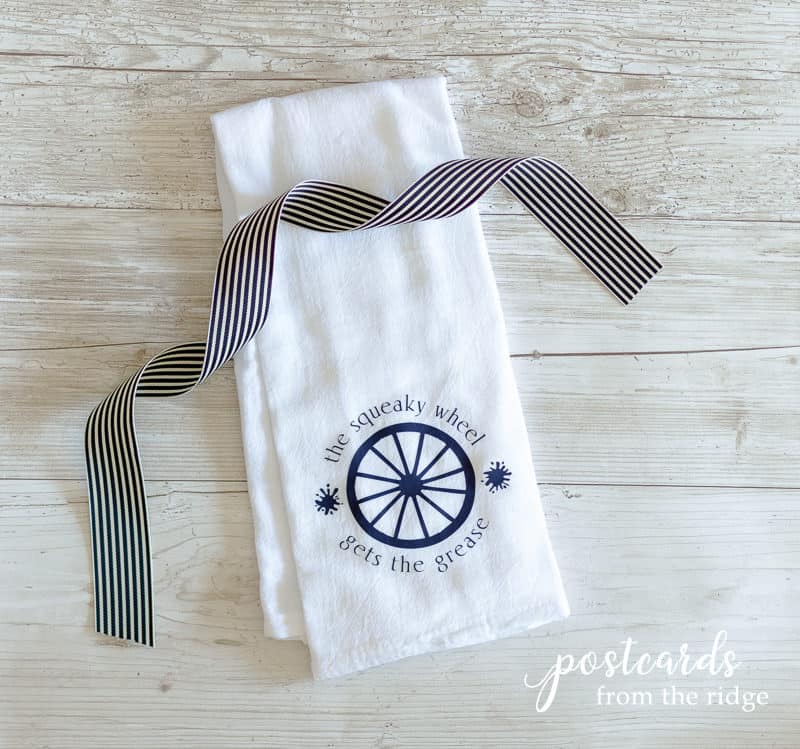
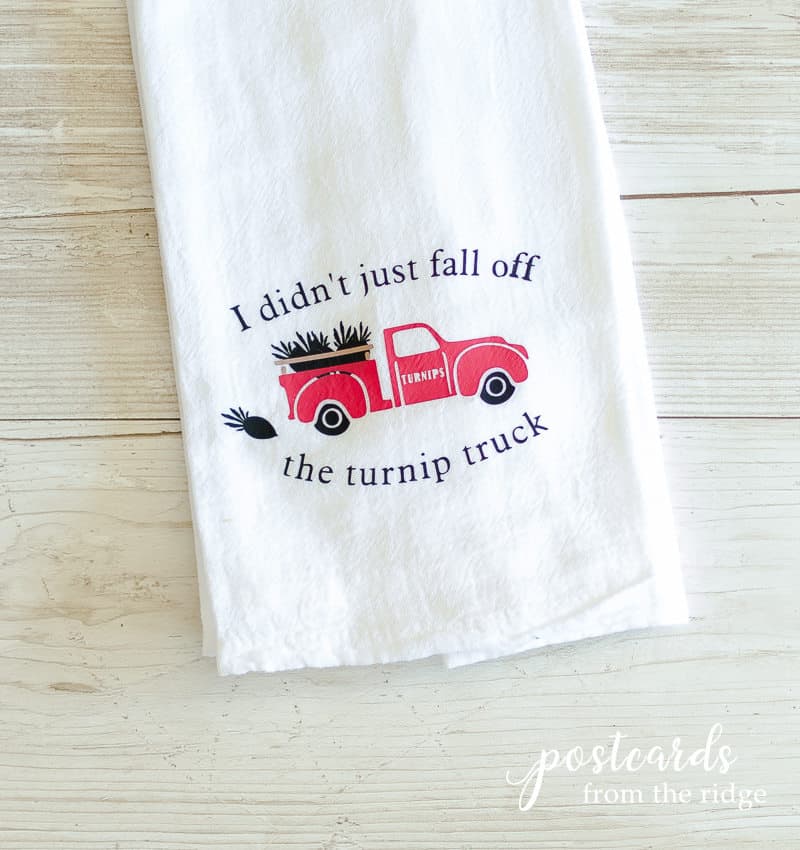
Tip: How to curve your text
You can also curve your text for more interest. Here’s how you do that:
- Attach all of your text lines/boxes. To do this, hold the “control” button
on your keyboard and then click the selected lines shown in the “layers”
list on the left of the screen. - Click on the updated text box with all of the text lines you want to
center. - Click “curve” on the top toolbar.
- Drag the center control button left or right until the text curves the way
you want it to.
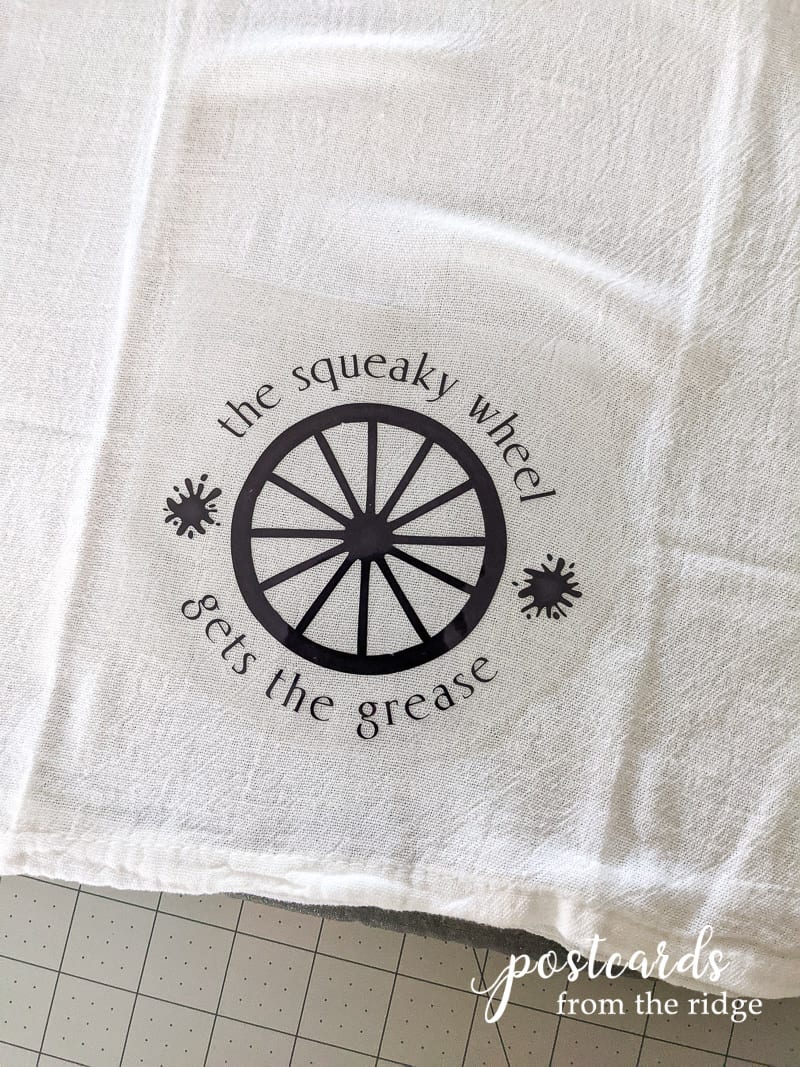
You can see an example on this tea towel:
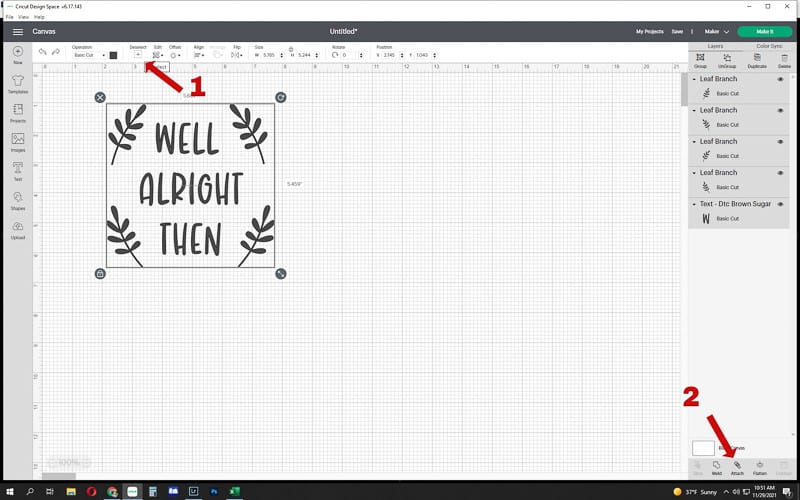
Step 2. Attach your elements
Once you have the design looking the way you want, here’s how you can attach
the images and text to each other so they all stay in place (see image for an
example):
- Click “select all” button on the top toolbar.
- Click “attach” on the bottom right toolbar.
Step 3. Resize your design
Once your design is finished, you need to make sure it’s sized correctly for
your project. If not, you’ll waste materials on a design that’s too large or
too small. Trust me, I know this. 😅
There are a couple of ways to do this (see image for example):
- Use the little resize arrow on the bottom left of the design box.
- Enter the exact width or height that you need your finished design to be.

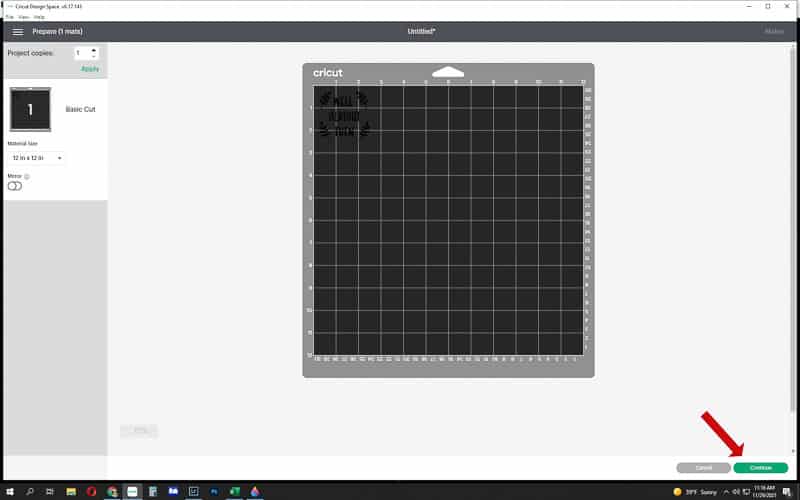
Step 4. Cut your design
Now that your design is the right size, you’re ready to cut it. To get
started, click the “Make It” green button in the top right corner.
TIP: You can drag the design anywhere on the mat. This is helpful if
you’re working with a material that has been used for previous projects and
might have a chunk missing.
REMINDER: If you’re making a project with iron-on material,
be sure to turn on the “mirror” feature. Otherwise your design
will be all wrong when you go to attach it to your fabric.
Click “continue” in the bottom right corner.
Select your base material
If you’re using a
Maker, you’ll need to click on the tab for the material that you’re using. The
pressure of the blade will be determined by your material.
If you’re using an
Explore Air 2, you’ll want to turn the dial on the machine to the right setting.

Attach your material to your cutting mat
Grab the correct mat and carefully attach your material, lining it up along
the edge of the grid.
Here’s a guide to which mat you’ll need:
- StandardGrip Mat – heavy cardstock, vinyl, iron-on
- LightGrip Mat – standard paper, light cardstock, vellum
- StrongGrip Mat – specialty cardstock, matboard, and backed fabric
- FabricGrip Mat – fabrics
For the project I’m demonstrating, I used a standard grip mat with premium vinyl in shimmer, silver color.
I also made some of the gifts with regular premium vinyl and some with everyday iron-on material. The standard grip mat works with both of these.
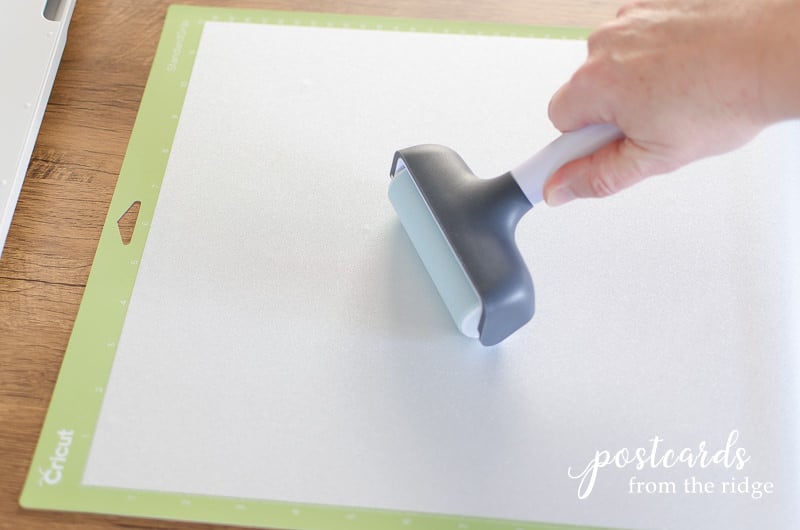
Use a brayer to make sure there are no air bubbles or wrinkles.
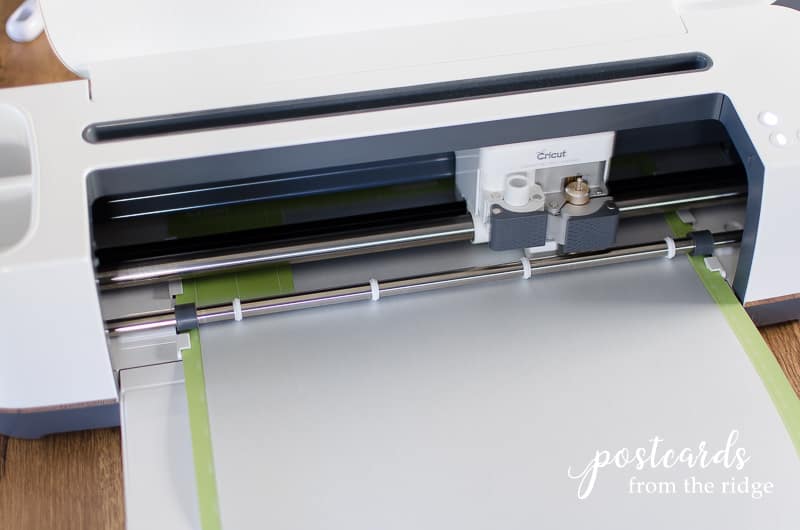
After your material is attached to your mat, load it into your machine. Be sure you have a
sharp blade in your Cricut for clean cuts. You can find replacement blades for all projects here:
Cricut replacement blades
Press go (the flashing “C” button) on your machine to let the cutting begin.
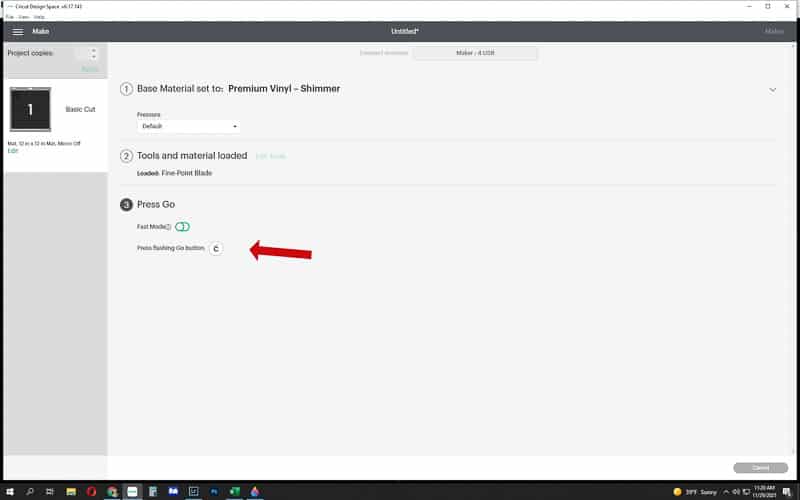
The Cricut will cut your design just like you designed it.
When the cutting is complete, your screen will prompt you to remove the material. To preserve leftover material for future projects, cut around the area that your design is on and save the remainder of the roll/sheet.
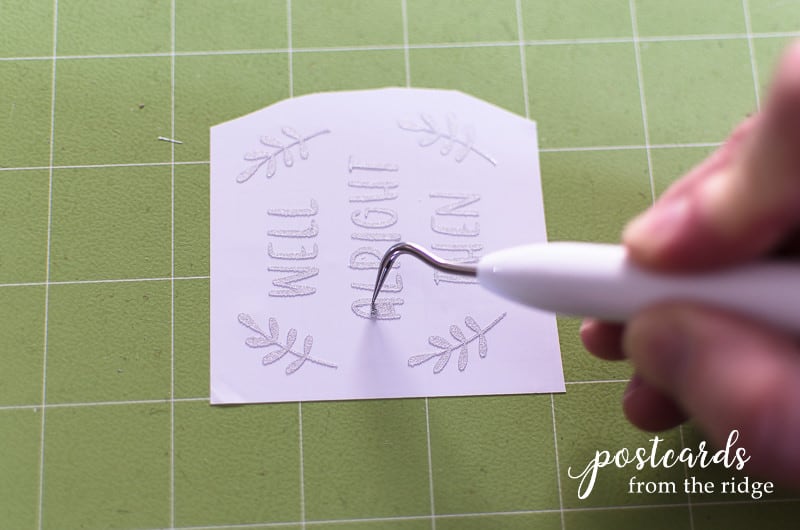
Step 5. Remove/weed excess material

Remove the excess material from the backing and dispose.

Where needed, use your weeding tool to remove smaller pieces. If you’re using iron on material, your design will be mirrored and is now ready to apply to your fabric.
If using vinyl, there are a couple more steps before you’re ready to apply, as follows. Keep scrolling to see how to apply iron-on.
Step 6. Apply Material to your Items
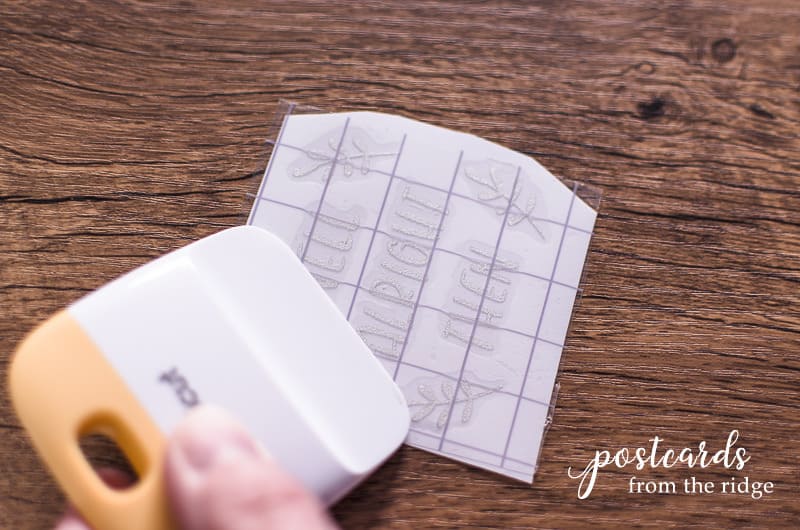
Vinyl Application
Attach transfer tape to the front of the design. Using your scraper, press firmly and rub the transfer tape against the vinyl so it adheres well to your object.
NOTE: some hard surface items might need to be cleaned with alcohol before adhering your vinyl. If unsure, test in an inconspicuous spot first.
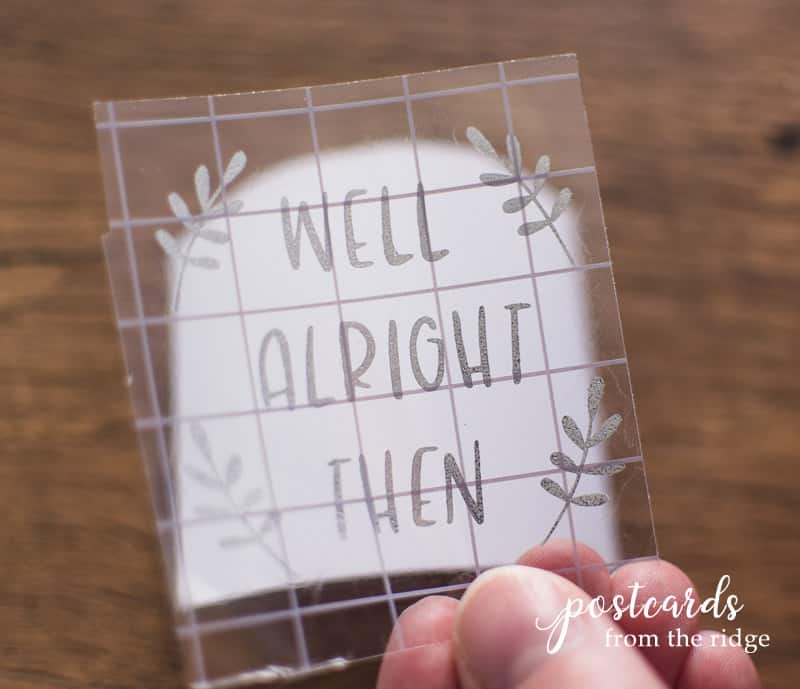
Slowly remove the backing from the vinyl. If it doesn’t want to come loose, you might need to press it back together and apply firmer pressure to the transfer tape.
TIP: I’ve found that pulling the transfer tape diagonally from a corner seems to work better.

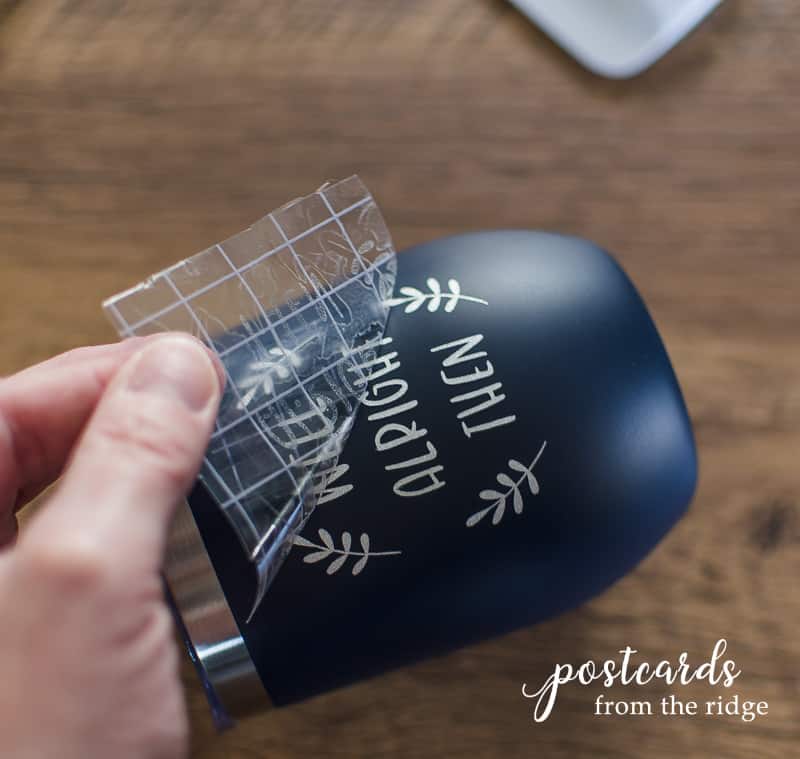
Carefully place your design on your mug (or whatever surface it’s going on).
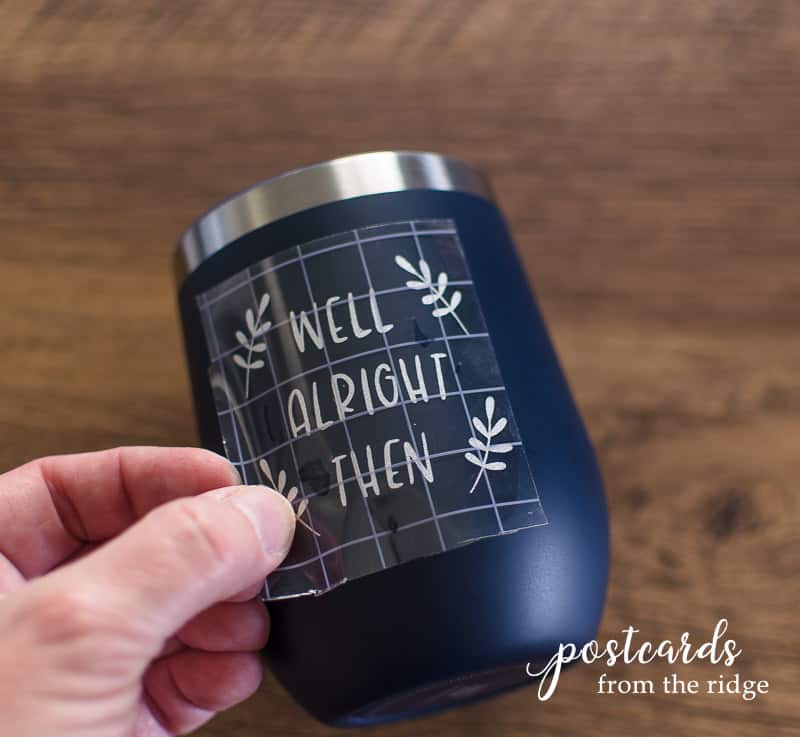
Press firmly with your scraper and drag it across the design to secure the vinyl to the mug.

Slowly remove the transfer tape from the vinyl. If the vinyl isn’t sticking, press the transfer tape over it and firmly drag/rub your scraper over it until it’s adhered well.
Sit back and enjoy the fruits of your labor. And know that someone on you gift list will be thrilled to get this cute present that you made especially for them.
Iron-On Application
For this particular iron-on project you’ll need these supplies:
- Everyday Iron-On, black, red, green, neutrals or other Cricut Iron-on
- Easy press (I used the EasyPress Mini for these tea towels)
- Standard Grip Mat
- Easy Press Mat
- Basic Tool Set
- Tea Towel Blanks (plain with no design)
The design, cutting, and weeding process is the same as it is for vinyl, except you’ll need to mirror your image before you cut it. Otherwise it will be backwards when it’s applied.
After you’ve removed the excess iron-on material, use your Easy Press on the front and back of the tea towels. Then place your design on the towel with the design against the fabric.
Once your design is placed where you want it, face down, place your heated EasyPress Mini
on the liner. You can see the recommended heat and times here: Cricut Heat Guide
You can layer up to 3 colors.
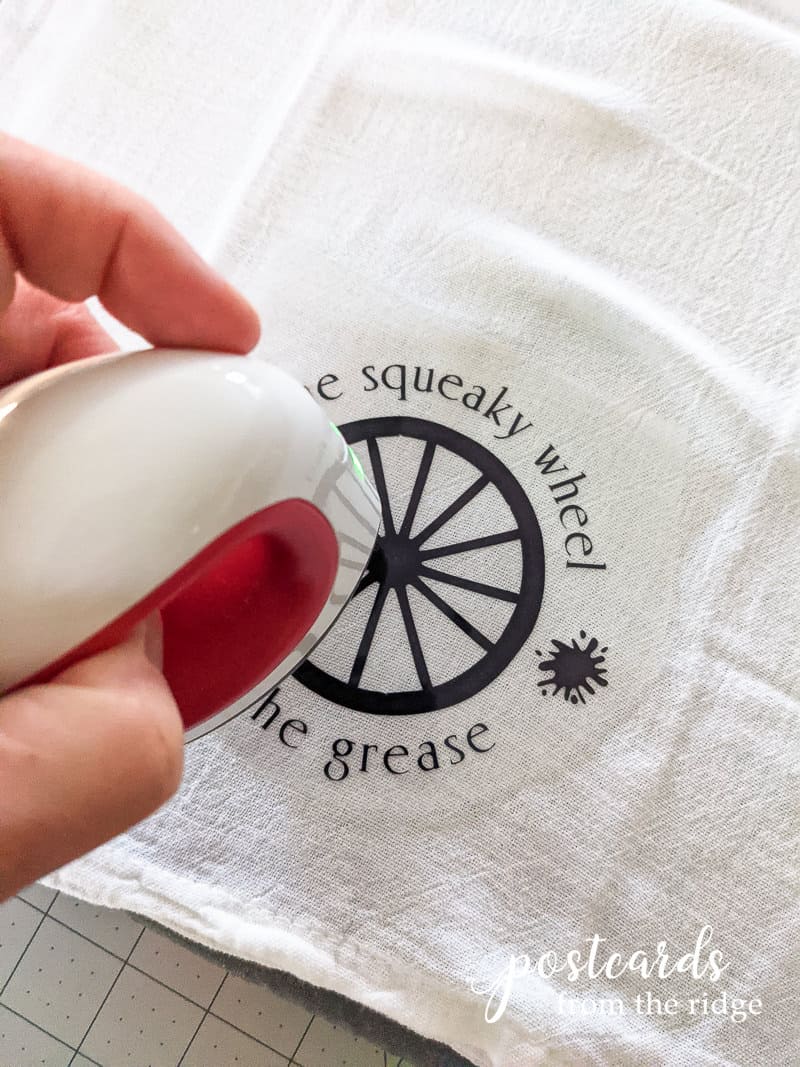
Slowly remove the liner and you’ve got a fun, personalized gift!
What else can you do with a Cricut? There are a gazillion possibilities and I want to make them all, lol. Here are a few of my previous projects:
- Felt Holly Wreath Made with Cricut Maker
- Painting an Ugly Bathroom Floor Using a Stencil Made with Cricut
- 3D Paper Wall Art Made with Cricut
- Learn more in this post: What is a Cricut Maker and what can I make with it?
What you do want to make with a Cricut? Let me know what you favorite projects are in the comment section. And feel free to ask any questions and I’ll answer them for you!
Happy creating!
Hi Angie,
What a lovely idea. I lost my dad just about a year ago and your post has given me some wonderful inspiration. Hoping you and your family find solace in all your fond memories of your dad. Hugs, Lynn