6 Steps to Make Your Next Room Makeover a Success
Tips for planning your next room makeover
This post contains affiliate links for your convenience. If a purchase is made after clicking one of the links I might make a small commission. Your price does not change. For full disclosure, go here.
Got an ugly room that’s screaming for a change? Don’t we all! Sometimes it’s hard to know just where to start if you’ve got a space that needs a makeover. Maybe you’ve seen a piece of furniture or artwork that has inspired you to redo a room, or perhaps you just know that you’re tired of the way a room looks and aren’t sure where to begin.
Once you’ve decided that a room needs to be changed, there are a few things you need to consider that will help you get started. I ALWAYS have a list of projects I want to do and today I’m sharing the process I use for a room revamp.
How to plan a room makeover
1. Set Goals
How do you want the space to function and what’s your time frame for completing it? For example, are you wanting to make an office more organized? Is your laundry room inefficient? Do you have guests coming soon and need to create a cozy guest bedroom before they arrive?
Once you decide how you need the space to function, then you can determine what you’ll have to change and accomplish.
For my most recent project, my studio had been neglected and needed to be refreshed. As part of a $100 Room Makeover Challenge, I planned to organize and refresh it. So my goals were mostly to update the room to make it an organized and inspiring space to create in.
2. Find Inspiration
This is where it can get a little overwhelming, but if you narrow the choices down to what you really love it will actually make things easier. Pinterest and shelter magazines are great resources for room makeovers. My Pinterest boards are all overflowing with ideas that I’d love to someday incorporate. Here’s my “Bedroom Ideas” inspiration pinterest board as an example:
3. Set Your Budget
How much are you going to invest in your project? This will help determine the amount of changes that can be made in your space. If you have a large budget, the sky is the limit on what you can do. If you don’t have a large budget, you can still make a space look totally different just by changing out some key elements and getting creative.
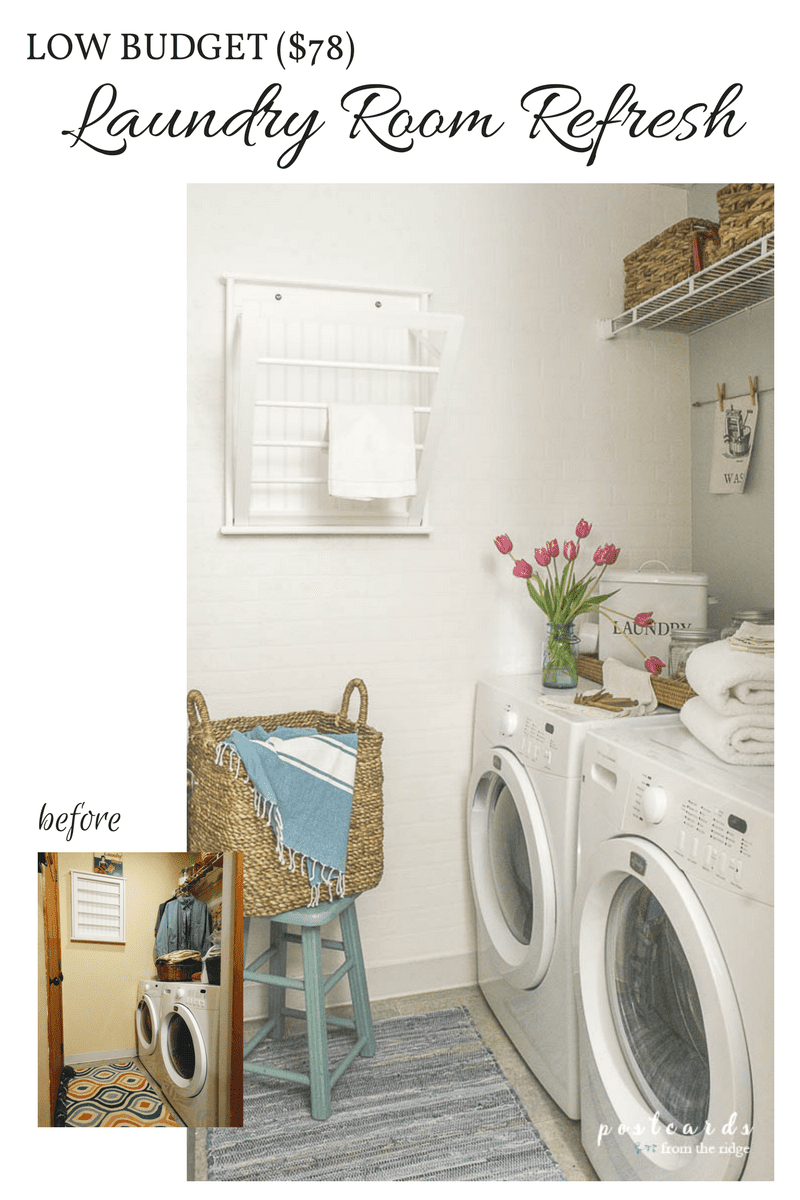
Low budget ideas
- PAINT – Painting the walls makes a huge difference and is the least expensive way to give a new look to a room.
- SHOP THE HOUSE – Another way to save money is by shopping other rooms of your house. Maybe the pillow from the living room would look great in the guest room? The lamp from the den might be perfect for the master bedroom? Try to see items in a setting different than how they’re currently being used.
- SHOP SECONDHAND – Craigslist, etsy, estate sales, and other places for previously loved items can help keep the budget intact as well. (See my tips for estate sale shopping HERE).
- DIY ART – You can make your own artwork if you’re crafty (HERE are 28 great DIY art ideas).
- DIY PILLOWS, ETC. – Sew pillows and more with just a little effort (learn how to make a decorator pillow with fringe HERE).
Last year I gave our laundry room a makeover for less than $100 by being creative with my money and also using things I already had. Here’s a peek, and you can see the details of the makeover HERE.
4. Determine Needs vs. Wants
Needs
Set priorities for your project needs, and see what your budget will allow. For example, if your bedroom needs an update and replacing your broken blinds is a must, then that goes at or near the top of your list. Write down what the room actually needs, and then rank those needs in order of importance.
Wants
Once you’ve figured out what the room must have, then you can make a list of items that you’d like to add it the budget allows it. For example, if a pretty throw blanket would add just the right touch but isn’t really a necessity, it goes on your “Wants” list. What actually makes it into the final plan depends on your budget and how creative or resourceful you are. And you can always add new items over time as your budget allows.
To help whittle down your “wants” list, ask for gift cards instead of gifts for holidays and birthdays or watch for sales on the items you want. Before you know it, your space will look just like you dreamt it would.
5. Start selecting items
Where do I start? I always recommend starting with an item that you’ll be keeping for a long time. Usually it’s an expensive item like a sofa or bathroom vanity, or something that isn’t easily changed like flooring or counter tops. You’ll want to have a color scheme in mind when you start looking for these things because that will help narrow down your choices.
Once you decide on those long term items, then you can choose the items that are less expensive or easier to change like pillows, artwork, and accessories.
Find photos of rooms that you love, and see if you can recreate a similar look. If you’re using pinterest for inspiration, some pins lead to articles that list sources, so it’s possible that you can find some of the exact items from your inspiration photos. You can also look for similar pins, or do an online search for the items you want for your space.
NOTE – I like to change my decor with the seasons and usually opt for neutral shades when it comes to long term items. That way I don’t have to worry about whether or not my sofa will match my pillows, or if the rug will clash with the Christmas tree, or if the curtains will fight with spring flowers. You get the idea. But if you love bold colors and patterns, then by all means go for it on a more permanent item!
6. Put it all together
For my projects, I like to come up with a to-do list and also an inspiration board to help envision the finished project. For my inspiration boards I use canva and picmonkey, but you could simply pin things to your pinterest boards or tear out pages from magazines and add them to a folder or notebook. There’s no right or wrong way to keep up with your plan.
Once you have everything in one place, you can see if something doesn’t look right. Sometimes an item that you love might be the completely wrong color or style and will stand out from everything else. You may need to rethink it if that’s the case. Hopefully everything will blend together nicely and you won’t have to worry about it.
Design Plan
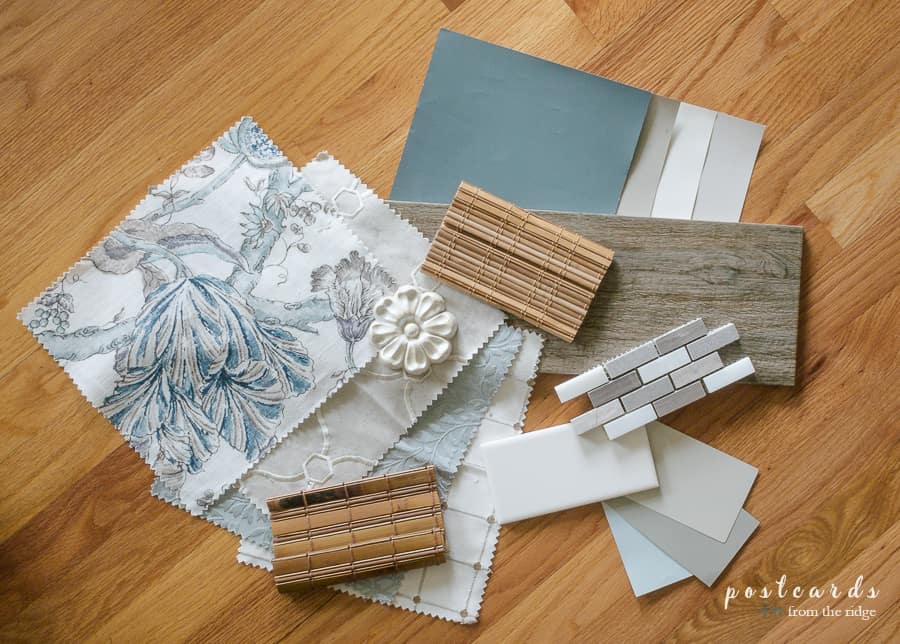
Here’s one of my inspiration boards from my most recent project, my design studio:

Click to shop ⇨ 1 // 2 // 3 // 4 // 5 // 6 // 7 // 8
Here’s a peek at the completed project:
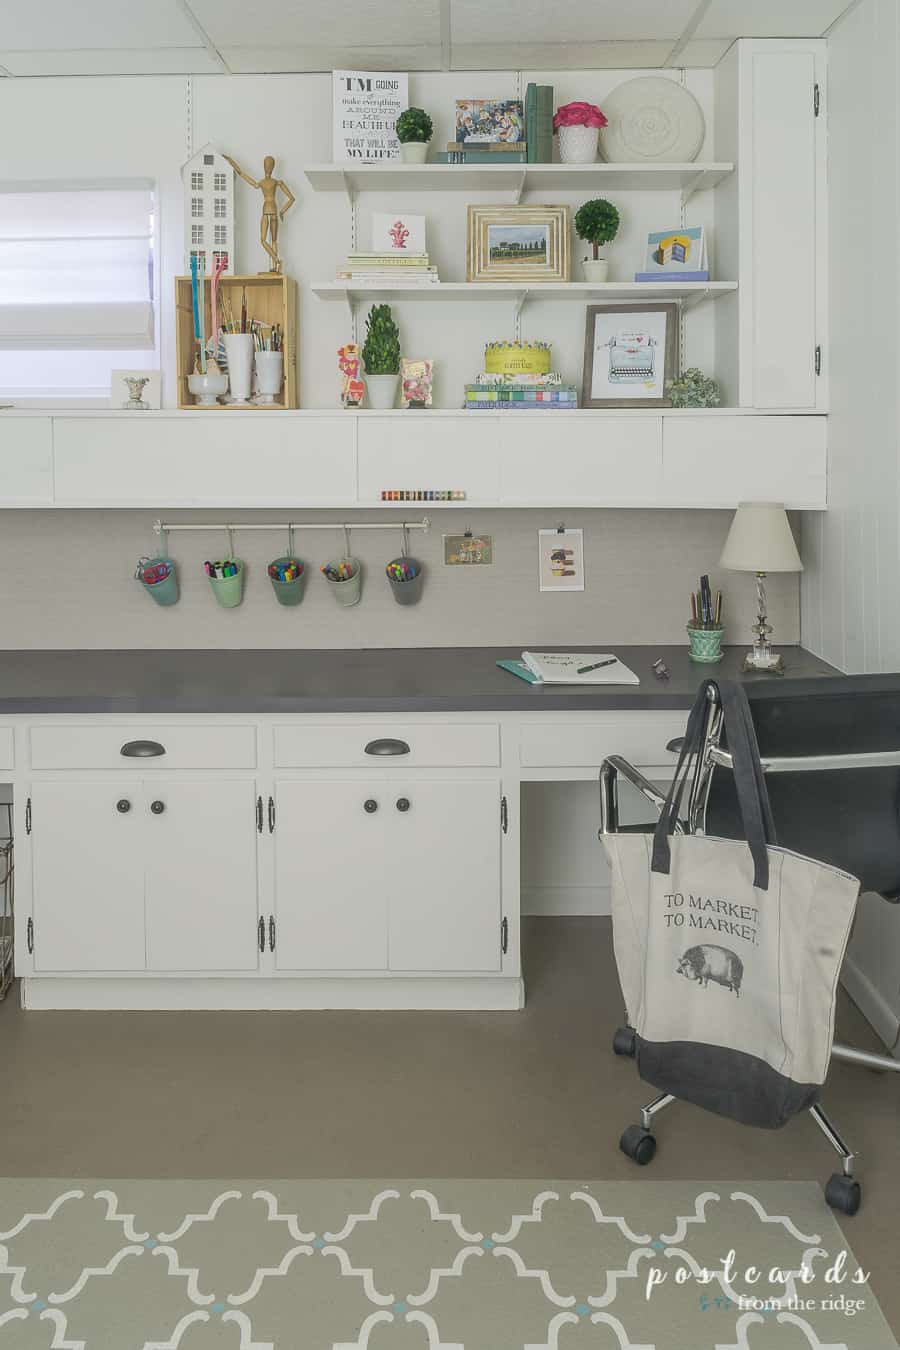
You can see the whole room HERE. I had to tweak a few things as I did the project but it all worked out great in the end.
Use a Project Planner
Stay on task and budget by using a project planning checklist.
I’m sharing a simple project task sheet printable for free. Simply join our subscriber list and you’ll received a link to the printable in your inbox. Click the link, download it to your computer, and print it as you wish, any time you want!

I hope this helps you get started with your room makeover project. If you’re like me, you’ve already got a long list of ideas in your head. It’s always great to get those ideas going and complete the projects for a brand new space.
Here are a few projects on my to-do list:
- Sprucing up the front porch and deck areas for spring with flowers and new outdoor cushions
- A mini makeover in our den with painted and restyled bookcases, new accent chairs, and a painted mantel
- A master bedroom refresh in the fall with new paint and bedding
What projects are on your to-do list?
Get this look → blue floral fabric / geometric squares / Mosaic Tiles / Wood look ceramic tiles /
Bamboo Shades


