How to Make a Bathroom Vanity from a Piece of Furniture
Learn how to make a bathroom vanity from a piece of furniture such as a buffet or dresser.
This post contains affiliate links for your convenience. I may make a small commission on products purchased with my link, but your price does not change. For full disclosure go here: Disclosure and Policies. Thank you for supporting my site.
Apparently I’m cursed with not liking ordinary (translation – easy to find) items. I like to be different. Not in a weird kind of way, but more like a unique, one-of-a-kind, “I’ve never seen it done quite like that” way. Well, hopefully I’m not too weird. But I do get some strange responses sometimes.
Like the time when I told our remodeling contractor that I wanted to turn our dining room buffet into a vanity for our master bathroom. He didn’t exactly say anything, but he looked like he was a little perplexed. “You wanna do what?”, was probably what he was thinking, but I’ll never know.
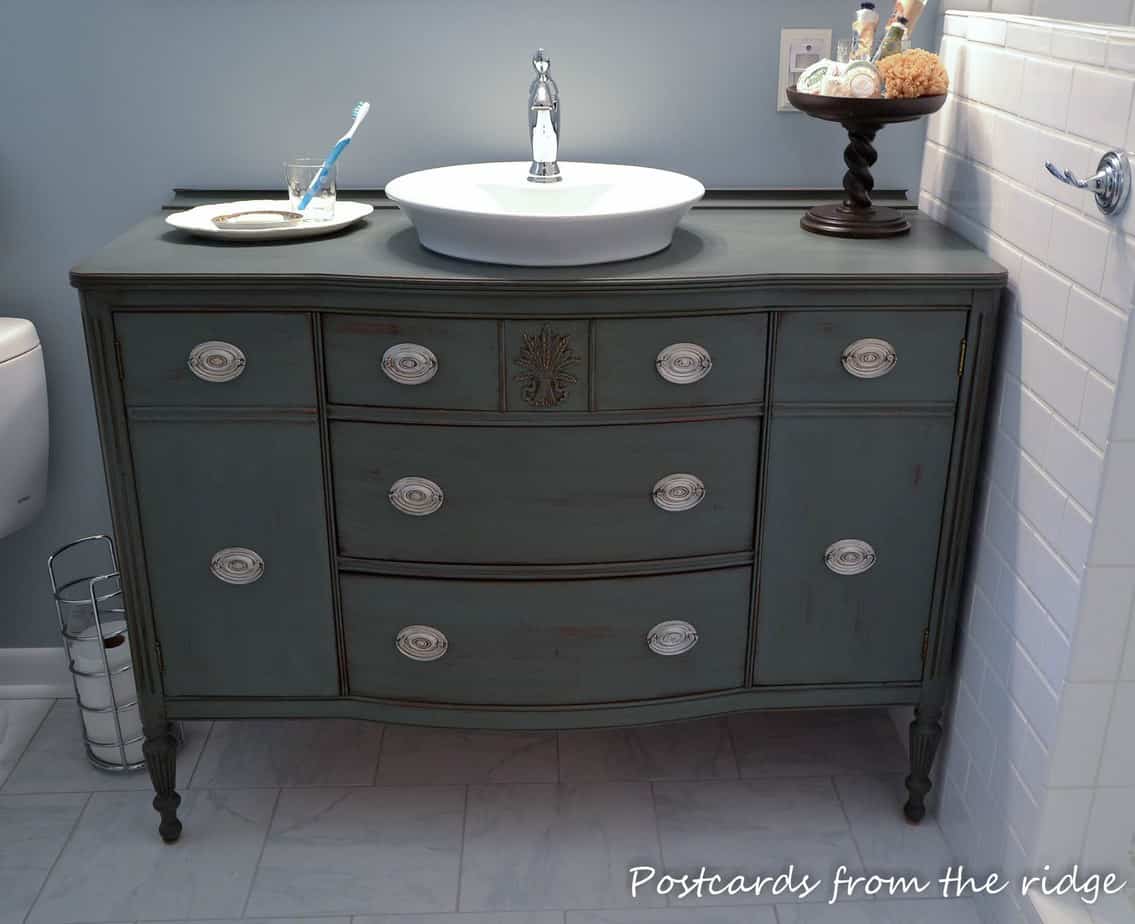
Fortunately, he was a good sport about it and worked some magic and transformed it for us. We even have drawers that still work and have space left inside of them for our stuff.
Here’s how it turned out.

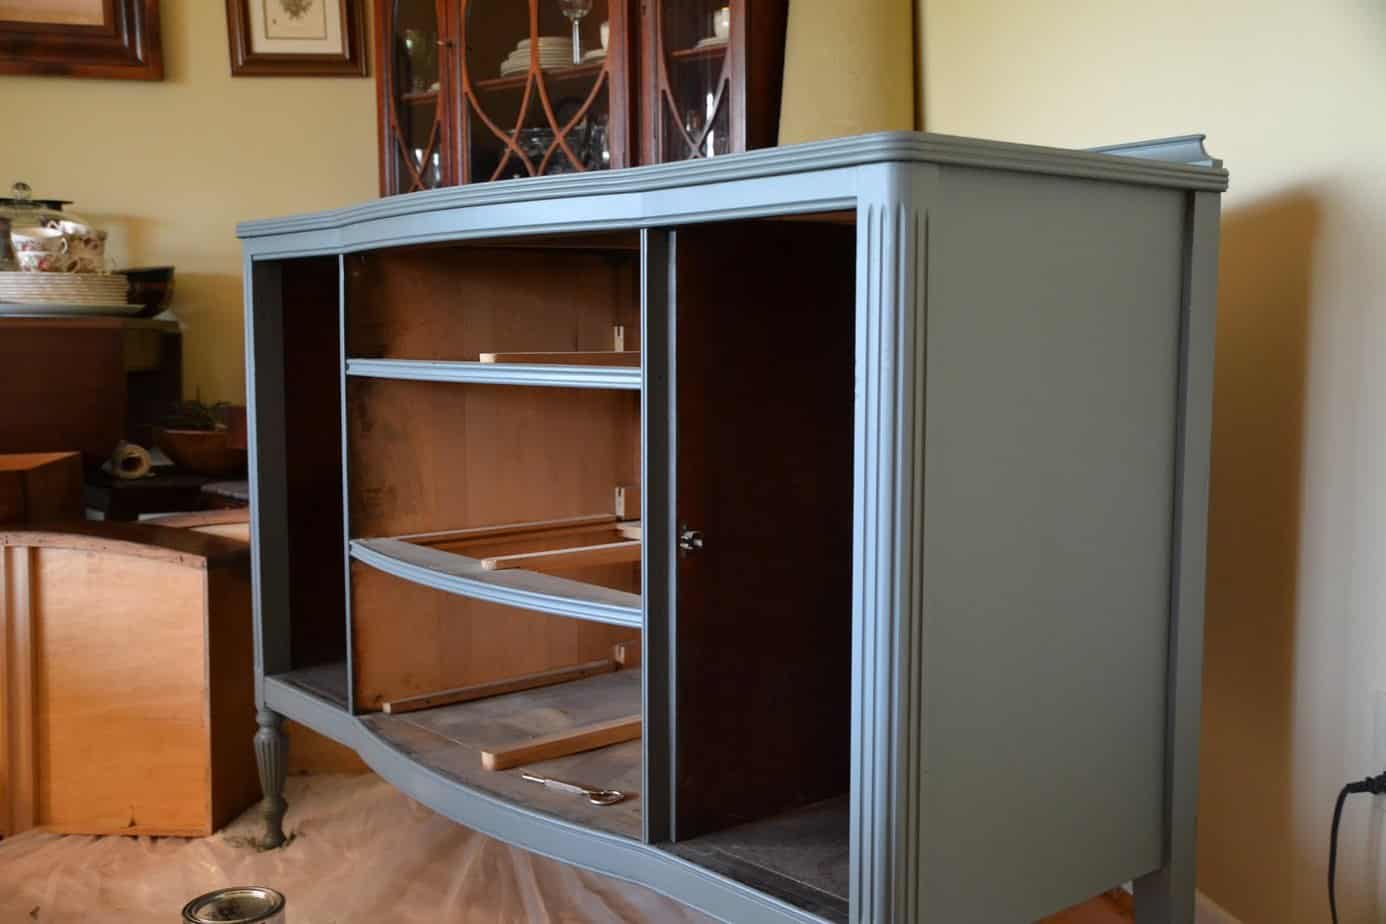
The before pic, when it was still being used as a buffet. We don’t have an official dining room in this house, so we really didn’t need this piece of furniture.

We’ve had it for probably 15 years, and I had thought about selling it. But I liked the lines of it and decided (hoped) it would make a nice vanity for our master bath.
And here’s what I did:
How to make a bathroom vanity from a piece of furniture
1. Paint it
The first thing I did was paint it with a coat of Benjamin Moore Regal Eggshell finish in Quarry Rock, #1568. I didn’t prime it, but did clean it well first with my favorite pre paint cleaner.
2. Distress the finish
After the paint dried completely, I sanded it lightly to expose some of the wood color and give it a nice distressed look. I used a tack cloth to remove all of the dust that was created from the sanding.
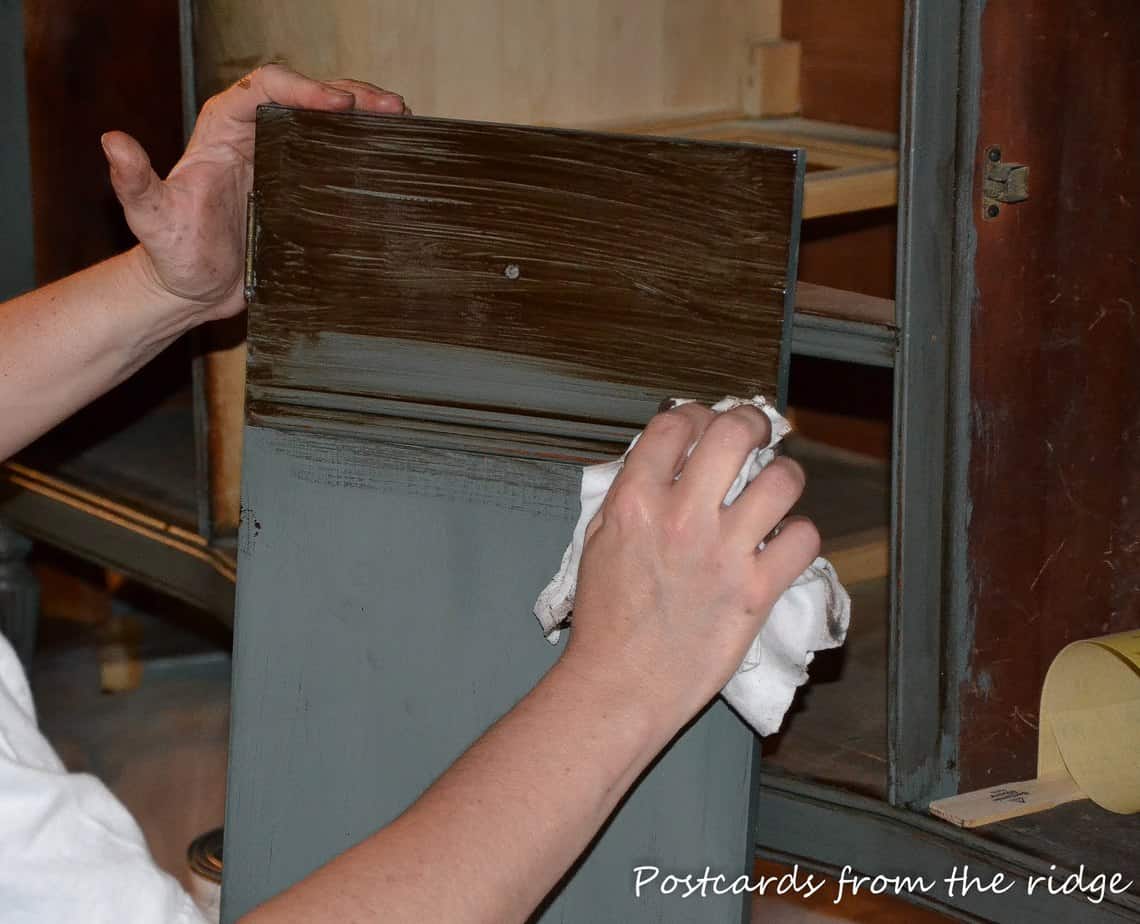
Then I coated sections of it with this stain and wiped it off immediately. This gave it a nice aged look.
3. Apply a water resistant finish
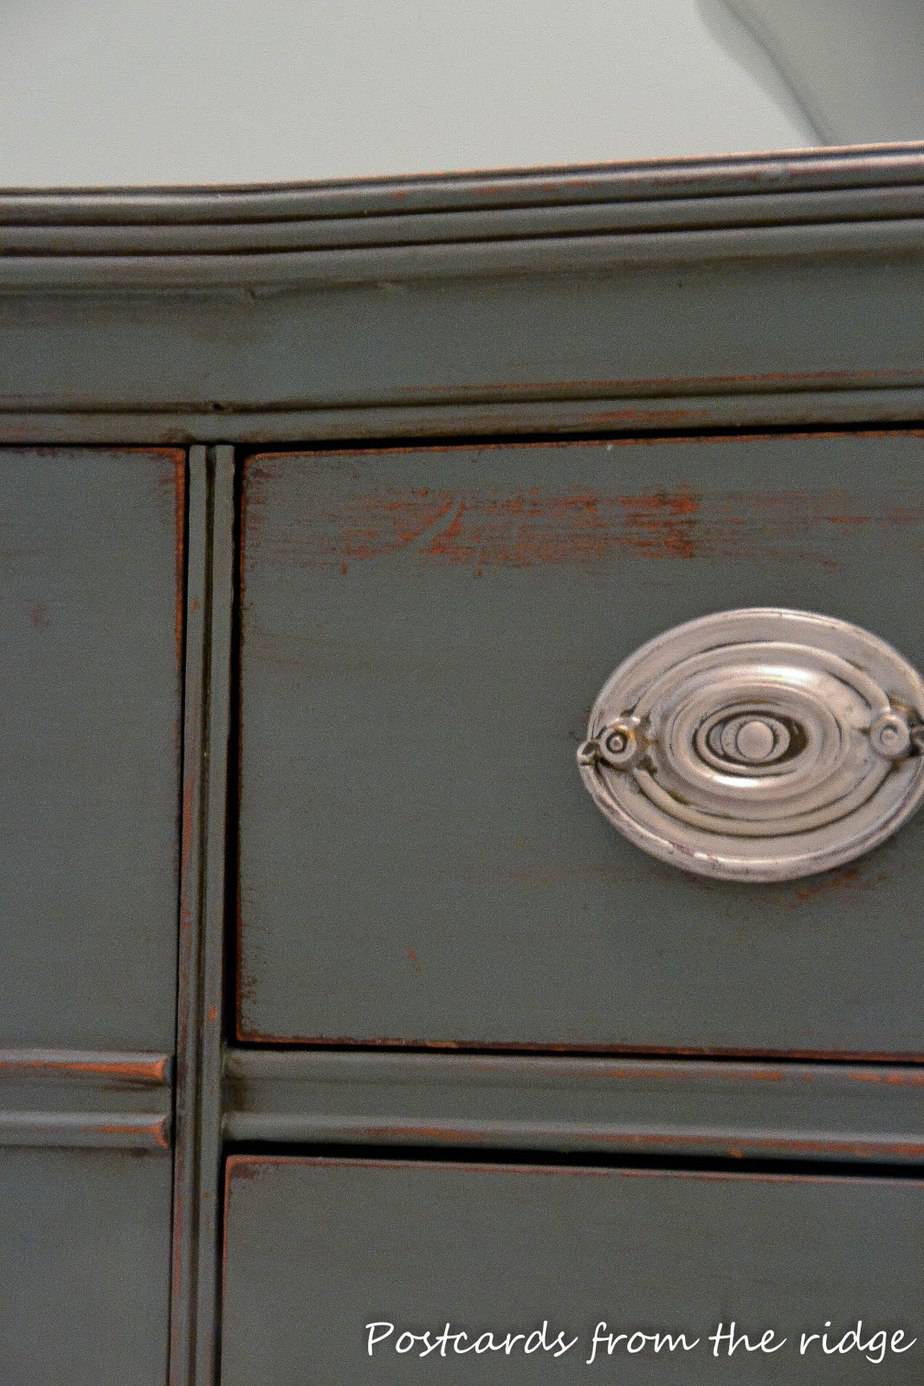
After the stain dried, I could have left it as it was, but since it was going into a bathroom I coated it with this varnish. 4 coats on the top, 3 on the rest of the piece.
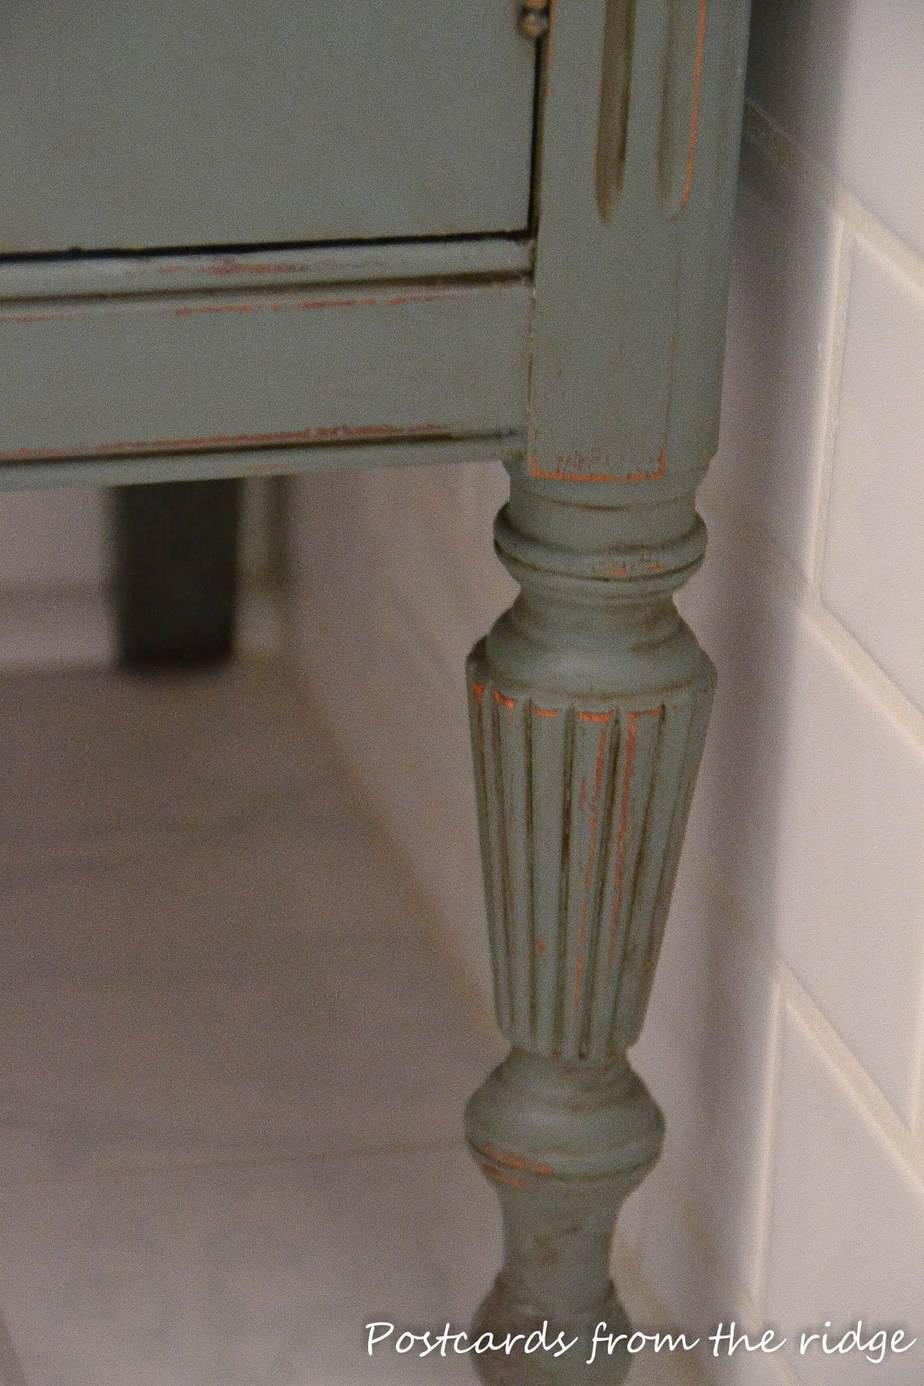
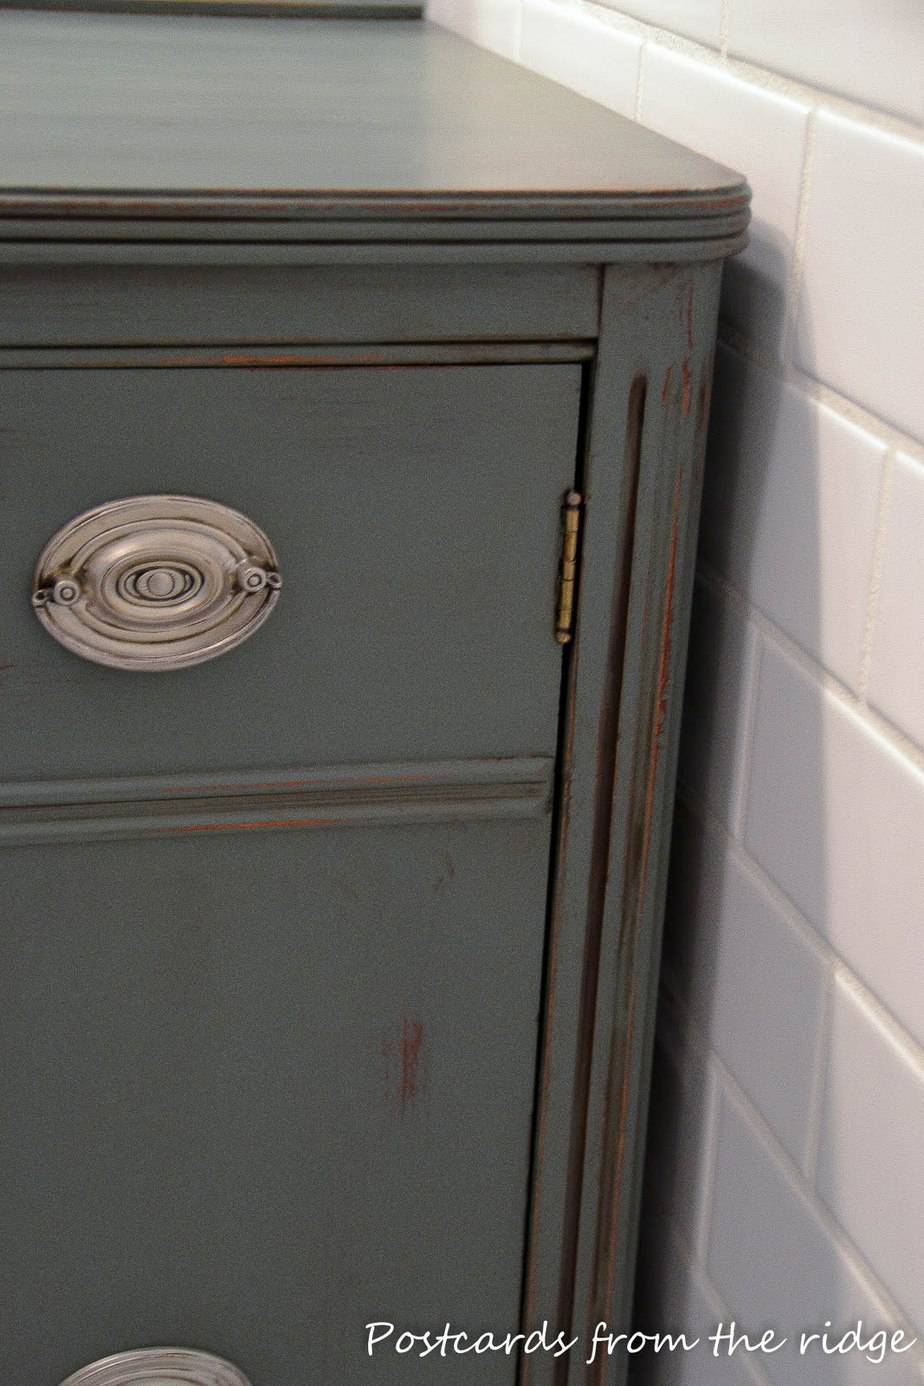

4. Reconfigure the drawers to fit around the plumbing
Since the Mr. and I have zero carpentry skills, the contractor did the carpentry work which included cutting a hole in the top for the sink, and reconfiguring the drawers so they would fit around the plumbing.
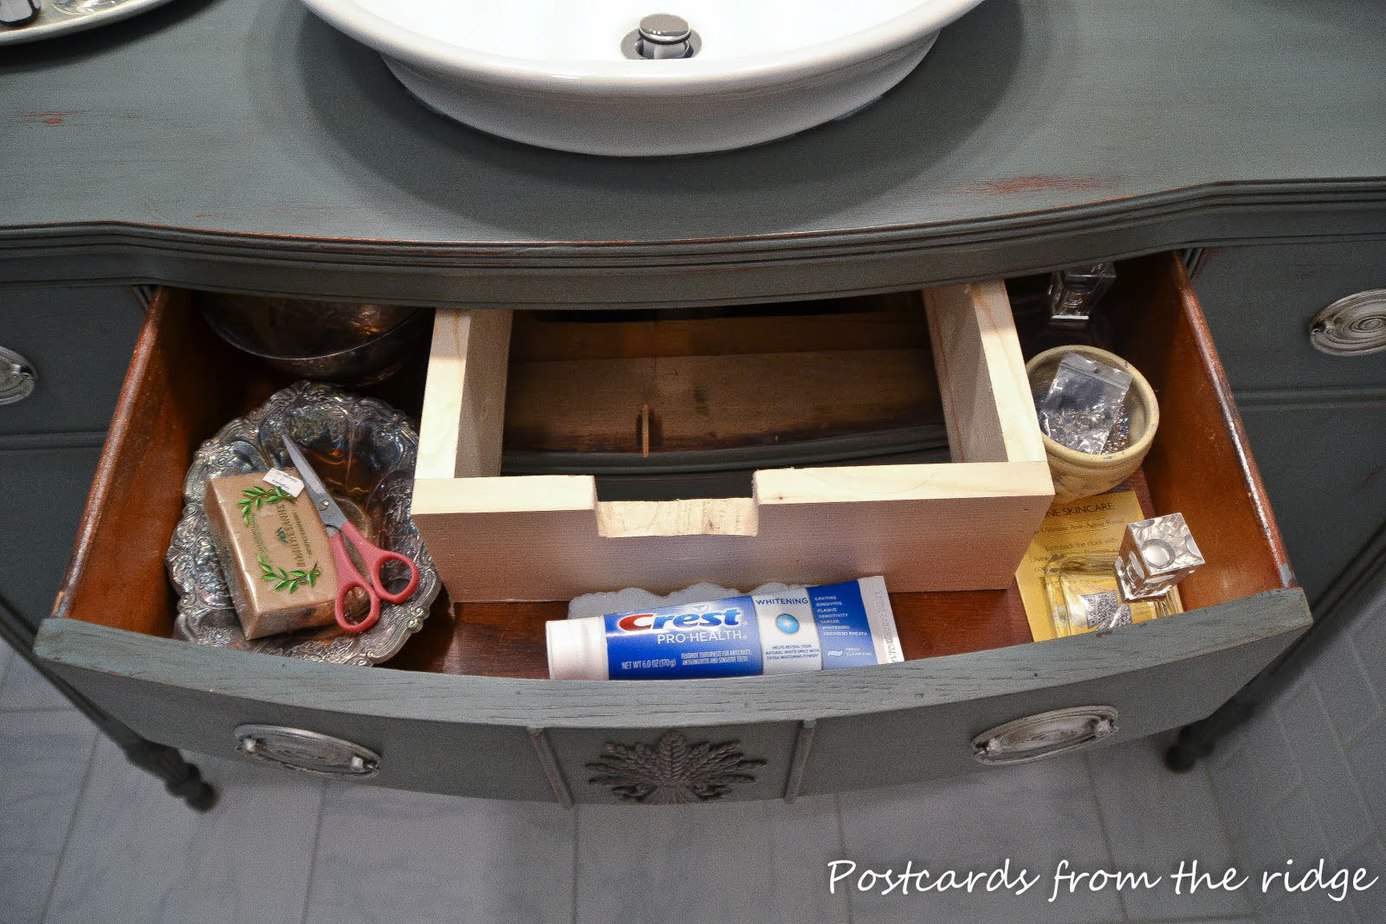
He also had to cut some of the back out. He was able to cut out a channel to fit around the plumbing so we still had usable drawer space in all 3 drawers.
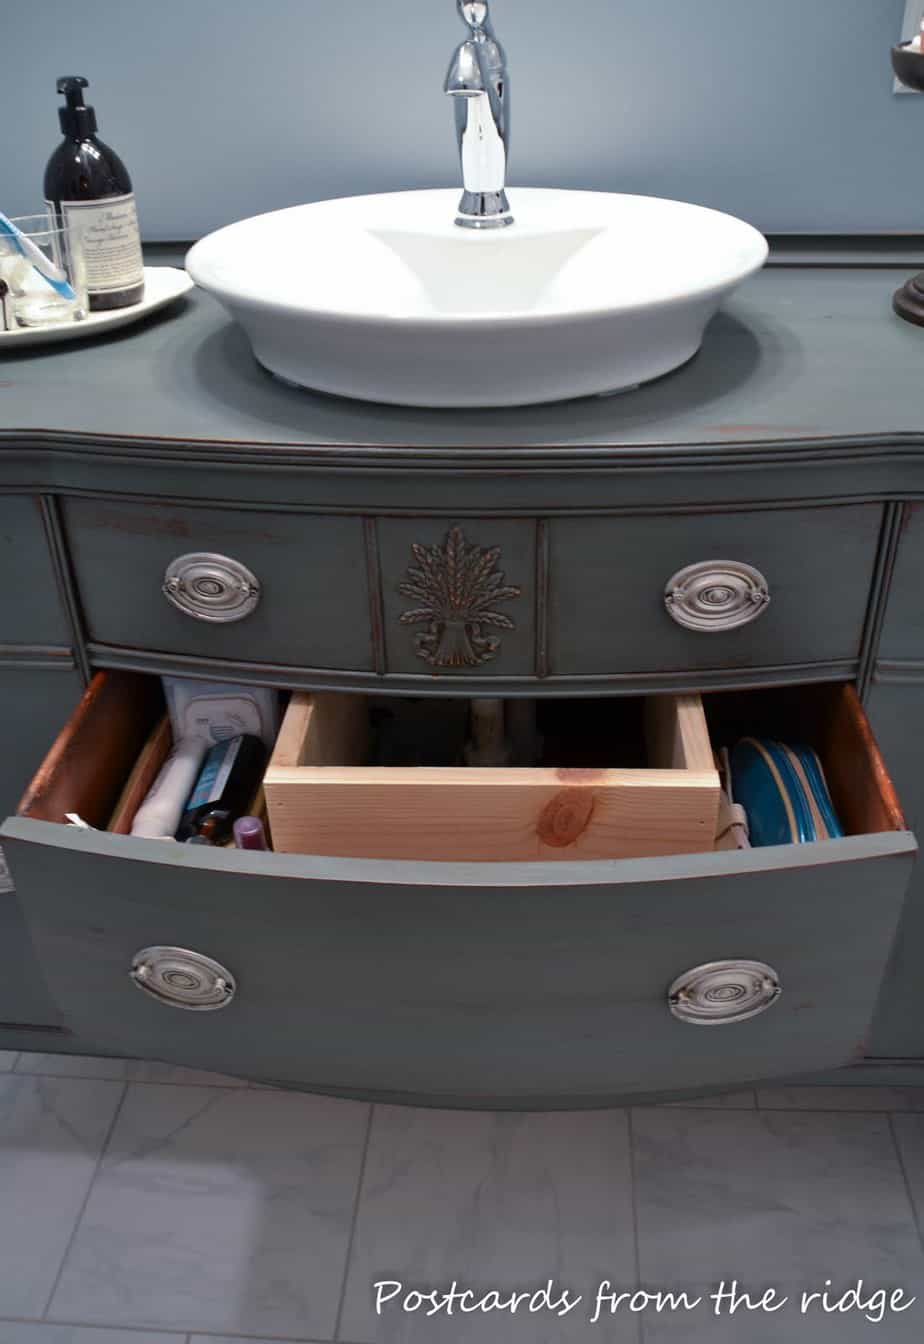
The bottom drawer had to have a piece cut from the back so it would fit around the trap, but we can use most of this drawer.
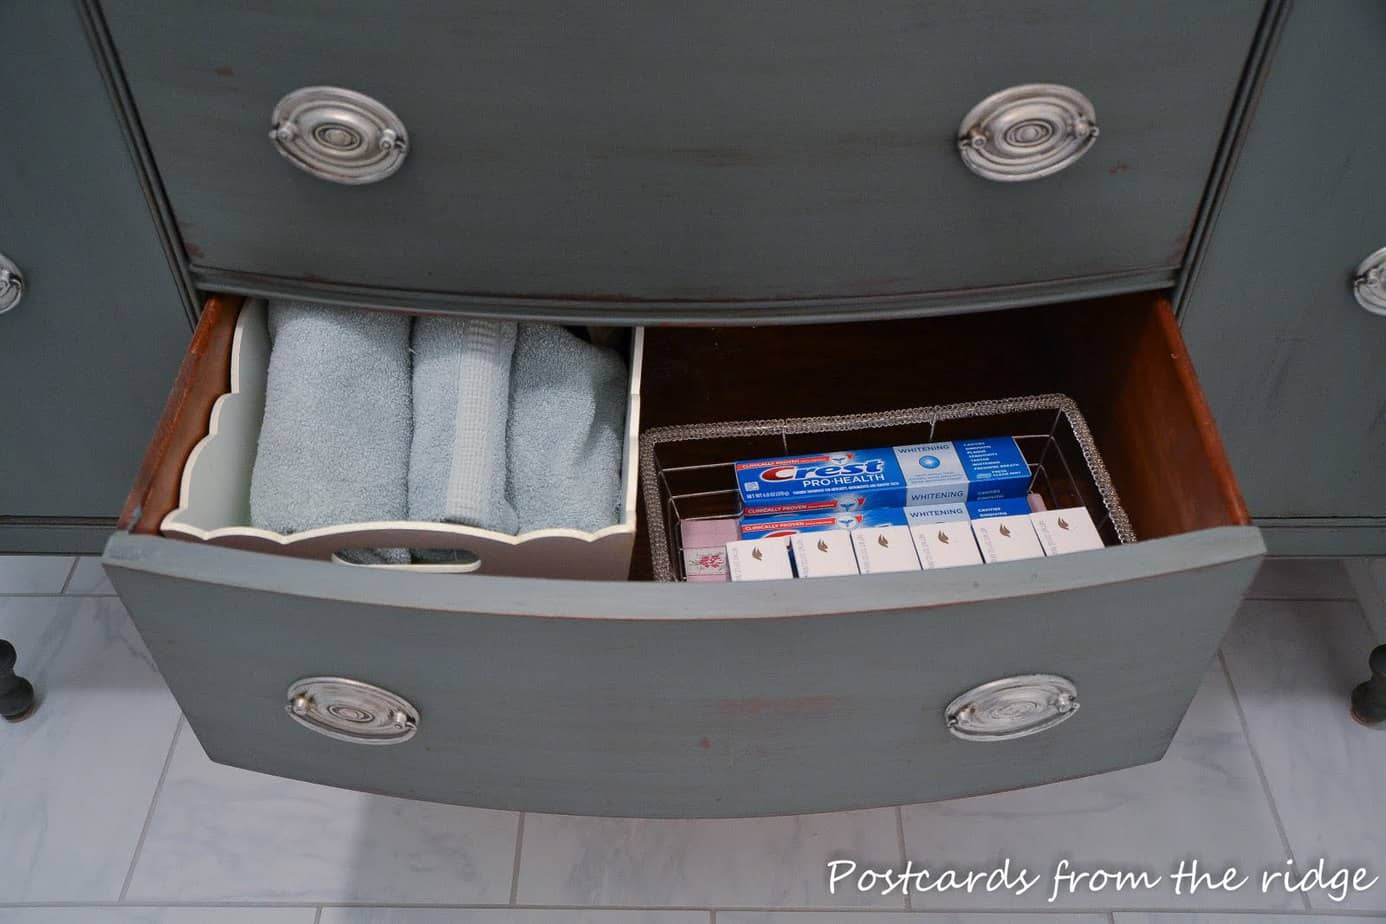
5. Install the sink and faucet
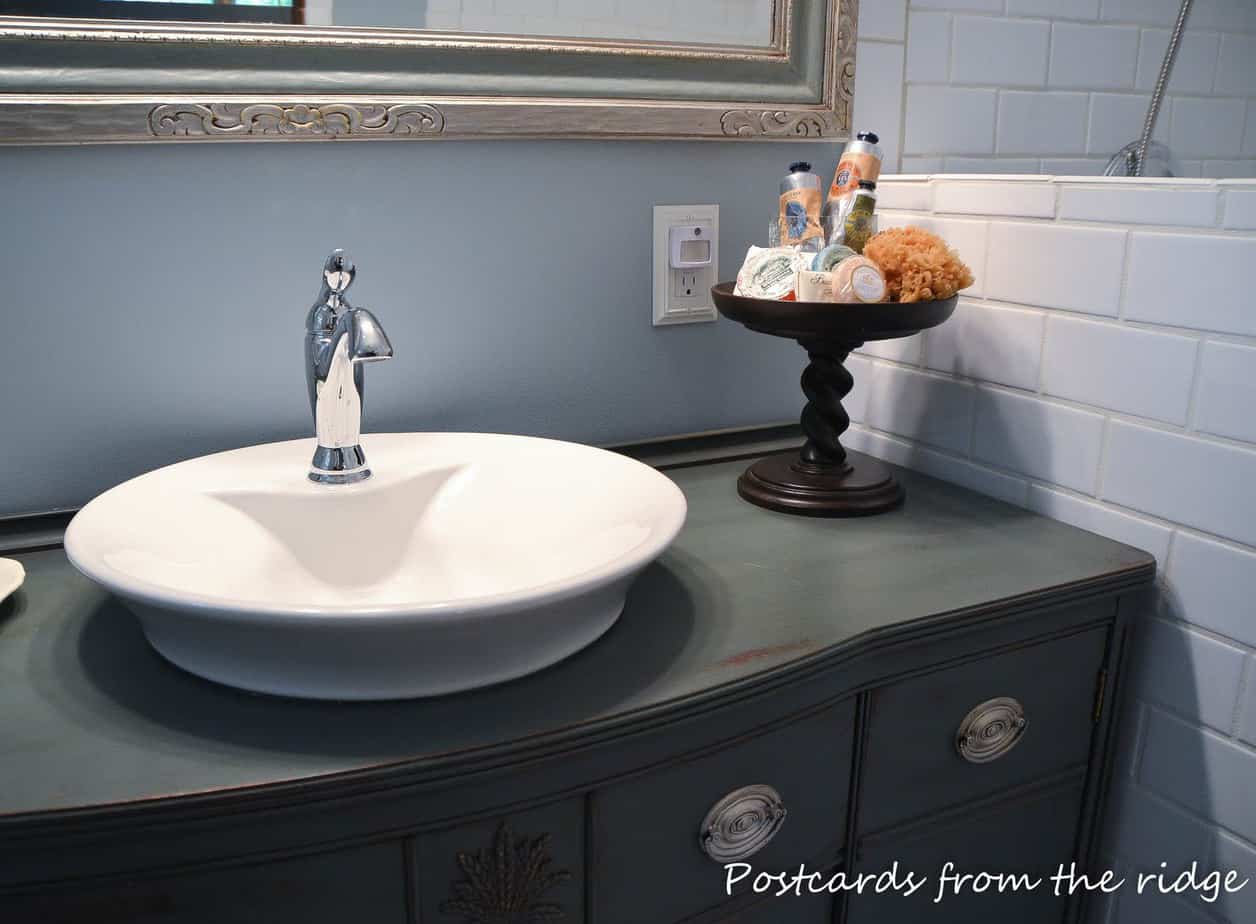
The plumber installed the sink and faucet and we then had a new vanity. He used the template that came with the sink and cut it out with a jigsaw.
Sources: Sink // Faucet // Stain Used for Aging // Water Resistant Sealer
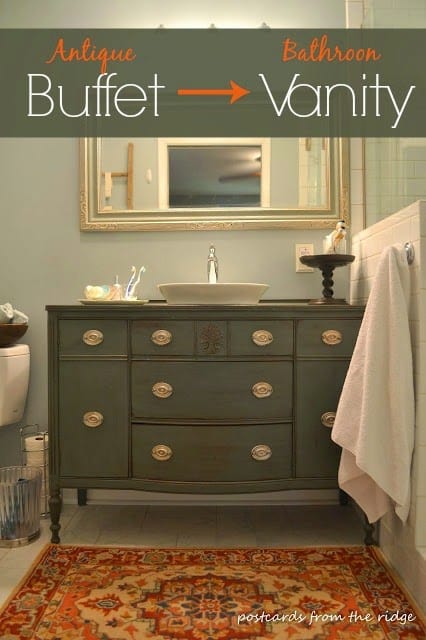
For a peek at the mirror above the vanity and the paint that was used on it, click here.
To learn about the transformation of the pulls from brass to pewter, go here.
To see the complete bath redo so far, click right here.
Linking this project up to Inspiration Friday at At the Picket Fence
- Power of Paint party over at Domestically Speaking
- Friday Feature at ReDoux
- Furniture Feature Friday at Miss Mustard Seed
- Feathered Nest Friday over at French Country Cottage
- Open House Party at No Minimalist Here
- It’s a Party over at DIYbyDesign
- Furniture Feature Friday Best of 2012



Oh that is beautiful! I love using furniture in different ways. Y'all did a great job.
Have a great evening.
I want to do this with a vintage dresser in my teenagers' bathroom but my husband said that the bowl on top would look to modern. I knew it wouldn't and now I have something to show him! It looks super great! Thanks for sharing!
It looks beautiful. The whole bathroom turned out so pretty! I love it. Your flooring is gorgeous too! I reallly like it =)
That is just beautiful! You couldnt find a more perfect piece, it goes perfect with the space. And the finish is incredible.
Denise
http://www.agirlandabrush.net
amazing! i love the color, the style, the hardware… i could move right in!
happily visiting from french country cottage
Hi Angie! I can see why you love it so much! It's gorgeous! Love the color, and love that you took a dining piece and transformed it into a vanity. Very clever. I'm you're newest follower.
You did an amazing job on this piece! Pinning. ~ Maureen
I'm seriously in love with this! What a beautiful color you chose and it fits so well in your bathroom!! I'm pinning this asap. Megan
It's absolutely gorgeous! I would love, love to do something like this in our house, hmmmmm…..I think I will! 🙂
Thanks, Rebecca. Go for it! All you need is an unused buffet or a dresser. I've even seen tables made into vanity. The sky is the limit. Let me know how it turns out if you do it.
Thanks for stopping by, and have a great weekend.
Angie
That is so pretty! I love the colour that you used. I just recently sold a dresser to a couple who were planning on doing the same thing with it. I think that it is such a great idea!
I absolutely love this! I'm in the middle of painting a very different (boring) type of vanity that I can't replace right now. I love the idea of sanding and applying stain to age it a bit. Thanks for the idea!!
Thanks, Karen. It's a very easy process to do and has a nice way of giving character to any piece of furniture.
Have a great weekend.
Angie
This is one of the most beautiful things that I have EVER seen on a blog and I follow a lot of blogs! It's just stunning! I saw something kind of similar on Pinterest with the exact dresser/buffet that I own and I so wondered how they did this and if I could do it too. I'm your newest follower and I can't wait to see what else you create! ~ Jamie
Thanks for the sweet compliments, Jamie. I'm very happy with the way that it turned out. I had seen some inspiration pieces on pinterest and elsewhere and had been thinking about it for a while. Thanks for visiting and for adding me to your follow list! Have a great weekend.
Angie
I think you've done a great job of capturing the look from your inspiration picture…Great job. Thanks for the tips on changing the look of the brass pulls. Did you prep the metal pulls? Did you put any coating on after the paint?
Thanks, Coreen. I looked for a piece that was more like the shape of my inspiration piece, but in the end decided to save our money and use what we already had. I decided to paint it because I didn't want the wood color in this room. As for the pulls, no I didn't prime them, but did wipe them off before painting them. And I did not coat them with anything after painting them. Time will tell if I made a mistake there, but I've still got plenty of the paint if I need to repaint them or touch up. Thanks for visiting! Have a great weekend.
Angie
i am so IN LOVE with this! amazing job! Thanks for stopping by my blog earlier today–so happy to meet you!
love this the style and the color, and i love that you repurposed it. i would love to feature it , if this would be ok with you please let me know.
lauren
Sure, Lauren. I'd feel honored to have it featured on your site. Thanks for offering. And thanks for stopping by!
Angie
I love it! I love when a piece of furniture is used as a vanity. Wish I could add one. Love the color.
Thanks, Kim. It's was a bit of a challenge making the drawers fit around the plumbing, but I'm glad it worked! Thanks for stopping by. I always love seeing what you're doing on your beautiful blog.
Angie
I know I've been here. On this post before. Could've swore I left a comment telling you how much I covet your bathroom vanity. How much I wish I could just rip out my vanity and do something just like this!
But I guess not. Or, more likely than not, I forgot to hit "publish" cuz I've been known to do that. Well, not known by other bloggers for doing that because they never get the comment in the first place …
Publish will be hit this time for sure!
🙂
Linda
Loving it~ thanks for linking up at Feathered Nest Friday!
Thanks Courtney. I loved the dresser/vanity you shared a few weeks back on your site. Thanks for hosting party. Have a nice weekend.
Angie
Oh how I love this project. I wish I had a space in my home for something like this. I am a HUGE fan of all Modern Masters products, esp. their Dead Flat Varnish. Thank you for sharing at my party, I am featuring today when it opens at 2:00 PST. -K
You really did an awesome job on this transformation. Absolutely beautiful. I am your latest follower (I followed you on both Linky Followers and Google Friends. I'd love for you to drop by and check out my blog and consider following me back (if you aren't already a follower). Thanks.
Oh thanks. I just visited you blog and it's fabulous. Following you too now. Thanks for inviting me over! And thanks so much for stopping by here. I linked up to your party, even though I'm a little late (#146). Looks like you're a popular gal! Thanks again. Have a great weekend.
Angie
Fantastic! We have been on a look out for a buffet or something like that to redo our bathroom! Nice to see it already done by someone and helps to see the finished project!
Great job!!
Great Job – I love this, the colour and the detail on the piece is perfect. CJ
This came out so beautiful! I love that you repurposed an old buffet. The drawers and doors will give you so much bathroom storage!!!
Wow this is beautiful! I looooove the color! Delicious! Thanks for such a great tutorial…must go find buffet now!
Thanks, Maryann. I'm so glad it turned out as well as it did since I've never done it and neither had our contractor. Beginner's luck I guess. Thanks for visiting.
Angie
Really beautiful. I will be featuring it tonight at my Swing into Spring party that opens at 8pm EST. Please stop by and pick up an I've Been Featured button. Thanks.
Thanks so much, Judy. I feel honored to be featured on your site with the other great features. Have a great day.
Angie
Wow this is just gorgeous!I love the effect the stain gives it. Totally pinned it!
Thanks Jacky. I thought about leaving it painted without the stain/glaze, but am really glad I decided to go ahead and add it. It gives it a bit more of an aged look. Thanks for visiting and pinning it. Have a great day!
Angie
Love this look!
Absolutely GORGEOUS!! I would do something like that too, instead of buying a regular bathroom vanity. You couldn't find one as beautiful and unique as this one!! Great color choice too! Your newest follower 🙂
Angie,
I saw your vanity was featured -as well it should be!
High five,
Laura
Angie, I did this to two dressers for my baths at our beach house but didn't know how to finish off the tops to waterproof them. I polyurethaned them but that was absolutely the WRONG thing to do. Some of it bubbled up and I am going to have to sand it down. How did you finish off the top of this BEAUTIFUL piece?
Hunter @ tgundlac2000@yahoo.com
This is just gorgeous beyond words – perfect color – perfect amount of distressing!
Definitely your newest follower –
WOuld love to have you come visit and follow back when you have the time!
Hugs,
Suzan
( visiting from MMS )
Thanks Suzan! I just dropped by your blog and am amazed at the furniture transformations you have done! Following you back! Have a great day! ~ Angie
This is what I want to do in my master bath. You did a great job refinishing it and the color is beautiful. I really like your sink with the faucet in it. Would you mind telling me what brand it is. Thanks
Hi Angie – I would love to use one of your vanity pics for a bathroom inspiration board. I will post a link back to this post. Let me know if it's ok with you!
Thanks,
Dawn
Hi Dawn! That would be fine with me. Just be sure to have a link back to this post with the picture. Thanks for asking. And thanks for visiting! ~ Angie
Angie, I think Jacque and I might need to come over for some painting lessons! Love the transformation! Off to share this gorgeous piece!
You guys are welcome anytime. But it's only a deal if you give me lessons on using a drill press and all the other equipment you're always using over there! Thanks for stopping by! Have a great weekend! ~ Angie
So gorgeous!
Thanks Karen!
One of the most amazing transformations I have seen! What a vision you had and the finish is amazing! Fantastic job!!
Hi Cyndy! Thanks so much for the kind words! And thanks for visiting! Have a great weekend! ~ Angie
This Is great! Now maybe the Man Part will finally let me do this after I show him yours…. Ha HA
I love how this turned out. You guys did an amazing job. Pretty smart to build the box so that some of the drawer is still usable rather than just sealing it shut. Sharing it in FFF on 6/14/13. Thanks so much! xoxo
Hi Angie,
I just did something similar to this for my bathroom vanity. How has the varnish held up in you bathroom?
Hi Anna. We've had it for 4 1/2 years now and only have one small spot where the varnish hasn't held up. Some hair mousse product was left on the surface and not wiped up and the alcohol ate through the finish all the way down to the wood. Scary, huh? I will touch it up eventually. Otherwise, it's held up great. I'd love to see your vanity! Feel free to email me a picture or post it on my facebook page.
Like everyone else above- I love this! Can you tell me please if you sprayed the blue paint on or used a brush? Thank you.
Hi Mimi,
Thank you! I used a high quality synthetic brush to apply the paint. Wooster is my favorite brand.
Hello. I have a similar cabinet that I want to use. My dilemma is that the rail/runner is in the center of the middle drawers. It looks as though your rails were in the center as well. We're they moved or reconfigured in the process of revamping the drawers to fit around the drain pipe/trap and water lines.
Love it so much.